Hacking The Linksys WRT120N Part 2

linksysjtag

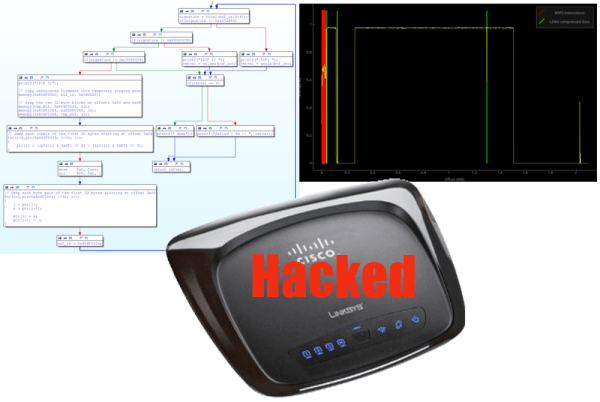
[Craig Heffner] has been busy with his Linksys WRT120N router. When we last checked in on [Craig] he had reverse engineered the obfuscation techniques used in the router’s firmware. Since then, he’s re-enabled JTAG, cracked the “encryption” used for saving configuration backups, and now he’s devised a simple attack to change the admin password.  With the firmware unlocked, [Craig] went after the hardware JTAG. His first hurdle was a missing jumper connecting the TDI pin to the processor. With a solder blob making the connection, he then found the router would connect to his JTAG debugger, and immediately reset. TDI had been re-used as a GPIO in software, and assigned to the reset button on the back of the router. [Craig’s] JTAG pod was pulling the pin low and causing the reset. To make matters worse, the bootloader also redefined and checked for the reset button. If the button were pressed it would boot into a recovery mode. [Craig] patched the bootloader with a little help from IDA pro. He then desoldered the router’s flash and programmed it outside the system. The firmware required a similar patch. Rather than desolder the flash chip again, [Craig] created a firmware update the router would accept and flashed it via the router’s web interface.

Since he already was deep into the Linksys Firmware, [Craig] looked for any obvious attack vectors. He found a big one in the /cgi/tmUnBlock.cgi. Inside the firmware, the URL sent to the CGI would be sent through sprintf().  In plain english, it means that no input length checking was happening – so a URL longer than the firmware engineers expected (in this case 256 bytes) would overflow into areas of memory it wasn’t supposed to – in this case, the stack. For an astute attacker, that’s a wide open door.  [Craig] was able to use find some Return Oriented Programming (ROP) gadgets and created an input value that would cause the router to reset its own administrator password. After running the exploit, a quick trip to the router’s webpage proved his attack was successful.

If that wasn’t enough, [Craig] also spent some time looking at the patches to the router’s firmware. The release notes of one of the patches mentioned encrypting configuration files. The WRT120N, like many routers, allows the owner to download and save the configuration as a file. It turned out that the “encryption” scheme was nothing more than an exclusive OR with 0xFF. A pretty weak encryption scheme by any standards. To [Craig] we send our congratulations. To the WRT120N software engineers, we’d suggest taking one of [Craig’s] embedded device exploitation classes.

Hacking The Linksys WRT120N

[Craig Heffner] recently found himself on the case of the Linksys WRT120N router. The router’s firmware was using some previously unknown form of obfuscation, causing headaches for those wishing to run their own software. The WRT120N, being a 2009 model is somewhat out of date at this point. That didn’t stop [Craig] though, as he dove into reverse engineering the firmware obfuscation.

[Craig] started by running the firmware through his own Binwalk tool. Binwalk analyzes firmware files for known data, be it embedded filesystems, raw compression streams, or binary files. In this case Binwalk only found a small LZMA block which contained the compressed html files for the router’s web interface. The rest of the firmware was unknown data with a high level of entropy. [Craig] couldn’t do anything more with the firmware update file alone, so he ordered a router to attack from the hardware side. Inside he found typical low-end router components:  An Atheros AR7240 SoC, a 2MB SPI flash chip, 32MB of RAM. He also found serial and JTAG headers.

[Craig] connected to the serial port and was greeted with a boot menu. This allowed him to run some commands on the router, but didn’t give him any way to dump memory. He had to go straight to the source – connecting directly to the router’s SPI flash with an FTDI C232HM cable. Using libmpsse, another of his open source tools, [Craig] was able to dump the flash. He now had the un-obfuscated bootloader code, albeit in MIPS assembly. [Craig] was then able to go after the bootloader with IDA Pro. After a bit of work, the obfuscation system was exposed. The system was simple – several byte and nibble swaps had been performed between the LZMA header block and the first few bytes of data. [Craig] finished out this part of his hack by writing a simple C program to de-obfuscate and decompress the firmware.

Adding Automatic Power-On To A Linksys NAS

auto-power-up-for-linksys-NAS

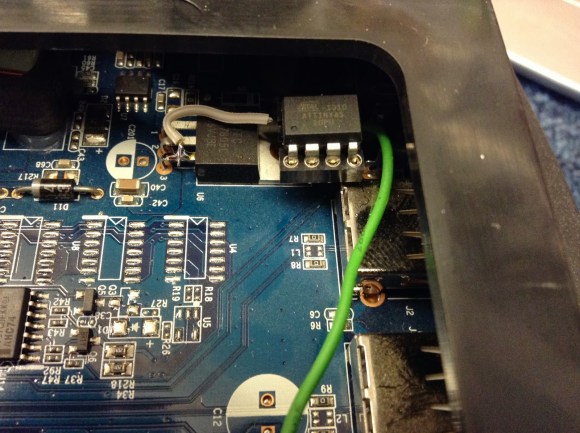
We feel [Jim’s] pain in having to physically press the power button to boot his Network Attached Storage device after a power outage. If you live in an area with frequent brief but annoying power blinks it wouldn’t take long to brew up your own solution. Here you can see the ATtiny45 that he added for the auto-boot.

Aside from having to go upstairs in order to reboot the machine there is also a compulsory disk check that his Linksys NAS200 performs before files are available on the network. You can see that he used an 8-pin socket which lets him remove the chip for programming. The socket gets a ground connection from the shielding of the USB port, it pulls 5V off of the linear regulator right next to it, and the green wire connects to the power button’s conductor.

The sketch compiled for the chip starts a ten second timer are power up. When the timer goes off it pulls the pin low and then high, simulating a button press. In hobby electronics it’s a common problem that we have to invent issues to use as the next project. So it’s nice to see a real life application like this one.

VU Meter Lives In A Linksys Housing

[Dillon] just finished his first project of the summer. It’s a volume units meter for his sound system and it has a few tricks up its sleeve.

He’s driving the rows of LEDs using an AN6884 LED driver chip. It has an integrated amplifier circuit which makes it the perfect part for building a VU display. He had a broken Linksys 5-port switch sitting around which he used as the enclosure for the project. It has just enough room to incorporate a speaker in case he wants to take the meter on the road with him. But when at home he can choose to use his stereo system instead with the flip of a switch. To ensure he’s making the most out of the 5-bit precision he’s included a voltage divider that can be adjusted with a potentiometer. We’ve embedded a video after the break which shows how well it works.

Looking for a bit more inspiration for your own VU meter project? Check out this RGB version.

Continue reading “VU Meter Lives In A Linksys Housing”

Wireless Rover Has Two Guns…one For Each Of Ya

texas_ranger_airsoft_rover

We never really get bored with remote-controlled rovers around here, especially when they involve reusing some old hardware as well as lasers. [Tycoon] wrote in to share his creation, which he has dubbed “Texas Ranger”.

Texas Ranger is built around an old Linksys WRT54GL router, which provides the rover’s WiFi connectivity as well as the serial interface through which everything else is controlled. The rover features a pair of PIC microcontrollers, which handle all of the servo control as well as telemetry calculations.

An onboard camera gives the operator a driver’s seat view of the action, allowing for precise control of the vehicle. Laser triangulation is used to help measure object distance, and a pair of airsoft pellet guns straddle the camera for whenever [Tycoon] feels like making his presence known. One feature we are especially fond of is the pair of Wii nunchucks which the rover uses to monitor its position. Always aware of its operating angle, it auto-adjusts the camera to compensate for uneven surfaces, guaranteeing that [Tycoon] doesn’t have to tilt his head to see straight.

Keep reading to see a quick demo video he shot of Texas Ranger in action.

Continue reading “Wireless Rover Has Two Guns…one For Each Of Ya”

Sluggy Wind Speed Sensor

Sometimes when we look at a hack, its to see how someone chose those parts for the project. In this case, it would have been hard to see it coming. [Janne Jansson] decided to combine a set of measuring cups, a hacked Linksys NSLU2 NAS, and a PS/2 Mouse together to make a self-contained Wind Speed Sensor for his roof. The measuring cups act as wind catchers, which in turns drives the rotation of one of the mouse ball sensors. This data is then logged and transmitted by the NSLU2. The NSLU2 is running a custom Linux based firmware, similar to how OpenWRT works for wireless routers.

To calibrate the device, he also made the best logical choice: to duct tape it to the hood of his car along with a much more expensive wind sensor and use that data to make his own device as accurate as possible. When placed atop his house with a 1500VA 220V UPS, the device managed 250 days of uptime before meeting its demise. Those 250 days also included 5 days of being frozen solid, yet still transmitting (somewhat meaningless) data. All of the relevant code and build instructions are available, for those of you with similar parts to spare.

Add IR Control To Your WiFi Router

wrt54g_ir_receiver

[Craig] wanted to use Boxee on his TV but his computer was in a different room. He rigged up a rather dubious method of delivering the A/V signal (this is a hack in the most guttural sense). More interesting to us is his solution for a remote control interface. We’re familiar with building USB connected infrared receivers but [Craig] decided to patch one into the serial connection on his Linksys WRT54G router. Continue reading “Add IR Control To Your WiFi Router”