3D Print A PCB The Hard Way

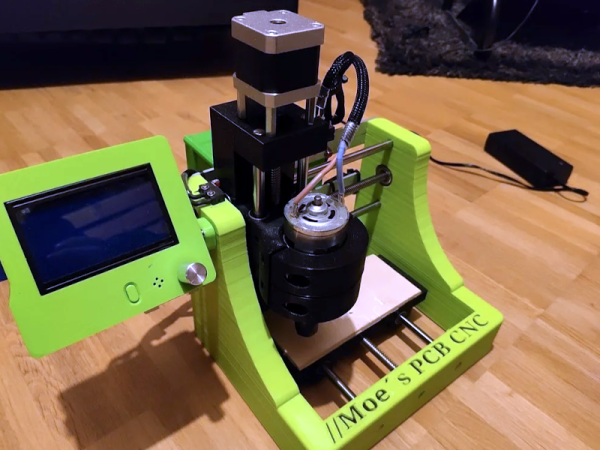
There’s an old joke about the physics student tasked with finding the height of a building using a barometer. She dropped the barometer from the roof and timed how long it took to hit the ground. Maybe that was a similar inspiration to [Moe_fpv_team’s] response to the challenge: use a 3D printer to create a PC board. The answer in that case? Print a CNC mill.

[Moe] had some leftover 3D printer parts. A $40 ER11 spindle gets control from the 3D printer software as a fan. The X, Y, and Z axis is pretty standard. The machine can’t mill metal, but it does handy on plywood and fiber board and should be sufficient to mill out a PCB from some copper clad board.

Continue reading “3D Print A PCB The Hard Way”

Improving Cheap Ball Screws

Most 3D printers use leadscrews for at least one axis. These are simple devices that are essentially a steel screw thread and a brass nut that travels on it. However, for maximum precision, you’d like to use a ball screw. These are usually very expensive but have many advantages over a leadscrew. [MirageC] found cheaper ball screws but, since they were inexpensive, they had certain limitations. He designed a simple device that improves the performance of these cheap ball screws.

Superficially, a ball screw looks like a leadscrew with an odd-looking thread. However, the nut is very different. Inside the nut are ball bearings that fit in the grooves and allows the nut to spin around with much less friction. A special path collects the ball bearings and recirculates them to the other side of the nut. In general, ball screws are very durable, can handle higher loads and higher speeds, and require less maintenance. Unlike leadscrews, they are more expensive and are usually quite rigid. They are also a bit noisier, though.

Ball screws are rated C0 to C10 precision where C10 is the least accurate and the price goes up — way up — with accuracy. [MirageC] shows how cheaper ball screws can be rolled instead of precision ground. These screws are cheaper and harder, but exhibit more runout than a precision screw.

This runout caused wobble during 3D printing that was immediately obvious on the prints. Using a machinist’s dial gauge, [MirageC] found the screws were not straight at all and that even a relatively poor C7 ball screw would be more precise.

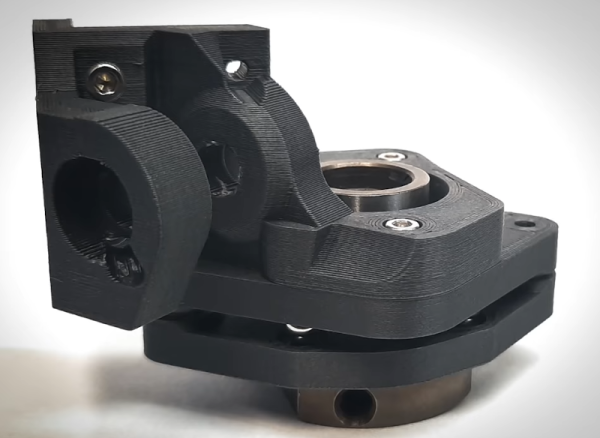
The solution? A clever arrangement of 3D printed parts. ball bearings, and magnets. The device allows the nut to move laterally without transmitting it to the print bed. It is a clever design and seems to work well.

Continue reading “Improving Cheap Ball Screws”

Inside An Oscillator With [Ken Shirriff]

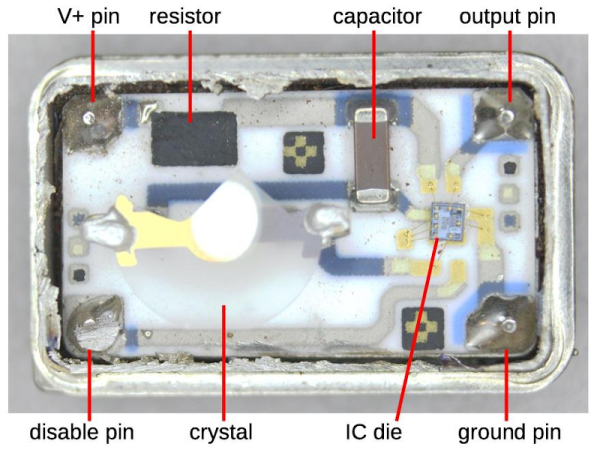
We are always glad to see [Ken Shirriff] tear into something new and this month he’s looking inside a quartz oscillator module. Offhand, you’d think there’s not much to these. A slab of quartz and some sort of inverter, right? But as [Ken] mentions, “There’s more happening in the module than I expected…”

If you’ve ever wanted to decap devices, big hybrid modules like these are a good way to get started since you don’t need exotic chemicals to get at the insides. [Ken] managed to break the fragile crystal wafer on the way in. Inside was also a small CMOS IC die. Time to get out the microscope.

If you follow [Ken’s] blog, you know he’s no stranger to analyzing IC dice. The oscillator IC is a pretty standard Colpitts oscillator but it also provides a programmable divider and output drive.

The circuit uses some unusually configured capacitors. [Ken] takes the time to point out CMOS logic structures throughout. If you haven’t seen one of [Ken’s] deep dives before, before, it’s a great introduction.

You can learn more about crystal oscillator theory. We used some test equipment to characterize a crystal a few years ago.

It’s Noodles All The Way Down: Ramen Comes To 3D Printer Support

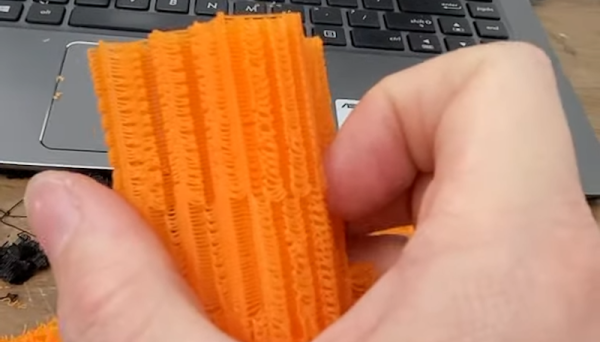
While ramen support might sound like a help desk for soup, it is actually a technique [GeoDroidJohn] uses to get easy-to-remove support structures on 3D prints. We saw the video below and we have to admit that it did remind us of a brick of uncooked ramen noodles.

We had to dig a little further to find out how he did it. We finally found a Reddit post that gives the recipe for Simplify 3D:

  • Nozzle diameter/2= layer height
  • Support material every other layer, 15% crossing at -45, and 45
  • 5 dense layers at 90% 0 gap layers top or bottom.

We have to admit, we try to avoid support where we can, and where we can’t we just pick one of the stock Cura settings. It wasn’t entirely clear how — or even if — you could replicate this in slicers other than Simplify 3D. The layer height, of course, is a given. We think 15% support density with [-45, 45] in the “line directions” box might get partially there. Maybe someone who is an expert in Simplify and some other slicers can help translate.

In any event, it did make us think about experimenting with different support structures. We’ve played with Cura’s tree supports before this and liked them. So maybe the defaults aren’t always the best.

We’d like to have time to try more of what we read about supports. You can also fit your printer with a marker if you want to try that.

Continue reading “It’s Noodles All The Way Down: Ramen Comes To 3D Printer Support”

3D Print Your Next Antenna

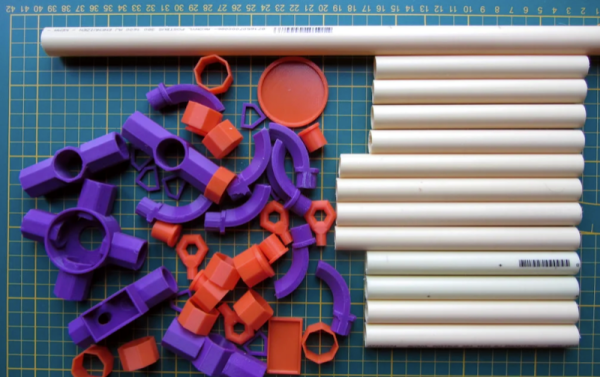
Building antennas is a time-honored ham radio tradition. Shortwave antennas tend to be bulky but at VHF frequencies the antenna sizes are pretty manageable. [Fjkaan’s] 2 meter quadrifilar helicoidal antenna is a good example and the structure for it can be created with 3D printing combined with electrical conduit.

Many people, including [G4ILO] use PVC pipe for the structure, and that design inspired [Fjkaan]. Despite being a bit less substantial, the conduit seems to work well and it is easy to cut. The helical design is common for satellite work owing to its circular polarization and omnidirectional pattern.

Continue reading “3D Print Your Next Antenna”

Plotter Uses Dual Disks

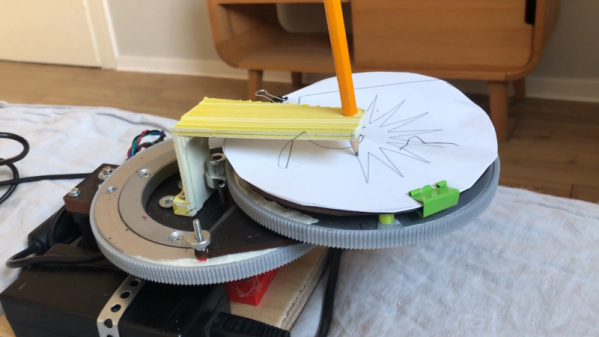
If you want to move a pen (or a CNC tool, or a 3D printing hot end) in the X and Y plane, your choices are typically pretty simple. Many machines use a simple cartesian XY motion using two motors and some sort of linear drive. There’s also the core-XY arrangement where two motors move belts that cause the head to travel in two directions. Delta printers use yet another arrangement, but one of the stranger methods we’ve seen is the dual disk polar printer which — as its name implies — uses two rotating disks.

The unique mechanism uses one motor to rotate a disk and another motor to rotate the entire assembly. The print head — in this case a pencil — stays stationary. as you can see in the video below.

Continue reading “Plotter Uses Dual Disks”

Practical Sensors: The Many Ways We Measure Heat Electronically

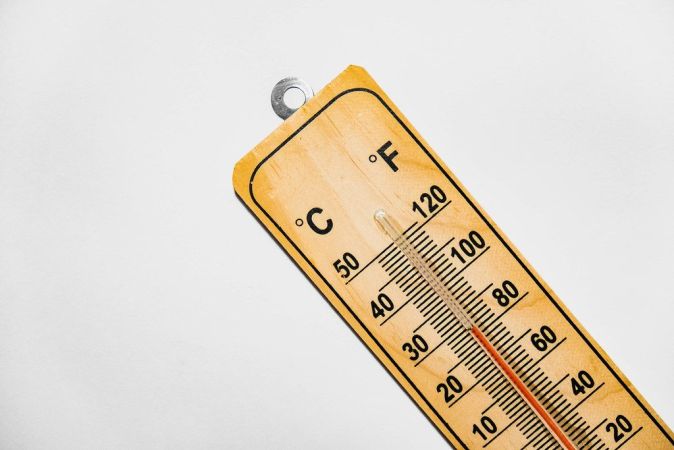
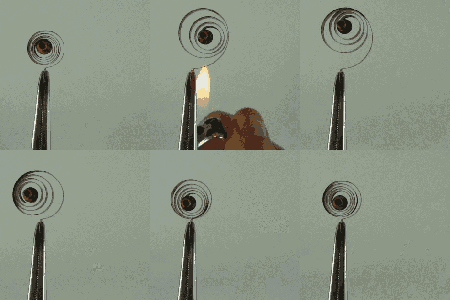
Measuring temperature turns out to be a fundamental function for a huge number of devices. You furnace’s programmable thermostat and digital clocks are obvious examples. If you just needed to know if a certain temperature is exceeded, you could use a bimetalic coil and a microswitch (or a mercury switch as was the method with old thermostats). But these days we want precision over a range of readings, so there are thermocouples that generate a small voltage, RTDs that change resistance with temperature, thermistors that also change resistance with temperature, infrared sensors, and vibrating wire sensors. The bandgap voltage of a semiconductor junction varies with temperature and that’s predictable and measurable, too. There are probably other methods too, some of which are probably pretty creative.

Bimetalic coil by [Hustvede], CC-BY-SA 3.0.
You can often think of creative ways to do any measurement. There’s an old joke about the smart-alec student in physics class. The question was how do you find the height of a building using a barometer. One answer was to drop the barometer from the top of the building and time how long it takes to hit the ground. Another answer — doubtlessly an engineering student — wanted to find the building engineer and offer to give them the barometer in exchange for the height of the building. By the same token, you could find the temperature by monitoring a standard thermometer with a camera or even a level sensor which is a topic for another post.

The point is, there are plenty of ways to measure anything, but in every case, you are converting what you want to know (temperature) into something you know how to measure like voltage, current, or physical position. Let’s take a look at how some of the most interesting temperature sensors accomplish this.

Continue reading “Practical Sensors: The Many Ways We Measure Heat Electronically”