It wasn’t long ago that you needed to know Morse code to be a ham radio operator. That requirement has gone in most places, but code is still useful and many hams use it, especially hams that like to hack. Now, hams are using the Raspberry Pi to receive highly readable Morse code using very low power. The software is QrssPiG and it can process audio or use a cheap SDR dongle.
There are a few reasons code performs better than voice and many other modes. First, building transmitters for Morse is very simple. In addition, Morse code is highly readable, even under poor conditions. This is partly because it is extremely narrow bandwidth and partly because your brain is an amazing signal processor.
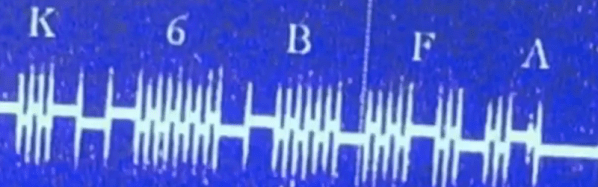
Like most communication methods, the slower you go the easier it is to get a signal through. In ham radio parlance, QRS means “send slower”, so QRSS has come to mean mean “send very slowly”. So hams are using very slow code, and listening for it using computerized methods. Because the data rate is so slow, the computer has time to do extreme methods to recover the signal — essentially, it can employ an extremely narrow filter. Having a QRSS signal detected around the world from a transmitter running much less than a watt is quite common. You can see a video introduction to the mode from [K6BFA] and [KI4WKZ], below.
Continue reading “Raspberry Pi Learns Slow Morse Code” →