The Grid Dip Meter: Forgotten Instrument

It used to be a major rite of passage for a hardware hacker to acquire an oscilloscope. Until recently, new instruments were rarely in normal people’s budgets, so you probably made do with a used scope. Now, there are lots of inexpensive options, especially if you include low-end PC scopes and “scope meters.” Digital meters are also now inexpensive (often free at some major stores), along with signal generators, frequency counters, and even logic analyzers.

But there is one piece of test equipment you don’t see as often as you used to and its a shame, because it is a very versatile piece of kit. Admittedly, if you aren’t doing wireless work, it might not be high on your wish list, but if you do anything with RF, it is not only a versatile tool, but a good value, too. What’s it called? That depends. Historically, they went by the name “Grid Dip Oscillator” or GDO. Sometimes you’d hear it called a “Grid Dip Meter” instead. However, modern versions don’t have tubes (and, thus, no grid) so sometimes you hear them now called dip meters or maybe just dippers.


Continue reading “The Grid Dip Meter: Forgotten Instrument”

Listen Up: IPhone Hack Diagnoses HVAC

We all know that guy (or, in some cases, we are that guy) that can listen to a car running and say something like, “Yep. Needs a lifter adjustment.” A startup company named Augury aims to replace that skill with an iPhone app.

Aimed at commercial installations, a technician places a magnetic sensor to the body of the machine in question. The sensor connects to a custom box called an Auguscope that collects vibration and ultrasonic data and forwards it via the iPhone to a back end server for analysis. Moving the sensor can even allow the back end to determine the location of the fault in some cases. The comparison data the back end uses includes reference data on similar machines as well as historical data about the machine in question.

Continue reading “Listen Up: IPhone Hack Diagnoses HVAC”

Start Gaming Early With IKEA High (Score) Chair

If you want your kid to be really great at something, you have to start them out early. [Phil Tucker] must want his kid to be a video gamer pretty badly. [Phil’s] build starts with a $20 IKEA high chair. He likes these chairs because at that price point, tearing into them isn’t a big risk. What’s more is you can buy extra trays so you can use it as a modular project with different trays serving different purposes.

The chair has two joysticks and two buttons, looking suspiciously like a video game controller. The current incarnation (see video, below) uses an Arduino Uno to trigger an Akai MPC1000 synthesizer via the MIDI interface.

Continue reading “Start Gaming Early With IKEA High (Score) Chair”

The Internet Of Reflow Ovens

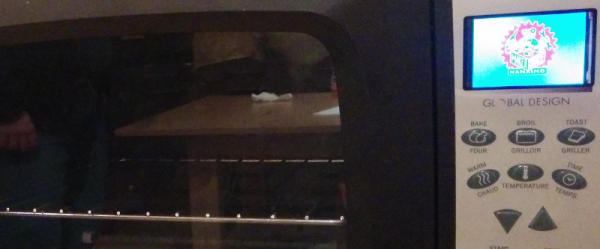
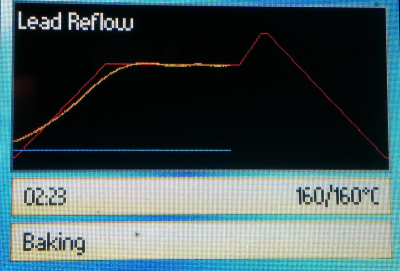
Using a toaster oven to reflow solder isn’t a new idea. But [Sukasa] wanted something that had more features and improved appearace. So he married a Netduino, a toaster oven, and some solid state relays to made a clean-looking reflow oven. His goal was to have nothing look like an overt modification to a casual observer. Inside, however, the oven now has a network connection for system status via a Web browser or JSON.

The new brains of the oven are a Netduino Plus 2 and an I2C port expander that connects to a few extra I/O devices. The challenging I/O, though, is the heaters. When cold, the oven can draw over 16 amps, so a pair of 12A solid state relays in parallel handle that load. There are also two fans: one to keep the electronics cool and another on software control. An IGBT allows the controller to pulse width modulate the fan’s output. A pair of MAX31855s read the thermocouples that report the temperature.

lcdThe controller was a mashup of the existing oven’s keypad and an add-on LCD display (see right). One thing we didn’t see was a schematic. Of course, you can read the code and figure out how it is all connected and (unless you use the exact same oven) you are probably going to need to modify things to suit your particular setup, anyway.

We’ve seen other good looking reflow oven and controller builds in the past, including one with a touchscreen. It is also worth noting that you can find reflow ovens at relatively low prices now if you don’t feel like rolling your own.

Hack A Cake

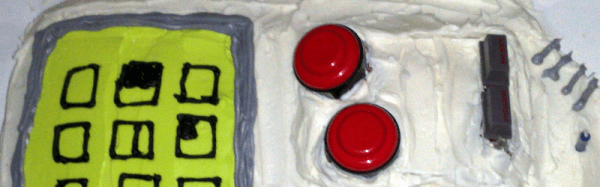
What’s a hacker going to do with an oven? Reflow solder? Dry out 3D printing filament? If you are [Alicia Gibb] you’d be baking a cake. While complaining that projects aren’t a hack seems to be a favorite past time for Hackaday commentators, we think [Alicia] will be in the clear. Why? Because these cakes have Arduinos, LEDs, and motorized candles among other gizmos.

The Game Boy cake is undeniably cool, although we have to admit the cake that screams when cut got our attention (see video below), even if it would unnerve guests.

As you might expect, you can’t bake the electronics directly into the cake. [Alicia] uses Tupperware or parchment paper to create cavities for the electronics. Connections and other solder joints get professional grade Saran wrap to keep the lead and other awful chemicals out of the cake.

Continue reading “Hack A Cake”

Laser Cut Mechanical Logic Gates

When you create logic circuits using ICs or FPGAs, you can’t easily visualize their operation without special tools. But if you’ve ever seen a mechanical computer (like the Computer History Museum’s Babbage engine) operate, you know you don’t have that problem. Just like it is fascinating to watch a 3D printer or CNC machine, watching mechanical logic gates work can be addictive.

[Anthony] wanted to build some mechanical logic gates and set out designing them using Inkscape. Unlike some common mechanical gate schemes, [Anthony’s] gates use gears to implement the logic operations. He sent the designs off to a laser cutter service and got back parts cut from 3mm acrylic.

Continue reading “Laser Cut Mechanical Logic Gates”

Easier PCB Vias With Drill Trick And Conductive Ink

If you’ve ever made double-sided PCBs without professional equipment, you had to deal with connecting one side of the board to the other. You have a few obvious choices: 1) Rely on component leads to connect both sides (and solder both sides); 2) Create vias and solder wire to both sides of the board; or 3) Use through hole rivets. [Diyouware] had a different idea: use conductive ink. After a few false starts, they found a technique that seemed to work well.

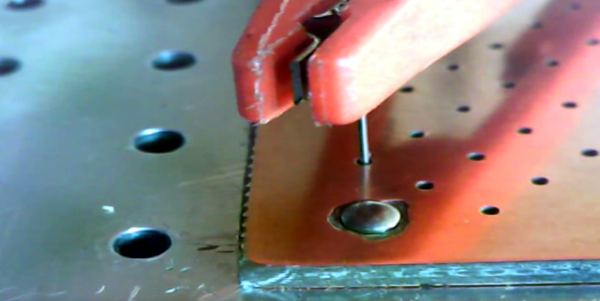
This isn’t the first time we’ve heard of people trying conductive ink with varying degrees of success. The biggest problem, usually, is that the ink wants to run out of the hole. [Diyouware] has an interesting solution for this problem: Don’t drill the hole all the way thorough.

Continue reading “Easier PCB Vias With Drill Trick And Conductive Ink”