A Milky Way Photo Twelve Years In The Making

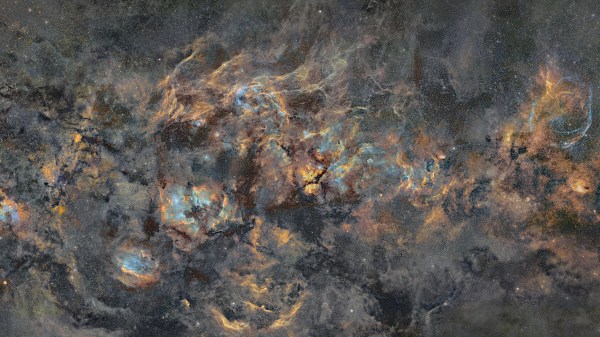
Starting projects is easy. It’s the finishing part that many of us have trouble with. We can hardly imagine completing a project after more than a decade, but seeing the breathtaking results of [J-P Metsavainio]’s gigapixel composite image of our galaxy might just make us reconsider. The photograph, which we highly suggest you go check out in its full glory, has been in progress since 2009, features 1250 total hours of exposure time, and spans across 125 degrees of sky. It is simply spectacular.

Of course, it wasn’t an absolutely continuous effort to make this one image over those twelve years. Part of the reason for the extended time span is many frames of the mosaic were shot, processed, and released as their own individual pieces; each of the many astronomical features impressive in its own right. But, over the years, he’s filled in the gaps between and has been able to release a more and more complete picture of our galactic home.

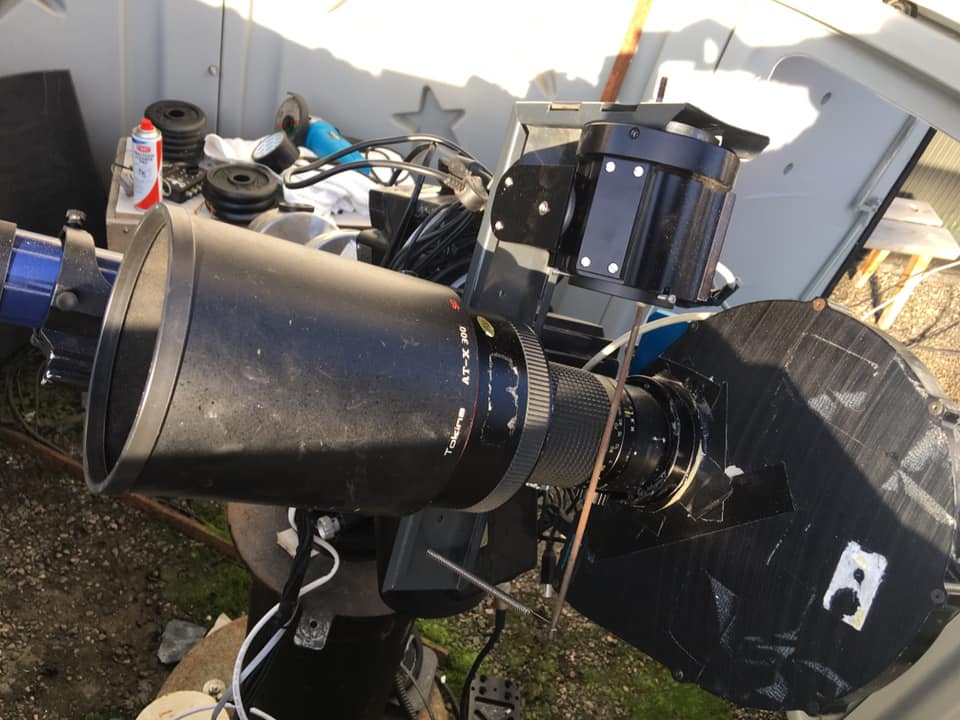
A project this long, somewhat predictably, eventually outlives the technology used to create it. Up until 2014, [Metsavainio]’s setup included a Meade 12-inch telescope and some modified Canon optics. Since then, he’s used a dedicated equatorial mount, astrocamera, and a Tokina lens (again, modified) with an 11-inch Celestron for longer focal lengths. He processes the frames in Photoshop, accounting for small exposure and color differences and aligning the images based on background stars. He’s had plenty of time to get his process down, though, so the necessary tweaking is relatively minor.

Amateur astronomy is an awesome hobby, and the barrier to entry is lower than it might seem. You can get started on a budget with the ubiquitous Raspberry Pi or with the slightly less practical Game Boy Camera. And if you’re just interested in viewing the cosmos, there are options for building your own telescope as well.

[via PetaPixel]

Hacking A Digital Microscope Camera For Fun And Automated PCB Inspection

A desire for automated PCB inspection has led [charliex] down some deep rabbit holes. He’s written his own inspection software, he’s mounted his PCB vise on a stepper-controlled table, and now he’s hacked his digital microscope camera to allow remote and automated control.

Eakins cameras have become a relatively popular, relatively inexpensive choice for electronics hobbyists to inspect their small-scale work. The cameras have a USB port for a mouse and overlay a GUI on the HDMI output for controlling the camera’s various settings and capturing images to the SD card. Using the mouse-based GUI can feel clunky, though, so users have already endeavored to streamline the process to fit better in their workflow. [charliex] decided to take streamlining a few steps further.

One issue in microscope photography is that microscopes have an extremely tight focus plane. So, even at the minuscule scales of an SMD circuit board, the components are simply too tall. Only a sub-millimeter-thick layer can be in focus at a time. If you take just a single image, much of what you want to see will be lost in the blurry distance. Focus stacking solves this problem by taking multiple pictures with the focus set at different depths then combining their focused bits into a single sharp image.

This takes care of the focus issue, but even the most streamlined and intuitive manual controls become tedious given the multitude of pictures required. So [charliex] searched for a way to remotely control his camera, automating focus stacking and possibly even full PCB scans.

Continue reading “Hacking A Digital Microscope Camera For Fun And Automated PCB Inspection”

An Infrared-Activated Solder Fume Extraction Fan

Even the most safety-conscious hackers among us might overlook protective gear when we’re just doing a quick bit of soldering. Honestly, though, eye protection is always a necessity. And those wisps of smoke, which drift so elegantly off the hot part of the iron, really shouldn’t drift directly into our nostrils. This is especially true if soldering you make a daily habit, or if you use lead-based solder.

And so, in defense of his lungs, [Jeremy S Cook] added a battery-powered fume extraction fan to his custom, concrete-based solder squid. Without proper power controls, though, the fan could easily drain its battery while no actual solder activity was occurring. To tackle that problem, he recently upgraded his system with a passive infrared (PIR) sensor to control when the fan turns on and off. The PIR sensor detects motion, enabling the fan only when it sees busy hands in its view, so he no longer needs to muck around with manual controls.

Despite a large increase in functionality, the design is relatively straightforward and uses off-the-shelf components, making it an accessible project for anyone who knows their way around an iron. [Jeremy] also upgraded his power source to a LiPo battery with onboard charger, which keeps the build light, maneuverable, and easy to get close to whatever he’s working on.

Whether you build or buy, a fume extractor will help fight off the famously face-seeking solder smoke on your workbench. Which is a good thing, too, because that smoke carries more than just the alluring aromas of making.

Continue reading “An Infrared-Activated Solder Fume Extraction Fan”

NASA’s Perseverance Rover Makes Its First Martian Tracks

There’s a special kind of anxiety that comes from trying out a robotic project for the first time. No matter the size, complexity, or how much design and planning has gone into it, the first time a creation moves under its own power can put butterflies in anyone’s stomach. So we can imagine that many people at NASA are breathing a sigh of relief now that the Perseverance rover has completed its first successful test drive on Mars.

To be fair, Perseverance was tested here on Earth before launch. However, this is the first drive since the roving scientific platform was packed into a capsule, set on top of a rocket, and flung hundreds of millions of miles (or kilometers, take your pick) to the surface of another planet. As such, and true to NASA form, the operators are taking things slow.

This joyride certainly won’t be setting speed records. The atomic-powered vehicle traveled a total of just 21.3 feet (6.5 meters) in 33 minutes, including forward, reverse, and a 150 degree turn in-between. That’s enough for the mobility team to check out the drive systems and deem the vehicle worthy of excursions that could range 656 feet (200 meters) or more. Perseverance is packed with new technology, including an autonomous navigation system for avoiding hazards without waiting for round-trip communication with Earth, and everything must be tested before being put into full use.

A couple weeks have passed since the world was captivated by actual video of the rover’s entry, descent, and landing, and milestones like this mark the end of that flashy, rocket-powered skycrane period and the beginning of a more settled-in period, where the team works day-to-day in pursuit of the mission’s science goals. The robotic arm and several on-board sensors and experiments have already completed their initial checks. In the coming months, we can look forward to tons of data coming back from the red planet, along with breathtaking pictures of its alien surface and what will hopefully be the first aircraft flown on another world.