Homebrew LED Strips That Are HomeKit-Compatible

Google, Amazon and Apple are all duking it out for supremacy in the smart home space. As you’ve probably noticed, cheaper smart lights and the like typically don’t offer connectivity with Apple’s HomeKit system. However, if you want some smart lighting that works in that ecosystem without breaking the bank, you can always build your own!

This simple build uses an ESP8266-01S as the brains of the operation. It’s a cut-down board that only has two GPIO pins available, but for this job, that’s enough. It’s paired with a simple relay for switching a single-color LED strip on and off, and an MP2307 buck converter for power. The code loaded onto the ESP8266 is simple, and allows it to connect to Wi-Fi and link up with Apple HomeKit for control.

Let’s say you’re a real fancy-pants, though, and you want RGB-addressable LEDs for your HomeKit setup. No problem, you can do that too! It’s as straightforward as hooking up an ESP8266 to some WS2812B LED strip and flashing the right firmware that emulates an Elgato EVE LED strip. You can even activate special lighting effects on the via the EVE app if you so desire, to take advantage of the fully-addressable nature of the strip.

There are plenty of off-the-shelf solutions in this space, but many of them are quite expensive for what you actually get in the box. Sometimes building your own is more fun, too. Alternatively, if you don’t like Apple’s smart home solutions, you can always try a more open alternative. Video after the break.

Continue reading “Homebrew LED Strips That Are HomeKit-Compatible”

Camera-Mounted Stereo Mic Is Fluffy And Capable

Typically, the audio coming out of your camera is not of the greatest quality. An external mic is generally a great upgrade, and this build from [DJJules] aims to be just that.

It’s a stereo mic setup based on the work of the Office de Radiodiffusion Télévision Française, or ORTF. The ORTF stereo technique defines using two cardioid mics pointing left and right at a seperation of 110 degrees and 17 cm apart, which captures a quality stereo field that also sounds good when presented as a mono mixdown.

The build uses a simple wooden frame to hold two electret mic capsules in the required orientation. They’re wired up to a 3.5mm jack so they can be plugged straight into a mic input on a DSLR or other similarly-equipped camera. Hair curlers covered in faux fur are used as a wind shield for the mics, and gives the build a properly professional look. The frame is also given a mount so it can easily sit on a camera’s cold shoe fitting. Alternatively, a screw mount can also be used.

Good audio is absolutely key to making good content, and having quality mics is definitely what you need to achieve that. We’ve featured some other great DIY mic builds over the years, too. Video after the break. Continue reading “Camera-Mounted Stereo Mic Is Fluffy And Capable”

Building A Poketch Powered By An Apple Watch

In Pokemon Diamond and Pearl and the ensuing modern re-releases, the player is given a computer called a Poketch to assist on their journey. [DistressedOwl] decided to build one for real.

The build starts with an Apple Watch, which provides a capable smartwatch platform and a quality display. It’s then given a snap-on case that’s 3D printed in PLA. [DistressedOwl] decided to use model painting techniques to give the build a worn-in, distressed look, which feels fitting for a watch belonging to a rough-and-tumble Pokemon trainer.

The Apple Watch runs a custom app via Test Flight which mimics the appearance of the in-game Poketch. It includes various screens like a basic map and Pikachu looking melancholy next to a digital watch. Sadly, the dowsing app in the Poketch won’t help you find hidden items on the ground.

It’s a build that reminds us of some great Pip-Boy builds over the years. It would make the perfect addition to a Pokemon cosplay, too. Just don’t forget to take some Pokeballs along too!

Building A Tessellated NeoPixel Clock

Anyone can buy a clock, but building your own lets you express your creative flair along the way. [Edison Science Corner] did just that with this neat sci-fi looking design.

The build relies on an Arduino Pro Mini to run the show, paired with a DS3231 real-time clock module. The latter part is of great importance, as without it, the Arduino would not keep accurate time. The 3D printed enclosure looks nondescript from the outside. However, inside, it’s got a neat triangular structure which allows the time to be displayed in that attractive tessellated triangular fashion. There’s a black plastic separator between all the segments which stop unattractive bleed-through and really help with the final effect. The individual triangles are each lit by a NeoPixel LED, which are both addressable and capable of lighting up in RGB colors. It makes for an attractive and colorful display.

If you want to try something more traditional yet challenging, consider whipping up your own 7-segment displays. Video after the break.

Continue reading “Building A Tessellated NeoPixel Clock”

DIY Wind Tunnel Aims To Educate The Youth

Typically, when we talk about wind tunnels, we think of the big facilities in use by the aerospace and motorsports industries. However, there’s nothing stopping you building a wind tunnel of your very own, and it may even be easier than you think! [Jude Pullen] has whipped up just such a design with DIY in mind.

Intended for high school Design & Technology (D&T) classes, it uses relatively simple materials construction techniques. The airflow straightener is built out of PVC pipes, and the end boxes built out of cardboard. The transparent walls for observation are created out of acrylic, while a simple fan provides the necessary flow. The desk-sized wind tunnel can then be instrumented with a manometer, tachometer, and anemometer to measure pressure, fan speed, and wind speed. [Jude] also explores experiments that can be run in the wind tunnel, such as working with a small balsa wood glider and measuring the lift it generates with a scale.

[Jude] has a very pragmatic and real-world understanding of such projects, too. He notes the difference between making things to measure, and making them to fit, and highlights the values of both approaches. It’s a much more holistic approach than simply berating students to “do it right” or “do it better” when making things in a D&T class.

Use of a basic wind tunnel is often not taught to engineering students until at least the second or third year of an engineering degree, after all the boring math and static analysis has been dealt with. However, there’s no reason high school physics students can’t understand the physics involved, and they’re more than capable of undertaking such a build. Starting such education early often nets huge benefits for individuals and their eventual careers.

Once you’ve got yourself a wind tunnel, you might want to start thinking about some flow visualization, which gets really exciting.

Continue reading “DIY Wind Tunnel Aims To Educate The Youth”

Lamp Flashing Module Is Perfect For Automotive Use

Modern cars tend to have quite advanced lighting systems, all integrated under the control of the car’s computer. Back in the day, though, things like brake lights and indicators were all done with analog electronics. If your classic car needs a good old-fashioned flasher module, you might find this build from [DIY Guy Chris] useful.

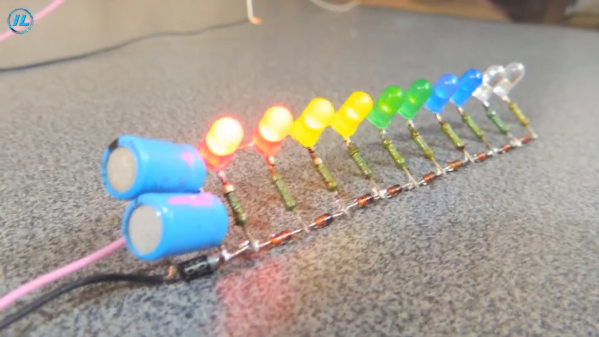
It’s an all-analog build, with no need for microcontrollers or other advanced modern contrivances. Instead, a little bipolar PNP transistor and a beefier NPN MOSFET as an oscillator, charging and discharging a capacitor to create the desired flashing behavior. Changing the size of the main capacitor changes the flash rate. The MOSFET is chosen as running 12 volt bulbs requires a decent amount of current. The design as drawn is intended to run up to eight typical automotive bulbs, such as you might find in indicator lamps. However, [Chris] demonstrates the circuit with just four.

Flasher circuits were in regular use well into the 1990s. The original Mazda Miata has a very similar circuit tucked up under the dashboard to run the turn signals. These circuits can be hard to find for old cars, so building your own may be a useful workaround if you’re finding parts hard to come by. Video after the break.

Continue reading “Lamp Flashing Module Is Perfect For Automotive Use”

A High-Powered Vacuum Cleaner For Tough Jobs

Vacuum cleaners are great for tidying up the home, but they typically can’t deal with the bulky, gross messes of a proper workshop. [CraftAndu] is currently building a sailing vessel, and has found that there’s simply too much sawdust for a regular vacuum to take on. Thus, he built a mighty vacuum of his own that’s able to deal with such conditions.

The core of the build is a giant 3.8 kW dust collector that’s used as part of a workshop dust extraction system. It’s of the type you’d normally use to suck up dust from machine tools. It’s then fitted with a long flexible hose that goes to the vacuum handle itself. The handle is made up of lengths of sewage pipe and several adaptors to fit it all together and hook up to the flexible tube. It’s also fitted with a set of wheels to allow it to be easily skated about the floor of the shop.

It’s a neat way to suck up all the lightweight sawdust that collects around the workshop. However, [CraftAndu] notes that even with the 3.8 kW extraction system powering it, it’s still quicker to use a broom for bigger detritus like wood chips and the like.

A lot of people think that vacuum projects suck, but we’ve always had a soft spot for them. Pun intended, and you’ll find the video after the break!

Continue reading “A High-Powered Vacuum Cleaner For Tough Jobs”