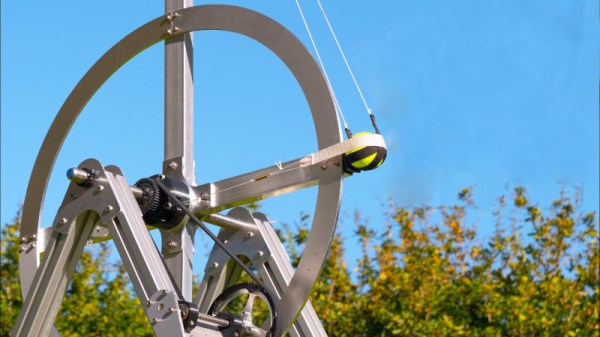
Most of us gained a familiarity with siege weapons from Age of Empires, and the march of technology has meant these relics aren’t typically seen on modern battlefields. However, development continues apace in the enthusiast community, and [Tom Stanton]’s latest trebuchet design puts a different spin on launching projectiles at speed.
The design takes advantage of the flywheel as an energy storage device. The flywheel is spun up to speed using a hand crank, through a timing belt and a set of hybrid 3D printed and CNC aluminium gears. Once spun up to sufficient angular velocity, a trigger releases the tennis ball payload from a sling, flinging it forth at speeds over 180 miles per hour.
Moving on from classical materials such as wood and nails, [Tom]’s latest design relies on aluminium in an effort to build something that won’t rot when left outside in the rain. The use of aluminium profiles also makes adjustment and redesigns easy, while providing the necessary adjustments to dial in things like release point and belt tension. We’ve featured a few different designs over the years; the walking-arm trebuchet is perhaps the most oddball of all. Video after the break.
While we’re currently in an era of comparatively low gas prices, the last few decades have seen much volatility in the oil market. This can hit the hip pocket hard, particularly for those driving thirstier vehicles. Thankfully, modifications can help squeeze a few extra miles out of each gallon of dinosaur juice if you know what you’re doing.
The art of striving for the best fuel economy is known as hypermiling, and involves a broad spectrum of tricks and techniques to get the most out of a drop of fuel. Let’s dive in to how you can build a more efficient cruiser for getting around town.
Step 1: Know Thine Enemy
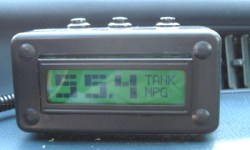
The MPGuino is a great solution for monitoring fuel consumption in older cars without a trip computer.
If you want to improve your fuel economy, the first step is to measure it. Without accurate measurement, it’s impossible to quantify any gains made or optimise for the best performance. For those with modern cars, it’s likely that there’s already a trip computer built into the dash. Using this to track your fuel economy is the easiest solution. Instantaneous modes are useful to help improve driving habits, while average modes are great for determining the car’s economy over time.
However, many older vehicles don’t have such features installed as stock. Thankfully, there’s a few ways to work around this. For those driving post-1996 vehicles outfitted with an OBD-II port, tools like Kiwi or Scangauge can often track fuel economy. Failing this, most fuel injected cars can be fitted with a device like the MPGuino that monitors fuel injection to calculate consumption. Fundamentally, all of these tools involve tracking the amount of fuel used per distance travelled. Factory tools and OBD-II gauges do it by using the car’s standard hardware, while the MPGuino splices in to speedometer signals and injector triggers to do the same thing with an Arduino. If you do decide to install a custom device, make sure you calibrate it properly, else your figures won’t bear much resemblance to what’s going on in reality.
Of course, as long as your car has a working odometer and a fuel tank that doesn’t leak, there’s always the pen-and-paper method. Simply reset the trip odometer to zero after filling the tank to the brim. Then, when refilling the tank, fill all the way to the top, and divide the miles driven by the gallons of fuel added back to the tank. This isn’t the most accurate method, as the nature of gas station pumps and automotive fuel tanks mean that tanks aren’t always accurately filled to the brim, due to air pockets and devices used to prevent overfilling. Despite this, it’s a handy way of getting some ballpark figures of your car’s performance over time.
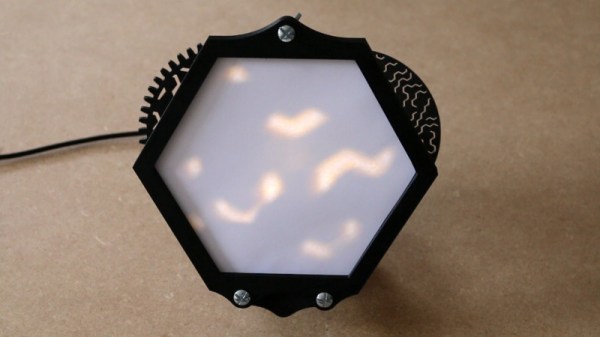
Inspired by the famous lava lamp, [Mojoptix] wanted to build a creation of his own with a similarly organic, changing lighting effect. However, rather than flowing heated wax, he created a lamp with pseudo-random effects his own way.
The lamp itself is built around a shadow-puppet concept, using a pair of rotating apetures that [Mojoptix] 3D printed. The apetures turn, one in front of the other, and are lit from behind by an IKEA LED light. As the apetures rotate, they present a slowly varying path for the light from the LED, which is projected onto a paper screen placed in in front of the assembly. To generate the long-period rotation, the rotating assembly is turned by the minute hand of a common clock movement. It’s a great way to get a slow-rotating motor and gearbox setup on the cheap, as long as your torque requirements are absolutely miniscule.
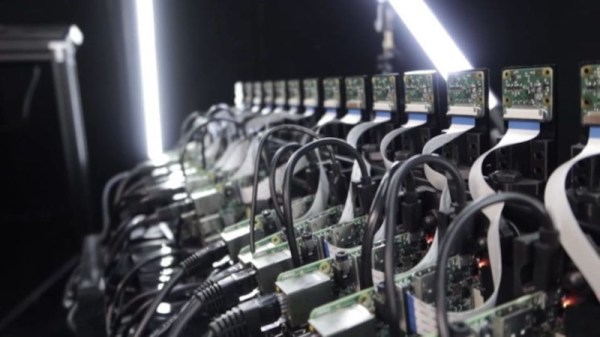
Bullet time became the hottest new cinema effect after it burst on the scene in The Matrix (1999). Back then, the cutting edge special effects required serious hardware and serious processing power to do the job. These days, of course, things have moved along somewhat. [Eric Paré] is no stranger to a high-end setup, but wanted to see what could be done at the lower end of the market. (Video, embedded below.)
Rather then relying on a bank of expensive DSLRs, [Eric] decided to try building a bullet-time camera rig out of 15 Raspberry Pis, and the standard Raspberry Pi Camera. Whereas just one camera in one of his professional setups may cost well over $1000, this entire rig was likely built for less than that in its entirety.
Initial results were jerky and unappealing, but [Eric] persevered. One of the biggest problems was inaccuracy in the camera assemblies, as they were stuck on with thermal paste. With some custom mods and tweaks, [Eric] was eventually able to get things to a passable state. It also has the benefit, compared to a DSLR rig, that the cameras can be mounted much more closely together due to their small size.
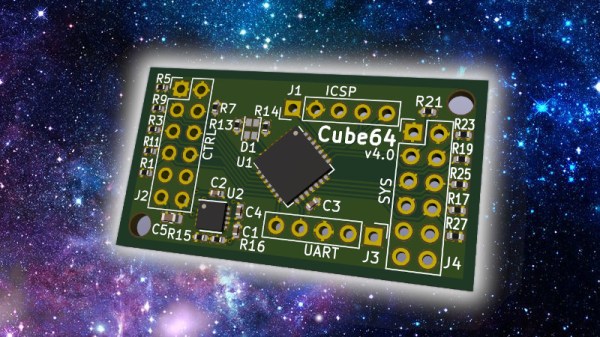
The Nintendo 64 was lauded for bringing quality 3D graphics and analog stick controls to the console realm, way back in 1996. Unfortunately, those analog sticks were never very good; if you’ve ever played four player Mario Kart 64, you know how it feels to be stuck with that controller. For a superior experience, consider building an adapter and upgrading to the GameCube controller instead.
Cube64 is a project that allows GameCube controllers to work with the original Nintendo 64 hardware. Using a PIC18F14K22 in its DIY version, or a PIC18F24Q10 in the SMD version, it’s the product of much work by [scanlime] and [darthcloud] to reverse engineer the N64 and GC controller protocols. The GameCube’s many buttons and sticks allow for easy mapping to the N64’s original button layout, and the hardware provides plenty of calibration options and maps to get things working exactly the way you like for the game you’re playing.
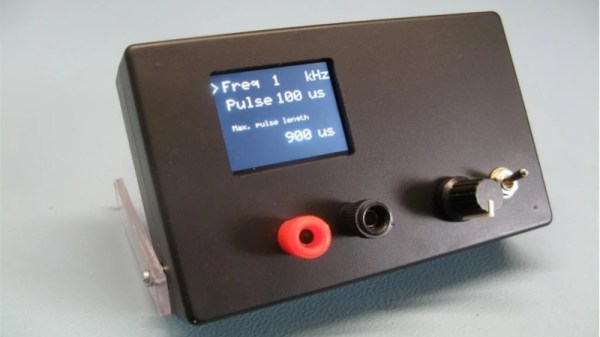
When working with hardware, whether a repair or a fresh build, it’s often necessary to test something. Depending on what you’re working with, this can be easy or a total pain if you can’t get the right signal to the right place. To eliminate this frustrating problem, [WilkoL] built a useful pulse generator for use in the lab.
[WilkoL] notes that historically, the job of generating pulses of varying length and frequency would be achieved with a smattering of 555 timers. While this is a perfectly cromulent way to do so, it was desired to take a different approach for the added flexibility modern hardware can offer. The pulse generator is instead built around an STM8 microcontroller; an unusual choice in this era, to be sure. [WilkoL] specified the part for its incredibly low cost, and highly capable timer hardware – perfect for the job.
Combined with an ST7735 TFT LCD screen, and programmed in bare metal for efficiency’s sake, the final project is installed in a project box with controls for frequency and pulse length – no more, no less. Capable of pulse lengths from 250 ns to 90 s, and frequencies from 10 mHz to 2 MHz, it’s a tool that should be comfortable testing everything from servos to mechanical counters.
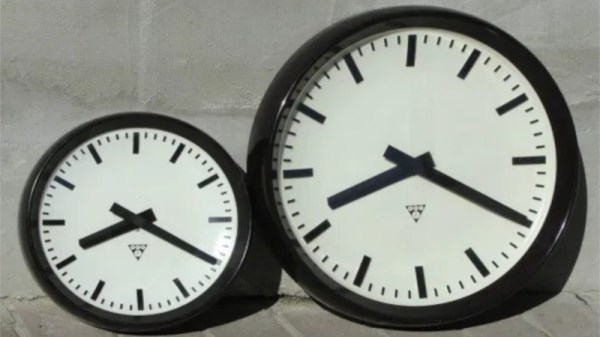
These days, everything’s got a clock in it, and a good proportion of those clocks are automatically syncronized to high-accuracy Internet time servers. Back in the past, things weren’t so easy. Often, institutions that required accurate time would use a single highly-accurate primary clock to drive a series of secondary clocks around a facility. Without the primary clock, the secondary clock has no signal to drive it. [Oleksii Samorukov] had just such a clock, and whipped up a controller to stand in for timekeeping duty.
The secondary clock in question is a Pragotron PJ 27, which requires regular 12V signals of alternating polarity in order to keep time. To handle this job, [Oleksii] decided to use an ESP32 in combination with an L298N motor controller. The L298N is an H-bridge driver chip, allowing it to easily supply the 12V signals in alternating polarities where required. To ensure the system keeps accurate time, the ESP32 regularly queries an NTP time server over WiFi.
It’s a tidy build, and one that brings this attractive 1960s timepiece into the modern era. We’d love to have such a stylish, well-built clock in our own home, too. Of course, if you want really accurate time, building a GPS clock is a great option, too!