Build Your Own Mouse For High Performance

For the dedicated gamer or hardcore computer user, there’s plenty of options for high-end input peripherals. We’ve seen plenty of makers build their own bespoke keyboards, too. Less commonly seen are custom mice, but [gipetto TranquilTempest] has crafted just such a device to suit their tastes.

The mouse is based on the PMW3360 sensor, prized for its 250 inch per second speed and 50g acceleration capability. Buttons are read by an ATMEGA32U4 which handles hardware debouncing for improved control. Anyone that’s accidentally double-clicked all their villagers in AOE II can appreciate this feature. There’s also specialised code to read the wheel encoder from [Ben Buxton] which helps avoids backscrolling.

The PCB was ordered from JLCPCB using their assembly service, which comes in handy for makers who want to build advanced designs without messing around with reflow. It’s designed to fit inside Microsoft mouse shells popular in years past – like the Wheel Mouse Optical and the Intellimouse 1.3.

Building your own mouse from the ground up is a great way to get yourself an input device that perfectly serves your needs. We’ve seen others work in the field, with custom trackballs and breakout boards for sensors. If you’ve got your own cutting edge build, be sure to let us know!

Vocal Effects On The Arduino Uno

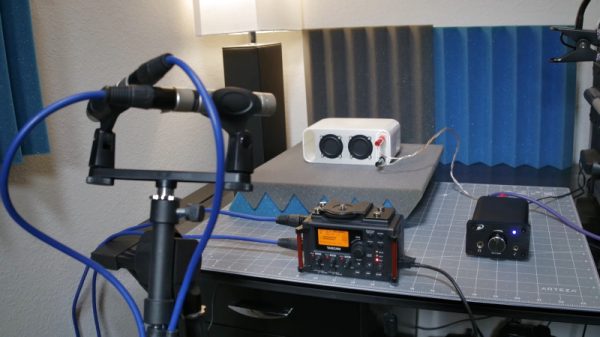
When one thinks of audio processing, the mind doesn’t usually leap to an 8-bit micro. Despite this, if you’re looking for some glitchy fun, it’s more than possible, as [Amanda Ghassaei] demonstrates with the Arduino Uno in this 2012 throwback project.

The build is designed for vocal effects, based on the idea of granular synthesis. This is where audio samples are chopped up into small chunks, called “grains”, and manipulated in various ways to make fun sounds. Controls on the box allow the nature of the sound created to be modified by the user.

[Amanda]’s project serves as a great example of what it takes to run audio processing on the Arduino Uno. There’s a guide to using the on-board ADC as a microphone input, as well as the construction of a resistor ladder DAC for output. As a neccessity, this also requires discussion of how to write directly to the ATMEGA’s IO ports, rather than using the slower digitalWrite() function typically used in Arduino projects. There’s plenty of value here for anyone learning to do audio on a microcontroller platform.

Overall, it’s a fun project that serves as a good primer for those keen to dive into digital sound processing. Of course, those looking to kick things up a gear would do well to check out the Teensy Audio Library, too. Video after the break.

Continue reading “Vocal Effects On The Arduino Uno”

There Really Was A Sewing Machine Controlled By A Game Boy

These days, high-quality displays and powerful microcontrollers are cheap and plentiful. That wasn’t the case a couple of decades ago, and so engineers sometimes had to get creative. The result of this is products like the Jaguar nu.yell sewing machine, as covered by [Kelsey Lewin].

The later nuotto model was capable of more advanced embroidery patterns. A Mario character cartridge was sold, while a later Kirby edition was scrapped before release.

The Japanese market product eschewed the typical mechanical controls of the era, to instead interface with a Nintendo Game Boy. The sewing machine would hook up to the handheld console via the Link Port, while the user ran a special cartridge containing the control software. This would allow the user to select different stitch types, or embroider letters. Very much a product of its time, the nu yell mimics the then-cutting edge industrial design of the first-generation Apple iMac. The technology was later licensed to Singer, who brought it to the US under the name IZEK. Sales were poor, and the later Jaguar nuotto didn’t get a similar rebranding stateside.

Back in the late 90s, the Game Boy was likely an attractive package to engineers. Packing a Z80 processor, buttons, and a screen, it could act as a simple human interface in lieu of designing one from the ground up.  Aprilia even used them to diagnose motorbike ECUs, and we’ve seen Game Boy parts used in medical hardware from the era, too. Video after the break.

Continue reading “There Really Was A Sewing Machine Controlled By A Game Boy”

Design And Construction With Copper Pipe

Copper is a material with many applications; typically, it’s used for electrical wiring or in applications where good heat conductivity is a requirement. However, it can also make for an attractive material in furnishings, which [Andrei Erdei] decided to explore.

A render of the coffee table design, exported from OpenSCAD into Fusion360.

[Andrei]’s work began in OpenSCAD, where he wrote scripts to enable the quick and easy assembly of various designs. The modular nature of commercially-available copper pipe and fittings allows complex structures to be assembled, particularly if you’re a fan of 90-degree bends. The final renders of some of these designs are impressive, with the coffee table design a particular highlight. Staying conceptual wasn’t enough, however, so [Andrei] set out to build one of his designs. Constructing a table lamp shroud out of copper parts was successful, though the real components have flanges and other features that aren’t represented in the rendering.

It’s a project that shows the value of tools such as OpenSCAD to aid the design process before committing to cutting real-world materials. While the designs on screen aren’t perfect representations of what’s possible in reality, it still proves to be a useful guide.

We’re a fan of the aesthetic, and would love to see more done with copper pipe as a construction kit. Global ore prices may limit experimentation, however. Alternatively, you can always harvest the metal from scrap!

Getting 1000 FPS Out Of The Raspberry Pi Camera

The Raspberry Pi camera has become a de facto standard for many maker projects, making things like object recognition and remote streaming a breeze. However, the Sony IMX219 camera module used is capable of much more, and [Gaurav Singh] set out to unlock its capabilities.

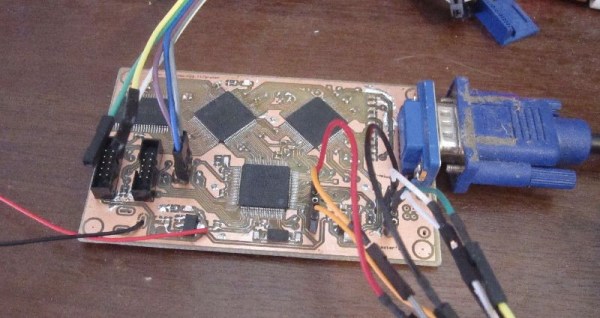
After investigating the IMX219 datasheet, it became clear that it could work at higher bandwidths when configured to use all four of its MIPI CSI lanes. In the Raspberry Pi module, only two MIPI lanes are used, limiting the camera’s framerate. Instead, [Gaurav] developed a custom IMX219 breakout module allowing the camera to be connected to an FPGA using all four lanes for greater throughput.

With this in place, it became possible to use the camera at framerates up to 1,000 fps. This was achieved by wiring the IMX219 direct to an FPGA and then to a USB 3.0 interface to a host computer, rather than using the original Raspberry Pi interface. While 1,000 fps is only available at a low resolution of 640 x 80, it’s also possible to shoot at 60 fps at 1080p, and even 15 fps at 3280 x 2464.

While it’s probably outside the realm of performance required for the average user, [Gaurav] ably demonstrates that there’s often capability left on the table if you really need it. Resources are available on Github for those eager to delve deeper. We’ve seen others use advanced techniques to up the frame rate of the IMX219, too. Video after the break.

Continue reading “Getting 1000 FPS Out Of The Raspberry Pi Camera”

Open-Source Collaboration Tackles COVID-19 Testing

When you think of open source, your mind likely jumps to projects such as Linux, Firefox, and other now-mainstream software. The ideals of the movement are applicable to other areas, too, however – and a group have come together to pool resources to tackle the COVID-19 pandemic.

The group has formed around Just One Giant Lab, a non-profit organisation operating out of Paris, France. They aim to create an open platform for scientific collaboration on a broad range of issues facing humanity. The current project aims to create an open-source method for safely testing for COVID-19 infection, in an attempt to help better manage cases popping up around the world.

Thus far, the group has collected a variety of resources and begun to host conference calls discussing best practices for testing for the virus. There’s discussion of various PCR assays and virus sequences that are all useful in detecting the virus, along with data from WHO reports in China. The current state of play has been boiled down in the lab notebook the group has prepared, available online.

It’s inspiring to see open-source ideals put to work in new arenas outside computer software. Time will tell if this is the new way forward, but it certainly can’t hurt to have more minds tackling the problems of today and tomorrow.

A Stylish Coffee Table Featuring Conway’s Game Of Life

Coffee tables are a great place to put your hot beverages, but most don’t offer a lot beyond that. For most people this is perfectly acceptable, but hackers often desire a little more. [Andrei Erdei] is one such person, who built Conway’s Game of Life into this handsome piece of furniture.

The build began with an existing coffee table, chosen for its glass top. Unfortunately, the top was painted black on one side, and was completely opaque, negating its use as a diffuser for LEDs. Instead, this was replaced with smoked glass, with frosted window film applied to make the final piece darker. This attention to detail allowed [Andrei] to install the WS2812B LED strips underneath such that they’re invisible when switched off. The LEDs themselves are run by a WEMOS D1 mini, based on the ESP8266. This microcontroller has plenty of grunt, which makes running the LEDs and the Game of Life code a cinch.

If you want to make something attractive and blinky, it’s hard to go wrong with Conway’s Game of Life. You can even use it to make a clock or a synthesizer; or build an entire game of Tetris within it. Video after the break.

Continue reading “A Stylish Coffee Table Featuring Conway’s Game Of Life”