Scanning Analog Film For The Last Time

Film cameras are capable of great resolution, and for a long time were superior in this regard to their digital successors. However, it’s now possible to store digital copies of analog images in superior detail, so [Jan] built a rig to scan their photos for the last time.

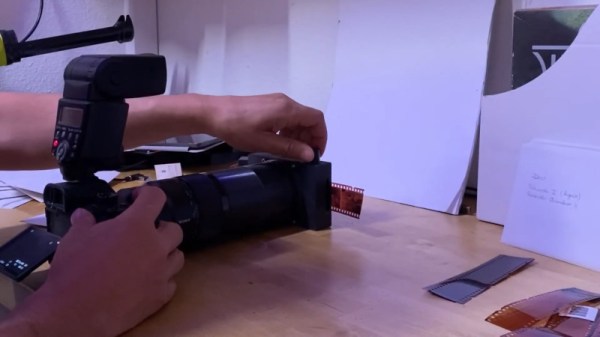
The general idea is to take a high enough resolution scan of film negatives or slides, such that there is no need to rescan the images when technology moves forward. To achieve this, [Jan] decided to employ a DSLR to photograph the materials in question. To do this quickly and accurately, with minimal fuss, special lens hoods were 3D printed to hold slides in perfect register in front of the lens. With a flash to provide even light, the results are excellent. Film negatives proved harder, requiring a carefully designed transport mechanism to avoid damaging the fragile materials. With some perseverance, the final tool worked well.

It’s a tidy way of digitally archiving analog photos, and with the resolution of modern cameras, one needn’t worry about lost resolution. We’ve seen mechanised builds for handling other formats too, such as this 8mm scanner. Video after the break.

Continue reading “Scanning Analog Film For The Last Time” →

Up Your Home Network Performance – Build Your Own Router!

Internet connections continue to increase in speed, and for a lucky few, it’s possible to get a Gigabit fibre connection at home. However, if you’re intending to use this connection to its fullest, you might find that your off-the-shelf router has become a bit of a bottleneck. [Wes Fenlon] of PC Gamer had this very problem, and found the perfect workaround – building a custom router instead!

The main problem with commodity routers is a lack of processing power. With networks growing ever faster, the hardware in routers hasn’t kept up with the needs of demanding power users. To solve this, [Wes] grabbed an old PC he had lying around, packing a quad-core i5 CPU and 16 GB of RAM. Fitted with an enterprise-grade 4-port Gigabit LAN card, and running Netgear’s  (Sorry commenteers!) Netgate’s pfSense routing software, the old machine has enough power to be complete overkill for the application.

The side benefit of this method is configurability. pfSense has a far more powerful set of options than most common routers. It’s config page also runs far more smoothly, too. There’s also the possibility to run all sorts of useful plugins, like router-level ad blockers and traffic monitoring utilities.

Overall, it’s a great way to repurpose a surplus machine and improve your network performance on the cheap. Others have tried similar builds, too. It has us contemplating the possibilities for our own networks at home!

One-Percenter Mods For Premium Apple Pencil Usability

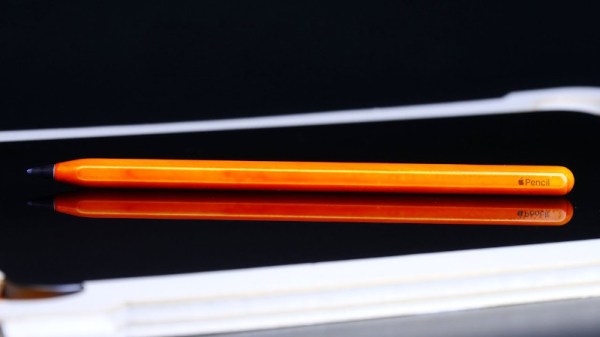
At $129 USD, Apple certainly do sell a very expensive “pencil”. Despite the high cost of entry, [Eric] identified several shortcomings and set about solving them himself with a few choice mods.

The first concern is the excessively slippery surface finish, that could lead to the expensive device being dropped and damaged. [Eric] starts by creating a special tool to help handle the pencil during the refinishing process. He highlights how key this is to getting a good final result, without fingerprints or other flaws ruining the finish. With the manipulator ready, the pencil is then given a wipe down with wax and grease remover prior to a dusting of a translucent spray paint. The finish is poor, however, and [Eric] instead elects to try again with a plastic primer first. A series of tinted clear coats are chased with a urethane clear topcoat for a hardy, grippier surface texture.

The final mod concerns the tip. It’s lathed down in a power drill to give a shape more akin to the ballpoint pens [Eric] is used to sketching with. Additionally, the tip is dyed black with a Sharpie marker and a heat gun, to help it contrast better when sketching on a white screen.

These mods may seem trivial to a casual user, but for a designer who draws for a living, usability is key. The striking orange finish is just a bonus. We don’t see too many stylus mods, but with the increased popularity of tablets, we’re sure to see more down the road. If you’ve got one, be sure to drop us a line! Video after the break.

Continue reading “One-Percenter Mods For Premium Apple Pencil Usability” →

Overclocking And Watercooling The TI-84, Just Cause

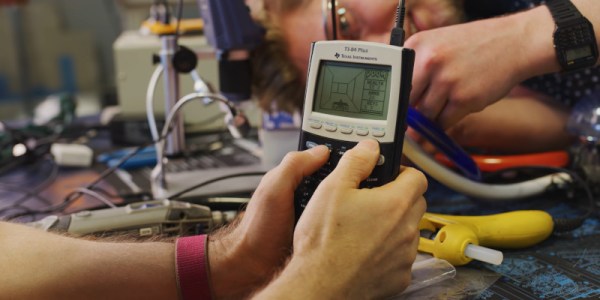
The TI-84 is an enduring classic – the calculator that took many through high school, college and beyond. A hacker’s favorite, it’s been pushed to the limits in all sorts of ways. The crew at [Linus Tech Tips] decided to join in the fun, overclocking a TI-84 Plus and adding water cooling to boot. 

The TI-84 uses a simple resistor capacitor circuit to generate its clock, making it overclocking it a cinch. By changing the resistor value in the circuit, the clock can be made to run faster. The team have some issues with pads delaminating from the PCB, but manage to sub in a trimpot which lets the clock be changed on the fly. A boost of 10MHz over stock gets the calculator operating at 26MHz, with notably quicker performance in the TI port of Doom 2. Without accurate measurement of CPU temps, it’s hard to say whether watercooling the calculator is justified. However, the team do a great job of entirely overengineering the solution, with a custom-made cooling block hooked up to a massive spherical reservoir.

With the stability issues inherent in overclocking, and the unwieldy watercooling tubes, it’s not a good hack in the practicality sense. It is, however, quite amusing, and that’s always worth something. TI calculators have long been targets for hackers, and you can even get them online if you so desire. Video after the break.

Continue reading “Overclocking And Watercooling The TI-84, Just Cause” →

Why You (Probably) Won’t Be Building A Replica Amiga Anytime Soon

Early in 2019, it  became apparent that the retro-industrial complex had reached new highs of innovation and productivity. It was now possible to create entirely new Commdore 64s from scratch, thanks to the combined efforts of a series of disparate projects. It seems as if the best selling computer of all time may indeed live forever.

Naturally, this raises questions as to the C64’s proud successor, the Amiga. Due to a variety of reasons, it’s less likely we’ll see scratch-build Amiga 500s popping out of the woodwork anytime soon. Let’s look at what it would take, and maybe, just maybe, in a few years you’ll be firing up Lotus II (or, ideally, Jaguar XJ220: The Game) on your brand new rig running Workbench 1.3. Continue reading “Why You (Probably) Won’t Be Building A Replica Amiga Anytime Soon” →

Hacking A Cheap Disco Light For UV Effects

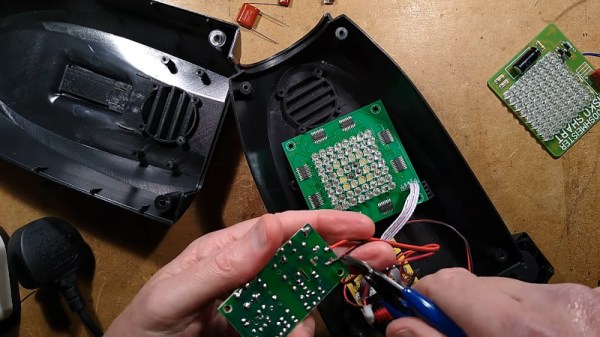
Back in the early days of disco, filament bulbs were all the rage. Whether tungsten, halogen, or other obscure types, party lighting involved lots of watts and lots of heat. These days, the efficiency of LEDs makes everything a lot cheaper, lighter, and lower power. [Big Clive] decided to dive into a cheap moonflower-type disco light from China, replacing the insides along the way.

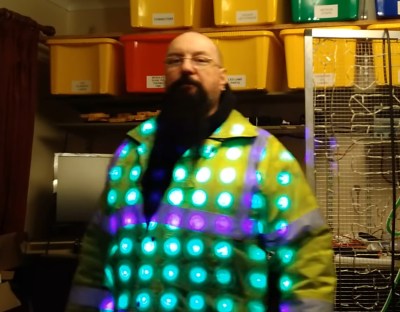
The final effect particularly shines when used on fluorescent materials.

The light originally consisted of an 8×8 grid of LEDs, driven by shift registers for a simple chase effect. Surprisingly, the power supply and other hardware inside seemed to at least make an attempt to meet UK regulations. However, [Big Clive] had other plans, whipping up a replacement PCB packing 64 UV LEDs. The video is informative, showing how with a few simple passive components, it’s easy to drive these LEDs from mains without excessive circuitry required to step down to more usual DC voltages.

The final result is a neat UV grid light that would look excellent through some fog on the dance floor. We’ve seen [Big Clive]’s teardowns before, too – like this nefarious CAN bus interceptor found in a Mercedes. Video after the break.

Continue reading “Hacking A Cheap Disco Light For UV Effects” →

Making Custom Gradient Markers At Home

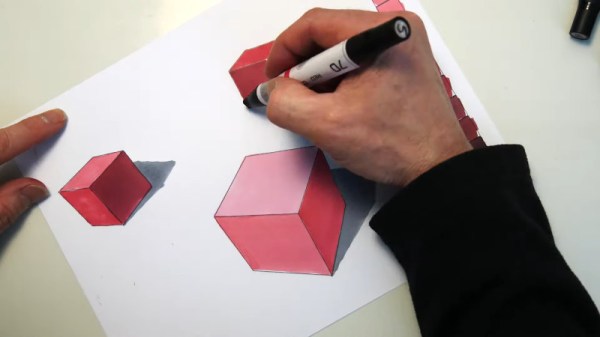
When doing high-end industrial illustration work, smooth gradients add a lot of production value to the final product. However, markers designed to do this well can be difficult to lay your hands on. [Eric] decided to create his own set of custom gradient markers, using commonly available supplies.

Starting with some existing markers that have dried out, the fabric ink reservoir inside is removed. A new one is created using tampons wrapped in heat-shrink, to replicate the construction of the original. Alcohol-based ink is required for smooth gradients, and [Eric] suggests using a heat gun to harvest the ink from a ballpoint pen, if store-bought is not available. The ink is then mixed with denatured alcohol to dilute it and injected into the fabric reservoir using a syringe. Each marker gets a slightly different ink mix to hit a range of lightness values for making smooth gradients.

It’s a tidy way of creating your own gradient markers in whatever color you may find useful. As a plus, the materials to do so are cheap and easy to obtain. We could even imagine 3D-printed marker bodies being an option, though nibs might prove a touch more difficult. We’ve seen [Eric]’s work before too, like this well-illustrated guide to using cardboard in product design. Video after the break.

Continue reading “Making Custom Gradient Markers At Home” →