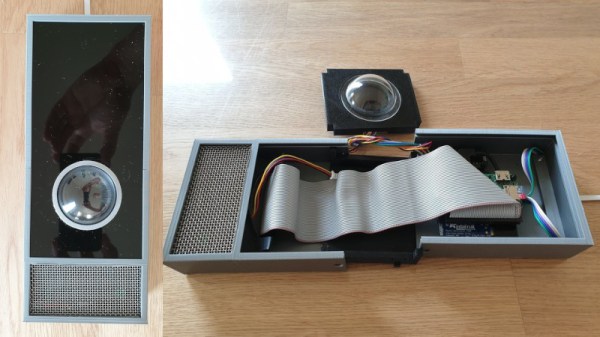
Affordable and reliable cell phones have revolutionized the way we communicate over the last two decades or so, and this change was only accelerated by the adoption of the smartphone. This is all well and good if you’re living in a place with cellular infrastructure, but if you’re in more remote areas you’ll have to be a little more inventive. This text-based communications device, for example, lets you send text messages without all of that cumbersome infrastructure.
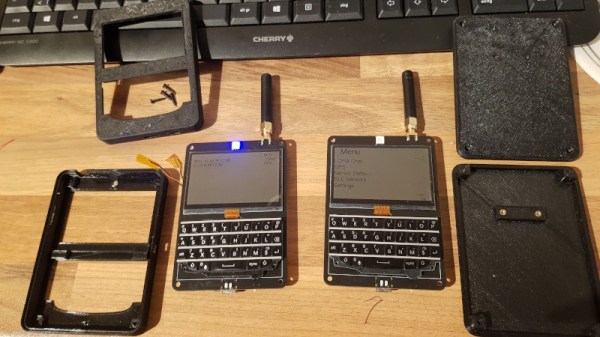
 While [Arthur] didn’t create this project specifically for off-grid use, it’s an interesting project nonetheless. The devices use a physical QWERTY keyboard and a small screen, reminiscent of BlackBerry devices from the late 2000s (partially because they are actually using BlackBerry keyboards). One of the other goals for this project was low power consumption, and between polling the keyboard, the memory LCDs, and receiving and transmitting messages using LoRa, [Arthur] was able to get the current draw down to 12 mA.
Between the relatively common nRF52840 and SX1262 chips, plus the fact that [Arthur] made the schematics available, this makes for an excellent off-grid device for anyone who likes to drive off into the wilderness or lives far enough outside of town that cell phone reception is a concern.
Looking for something a little easier to put together before your upcoming camping trip? This similarly styled LoRa communicator from [MSG] uses off-the-shelf modules to greatly reduce the part count. Another option for off-grid communications is to use existing smartphones paired with a LoRa network like we saw in this project.