Calculating The True Per Part Cost For Injection Molding Vs 3D Printing

At what point does it make sense to 3D print a part compared to opting for injection molding? The short answer is “it depends.” The medium-sized answer is, “it depends on some back-of-the-envelope calculations specific to your project.” That is what [Slant 3D} proposes in a recent video that you can view below.  The executive summary is that injection molding is great for when you want to churn out lots of the same parts, but you have to amortize the mold(s), cover shipping and storage, and find a way to deal with unsold inventory. In a hypothetical scenario in the video, a simple plastic widget may appear to cost just 10 cents vs 70 cents for the 3D printed part, but with all intermediate steps added in, the injection molded widget is suddenly over twice as expensive.

In the even longer answer to the question, you would have to account for the flexibility of the 3D printing pipeline, as it can be used on-demand and in print farms across the globe, which opens up the possibility of reducing shipping and storage costs to almost nothing. On the other hand, once you have enough demand for an item (e.g., millions of copies), it becomes potentially significantly cheaper than 3D printing again. Ultimately, it really depends on what the customer’s needs are, what kind of volumes they are looking at, the type of product, and a thousand other questions.

For low-volume prototyping and production, 3D printing is generally the winner, but at what point in ramping up production does switching to an injection molded plastic part start making sense? This does obviously not even account for the physical differences between IM and FDM (or SLA) printed parts, which may also have repercussions when switching. Clearly, this is not a question you want to flunk when it concerns a business that you are running. And of course, you should bear in mind that these numbers are put forth by a 3D printing company, so at the scale where molding becomes a reasonabe option, you’ll also want to do your own research.

While people make entire careers out of injection molding, you can do it yourself in small batches. You can even use your 3D printer in the process. If you try injection molding on your own, or with a professional service, be sure to do your homework and learn what you can to avoid making costly mistakes.

Continue reading “Calculating The True Per Part Cost For Injection Molding Vs 3D Printing”

Over-molding Wires With Hot Glue And 3D Printed Molds

We’ve said it before and we’ll say it again: water always finds a way in. That’s particularly problematic for things like wire splices in damp environments, something that no amount of electrical tape is going to help. Heat shrink tubing might be your friend here, but for an electrically isolated and mechanically supported repair, you may want to give over-molding with a hot glue gun a try.

The inspiration for [Print Practical]’s foray into over-molding came from a video that’s making the rounds showing a commercially available tool for protecting spliced wires in the automotive repair trade. It consists of a machined aluminum mold that the spliced wires fit into and a more-or-less stock hot glue gun, which fills the mold with melted plastic. [Print Practical] thought it just might be possible to 3D print custom molds at home and do it himself.

His first attempt didn’t go so well. As it turns out, hot glue likes to stick to things — who knew? — including the PETG mold he designed. Trying to pry apart the mold after injection was a chore, and even once he got inside it was clear the glue much preferred to stay in the mold. Round two went much better — same wire, same mold, but now with a thin layer of vegetable oil to act as a release agent. That worked like a charm, with the over-mold standing up to a saltwater bath with no signs of leaking. [Print Practical] also repaired an iPhone cable that has seen better days, providing much-needed mechanical support for a badly frayed section.

This looks like a fantastic idea to file away for the future, and one that’s worth experimenting with. Other filament types might make a mold better able to stand up to the hot glue, and materials other than the ethylene-vinyl acetate copolymer found in most hot glue sticks might be explored. TPU over-molds, anyone? Or perhaps you can use a printer as an injector rather than the glue gun.

Continue reading “Over-molding Wires With Hot Glue And 3D Printed Molds”

Injection Molding Using A 3D Printer

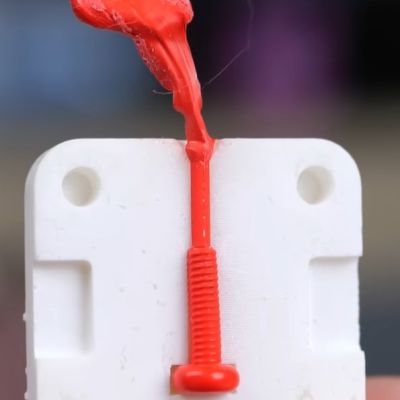
Recently [Stefan] of CNC Kitchen took a gander at using his gaggle of 3D printers to try injection molding (IM). Although the IM process generally requires metal molds and specialized machinery, 3D printers can be used for low-volume IM runs which is enough for limited production runs and prototyping before committing to producing expensive IM molds. In the case of [Stefan], he followed Form Labs’ guidance to produce molds from glass-infused Rigid 10K resin (heat deflection temperature of 218 °C). These molds are very rigid, as the ceramic-like noise when [Stefan] taps two together attests to.

Injection molded bolt, with imperfections on the head. (Credit: Stefan, CNC Kitchen)

The actual injection process is where things get more hairy for [Stefan], as he attempts to push the clamped-shut mold against the nozzle of the FDM printer to inject the molten plastic, rather than using an IM press. With PLA at standard extrusion temperature the plastic barely gets into the mold before solidifying, however. Following this, higher temperatures, different materials (PETG, TPU) and high flow-rate extruders are attempted, with varying results.

Many of the struggles would seem to be due to poor mold design, rather than fundamental issues with using an FDM. The Form Labs document details some of the basics, such as opening up the injection gate (to decrease pressure inside the mold), adding air vents to improve flow and so on. Commentators to the video with professional experience point out many of these issues as well, along with the benefits of preheating the mold.

With the caveat that most of the challenge is in making a good mold, we’ve even injection molding done with nothing more exotic than a hot glue gun. If you’ve got a friend, or a long enough lever, you can even inject the plastic by hand.

Continue reading “Injection Molding Using A 3D Printer”

Bit Of OpenSCAD Code Caps Off Wiremold

Wiremold is great stuff — it’s relatively cheap, easy to work with, and offers all sorts of adapters and angle pieces which take the hassle out of running (and hiding) wires. But [Dr. Gerg] found a shortcoming of this otherwise very flexible product: since each run is intended to start and end in a surface mounted box, he couldn’t find an end cap that would let him close off a section.

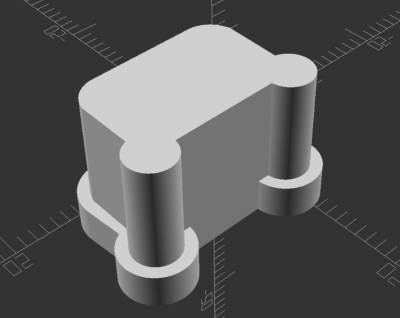
The solution? A desktop 3D printer and a chunk of OpenSCAD code telling it what to extrude. When you break it down, the Wiremold profile is fairly straightforward, and can be easily described with geometric primitives. A handful of cylinders, a cube or two, tie it all together with the hull() function, and you’re there.

We’d say this would be a fantastic project to cut your OpenSCAD teeth on, but since [Dr. Gerg] was kind enough to share the source code, you don’t have to figure it out on your own. Though there’s still benefit in reading over it if you’re looking for some practical examples of how the “Programmers Solid 3D CAD Modeller” gets things done.

So why would you want a Wiremold endcap? In the case of [Dr. Gerg], it sounds like he was trying to cover up a short run of wire that was running vertically. But we could imagine other applications for this basic design now that it’s out in the wild. For example, a short length of Wiremold outfitted with a pair of printed caps could make for a nice little enclosure if you’ve got a small project that needs protecting.

Slime Mold-Powered Smart Watches See Humans Fall In Love With The Goo

Humans are very good at anthropomorphising things. That is, giving them human characteristics, like ourselves. We do it with animals—see just about any cartoon—and we even do it with our own planet—see Mother Nature. But we often extend that courtesy even further, giving names to our cars and putting faces on our computers as well.

A recent study has borne this out in amusing fashion. Researchers at the University of Chicago found that human attitudes towards a device can change if they are required to take actions to look after it. Enter the slime mold smartwatch, and a gooey, heartwarming story of love and care between human and machine, mediated by mold.

Continue reading “Slime Mold-Powered Smart Watches See Humans Fall In Love With The Goo”

Lessons Learned: Plastic Injection Molding For Products

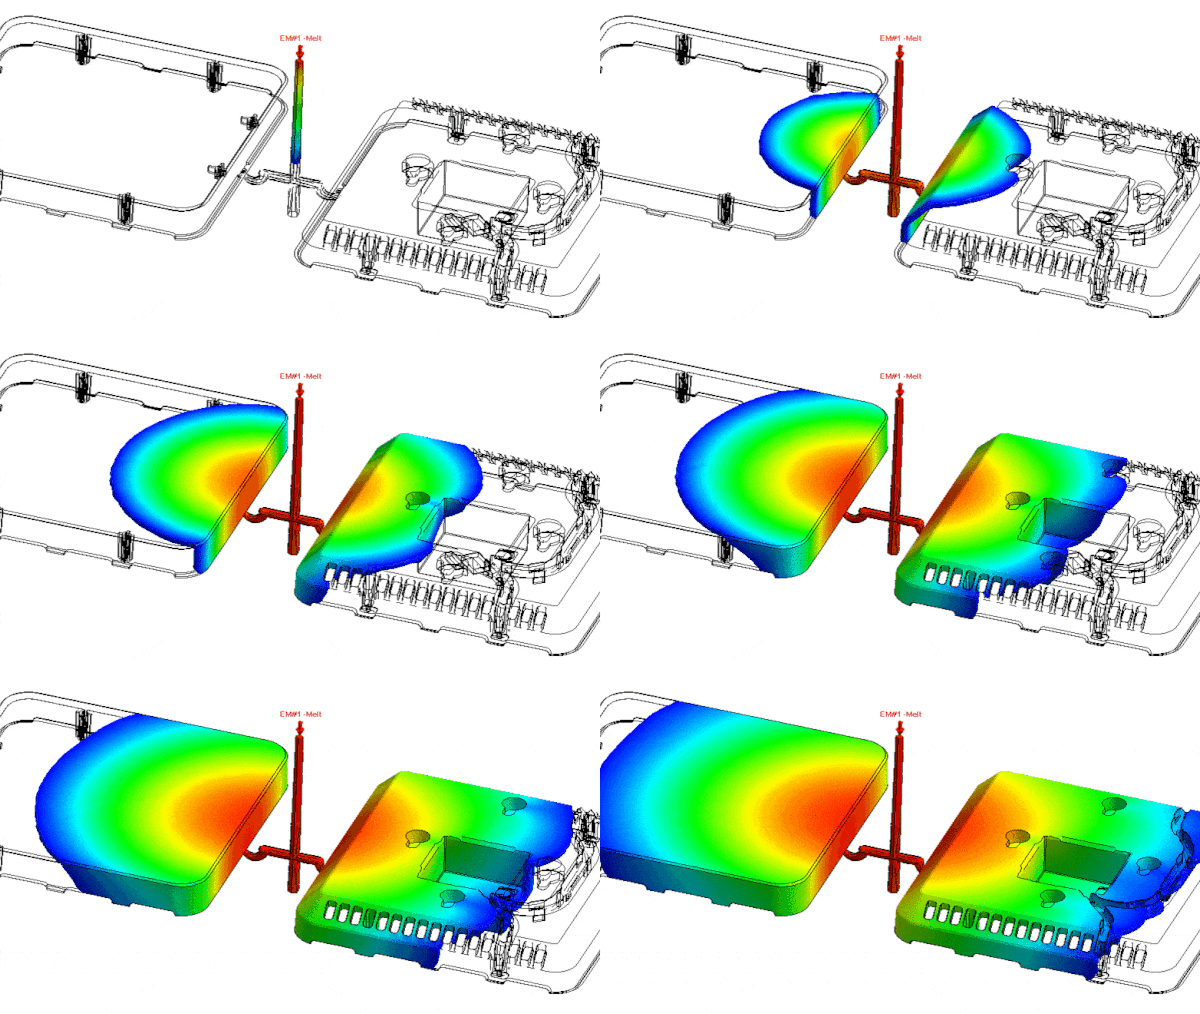
Injection molding is one of the technologies that makes the world go round. But what does it actually look like to go through the whole process to get a part made? [Achim Haug] wrote up a blog post that does a fantastic job of explaining what to expect when getting plastic enclosures injection molded in China.

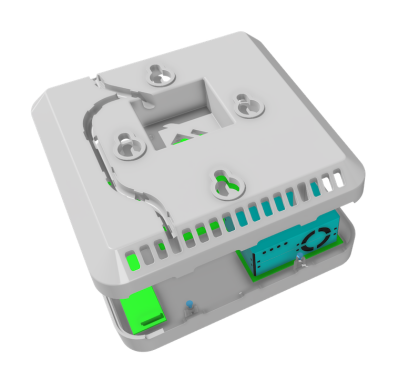
These air quality monitors required a two-part enclosure.

Injection molding a part requires making a custom mold, which is then used by an injection molding machine in a shop to crank out parts. These are two separate jobs, but in China the typical business model is for a supplier to quote a price for both the mold as well as the part production. [Achim] describes not only what navigating that whole process was like, but also goes into detail on what important lessons were learned and shares important tips.

One of the biggest takeaways is to design the part with injection molding in mind right from the start. That means things like avoiding undercuts and changes in part thickness, as well as thinking about where the inevitable mold line will end up.

[Achim] found that hiring a been-there-done-that mold expert as a consultant to review things was a huge help, and well worth the money. As with any serious engineering undertaking, apparently small features or changes can have an outsized impact on costs, and an expert can recognize and navigate those.

In the end, [Achim] says that getting their air quality monitor enclosures injection molded was a great experience and they are very happy with the results, so long as one is willing to put the work in up front. Once the mold has been made, downstream changes can be very costly to make.

[Achim]’s beginning-to-end overview is bound to be useful to anyone looking to actually navigate the process, and we have a few other resources to point you to if you’re curious to learn more. There are basic design concerns to keep in mind when designing parts to make moving to injection molding easier. Some injection molding techniques have even proven useful for 3D printing, such as using crush ribs to accommodate inserted hardware like bearings. Finally, shadow lines can help give an enclosure a consistent look, while helping to conceal mold lines.

Art of 3D printer in the middle of printing a Hackaday Jolly Wrencher logo

Make Better 3D Printed Molds, For Thermoforming Plastics

Thermoforming — which includes vacuum-forming — has its place in a well-rounded workshop, and Mayku (makers of desktop thermoforming machines) have a short list of tips for getting the best results when 3D printing molds on filament-based printers.

A mold is put into direct, prolonged contact with a hot sheet of semi-molten plastic. If one needs a mold to work more than once, there are a few considerations to take into account. The good news is that a few simple guidelines will help get excellent results. Here are the biggest ones:

  1. The smoother the vertical surfaces, the better. Since thermoforming sucks (or pushes) plastic onto and into a mold like a second skin, keeping layer heights between 0.1 mm and 0.2 mm will make de-molding considerably easier.
  2. Generous draft angles. Aim for a 5 degree draft angle. Draft angles of 1-2 degrees are common in injection molding, but a more aggressive one is appropriate due to layer lines giving FDM prints an inherently non-smooth surface.
  3. Thick perimeters and top layers for added strength. The outside of a mold is in contact with the most heat for the longest time. Mayku suggests walls and top layer between 3 mm to 5 mm thick. Don’t forget vent holes!
  4. Use a high infill to better resist stress. Molds need to stand up to mechanical stress as well as heat. Aim for a 50% or higher infill to make a robust part that helps resist deformation.
  5. Ensure your printer can do the job. 3D printing big pieces with high infill can sometimes lift or warp during printing. Use enclosures or draft shields as needed, depending on your printer and material.
  6. Make the mold out of the right material. Mayku recommends that production molds be printed in nylon, which stands up best to the heat and stress a thermoforming mold will be put under. That being said, other materials will work for prototyping. In my experience, even a PLA mold (which deforms readily under thermoforming heat) is good for at least one molding.

Thermoforming open doors for an enterprising hacker, and 3D printing molds is a great complement. If you’re happy being limited to small parts, small “dental” formers like the one pictured here are available from every discount overseas retailer.  And of course, thermoforming is great for costumes and props. If you want to get more unusual with your application, how about forming your very own custom-shaped mirrors by thermoforming laminated polystyrene?