Used Facemasks Turned Into Rapid Antigen Tests With Injection Molding

Here’s a little eye-opener for you: next time you’re taking a walk, cast your eyes to the ground for a bit and see how far you can go without spotting a carelessly discarded face mask. In our experience, it’s no more than a block or two, especially if you live near a school. Masks and other disposal artifacts of the COVID-19 pandemic have turned into a menace, and uncounted billions of the things will be clogging up landfills, waterways, and byways for decades to come.

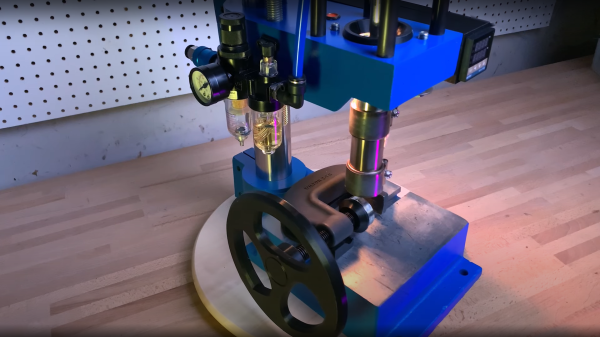
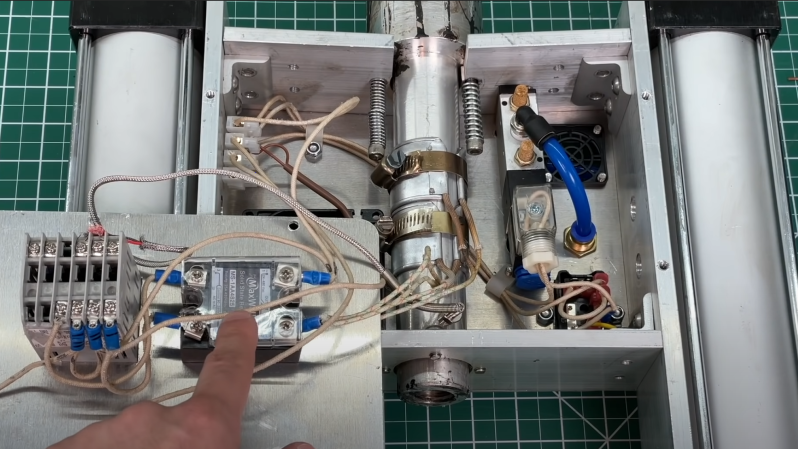
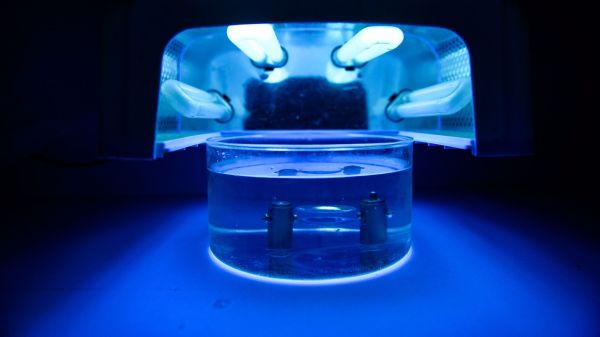
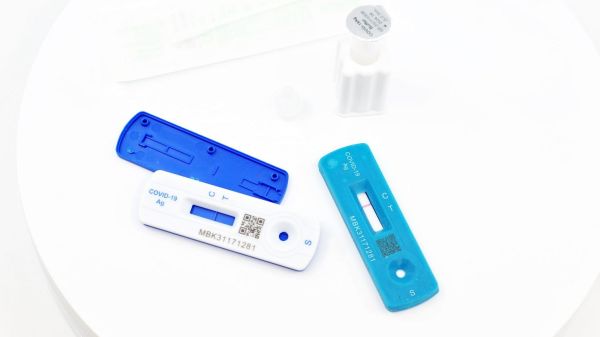
Unless they can be recycled into something useful, of course, like the plastic cases used for rapid antigen tests. This comes to us by way of [Ric Real] from the Design and Manufacturing Futures lab at the University of Bristol in the UK. If any of this sounds or looks familiar, refer back to October when the same team presented a method for turning old masks into 3D printer filament. The current work is an extension of that, but feeds the polypropylene pellets recovered from the old masks into a desktop injection molding machine.

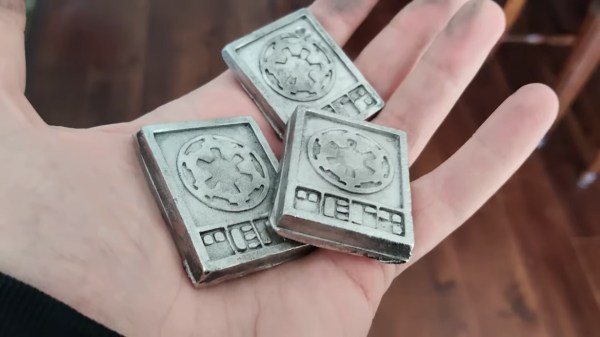
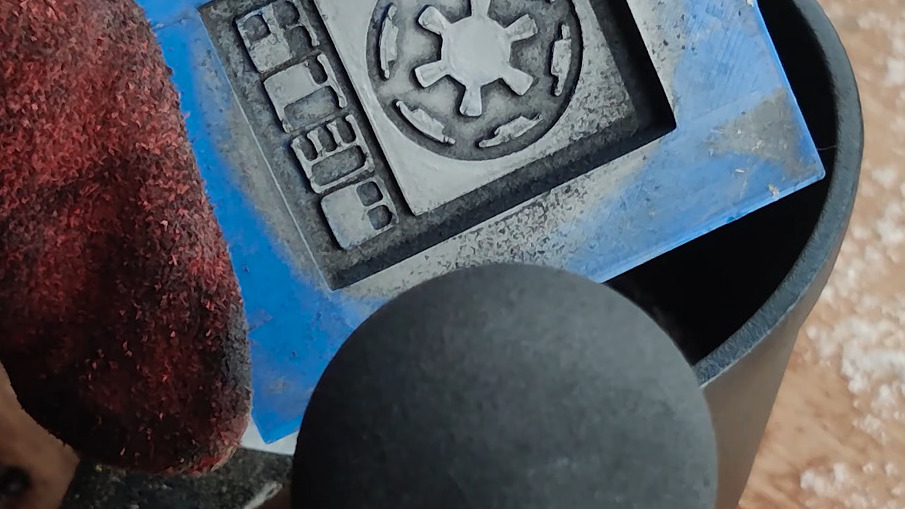
The injection molding machine is fitted with 3D-printed molds for the shells of lateral flow devices (LFD) used for COVID-19 rapid antigen testing. The mold tooling was designed in Fusion 360 and printed on an Elegoo Mars MSLA printer using a high-strength, temperature-resistant resin. The molds stood up to the manual injection molding process pretty well, making good-quality parts in the familiar blue and white colors of the starting material. It’s obviously a proof of concept, but it’s good to see someone putting some thought into what we can do with the megatonnes of plastic waste generated by the pandemic response.

3D Printed Molds For Casting Rose’s Metal

Have you ever played with Rose’s metal? It’s a fusible alloy of bismuth, lead, and tin with a low melting point of around 100 °C. Historically, it’s been used as a solder for cast iron railings and things, and as a malleable pipe filler material to prevent crimping while a pipe is bent.

[Ben Healey] has been playing around with Rose’s metal and some PETG printed molds, making everything from Star Wars Imperial credits to chess pieces to leather stamping tools. In the video after the break, [Ben] takes us through the process, beginning with mold-making from STLs — something he picked up from another YouTuber.

He recommends adding registration marks to multi-part molds in order to keep everything lined up, and adding a small recess in the seam for easy separation with a flat-head screwdriver. So far, the molds have held up to multiple pours, though [Ben] did print them rather thick and is glad he did.

As far as making liquid metal, [Ben] used a cast iron pot with a convenient pour spout, and a blowtorch. He added graphite powder to the molds in an effort to make them give up the goods more easily. To finish the pieces, [Ben] cut the flashing with tin snips and used sandpaper and a Dremel to smooth the edges. Copper plating didn’t work out, but [Ben] is going to try it again because he thinks he screwed something up in the process. He’s also going to try printing with TPU, which we were just about to recommend for its flexibility.

There are many ways to cast metal on the (relatively) cheap. Have you considered Kinetic Sand?

Continue reading “3D Printed Molds For Casting Rose’s Metal”

DIY Injection Molder Built From A Cheap Pneumatic Press

[Kurt Schaefer] was watching YouTube videos of people making molds for injection molding purposes using what he considered to be the toy 3018 CNC machines, and looking at the results, decided he needed a piece of the action. However, once you have molds, the next obvious issue to address is lack of access to an injection molding machine. But these things are expensive. As luck would have it, you can get a nice-looking pneumatic press for less than $350, and with a little more money spent, [Kurt] found he could convert it into a functional injection molding machine (video, embedded below), and get some half-decent results out of it.

After ordering the press on eBay, what eventually arrived was quite a mess, having clearly been inadequately packed for its weight, and had sustained some damage in transit. Despite this, it seemed the functional bits were fine, so [Kurt] decided to press on with the build. The first obvious change is the requirement of a heated chamber to deal with the feedstock material. Using an off-the-shelf injection molding chamber by buster beagle 3D, only a few standoffs and a support bracket needed machining in order to complete the mechanics. A common PID controller available from the usual suppliers, with some heat bands wrapped around the chamber, dealt with the injection temperature requirements, and some 3D printed enclosures wrapped it all up neatly.

After some initial wobbles, and a couple of hacks to the design, [Kurt] got some pretty good results out of this simple setup, and it appears to be pretty tune-able and repeatable, which will help maintain the quality of those results. In short, a neat hack of easy to get parts, and perhaps a welcome addition to a hackerspace near you?

3D printed parts are available on the Thingiverse page, as well as a Fusion360 CAD model. The shopping list for parts can be found in the video description, if you want to have a go at reproducing this.

We’ve seen a few DIY injection molding attempts over the years, like this slick plastic molding setup. Here’s one with 3D-printed molds, and if you just need something the right shape, you could just injection mold with a hot glue.

Continue reading “DIY Injection Molder Built From A Cheap Pneumatic Press”

Integrating sphere test setup

Cannonball Mold Makes A Dandy Integrating Sphere For Laser Measurements

It’s an age-old riddle: if you have a perfect sphere with a perfectly reflective inner surface, will light bounce around inside it forever? The answer is pretty obvious when you think it through, but that doesn’t mean that you can’t put the principle to use, as we see with this homemade Ulbricht sphere for optical measurements.

If you’ve never heard of an Ulbricht sphere, don’t worry — it’s also known as an integrating sphere, and that makes its function a little more apparent. As [Les Wright] explains, an integrating sphere is an optical element with a hollow spherical cavity that’s coated with a diffusely reflective coating. There are two ports in the sphere, one for admitting light — usually from a laser — and one for light to exit. The light bounces around inside the sphere and becomes perfectly diffuse, and creates a uniform beam at the exit port.

[Les]’ need for an integrating sphere comes from the desire to measure the output of some of his lasers with his Raspberry Pi-based PySpectrometer. Rather than shell out for an expensive commercial integrating sphere, or turn one on a lathe, [Les] turned to an unlikely source: cannonball molds. The inside of the mold was painted with an equally unlikely ultra-white paint concocted from barium sulfate and PVA glue. With a few ports machined into the mold, it works perfectly to diffuse the light from his dye lasers for proper measurements.

Lasers can be an expensive hobby, but [Les] always seems to find a way to make things more affordable and just as good. Whether it’s homemade doorknob caps for high-voltage power supplies or blasting the Bayer filter off a cheap CCD camera, he always seems to find a way.

Continue reading “Cannonball Mold Makes A Dandy Integrating Sphere For Laser Measurements”

Hackaday Podcast 153: A 555 Teardown To Die For, Tetrabyte Is Not A Typo, DIY Injection Molding, And Using All The Parts Of The Trash Printer

Join Hackaday Editor-in-Chief Elliot Williams and Managing Editor Tom Nardi on another whirlwind tour of the week’s top stories, hacks, and projects. We start off with some breaking Linux security news, and then marvel over impeccably designed pieces of hardware ranging from a thrifty Z table for the K40 laser cutter to a powerful homebrew injection molding rig. The finer technical points of a USB device that only stores 4 bytes at a time will be discussed, and after taking an interactive tour through the internals of the 555 timer, we come away even more impressed by the iconic 50 year old chip. We’ll wrap things up by speculating wildly about all the bad things that can happen to floating solar panels, and then recite some poetry that you can compile into a functional computer program should you feel so inclined.

Take a look at the links below if you want to follow along, and as always, tell us what you think about this episode in the comments!

Direct Download (58 MB)

Continue reading “Hackaday Podcast 153: A 555 Teardown To Die For, Tetrabyte Is Not A Typo, DIY Injection Molding, And Using All The Parts Of The Trash Printer”

injecto doing it's thing

Tiny Homemade Injection Molder

With 3D printing continually gaining ground, some hackers might not see the need for traditional injection molding. After all, you can tweak the code or the model and print dozens of different iterations with fairly minimal lead time. Things get trickier when you need to print hundreds or thousands of the same thing and that ten-hour print time adds up quickly. [Actionbox] built a tiny injection molder they dubbed INJEKTO to speed up their manufacturing.

The design was optimized to be accessible as it is held together with brackets and cheap aluminum flat stock. The hardest part to source is the heating chamber, as it is a piece of turned aluminum. A PID controller keeps the temperature relatively stable and heats the plastic pellets you can dump in the top. Next, you’ll need an external air compressor to power the dual 2″ pneumatic pistons. The pistons push the plastic out of the spring-loaded extruder nozzle. [Actionbox] is already planning on a second version with 4″ pistons that provide significantly more force to extrude larger amounts of plastic as the current version tops out at about 27 grams.

Injection molding still needs a heavy-duty mold to inject into, which can be hard to machine. So until we can 3D print an injection mold, this multi-head 3D printer is something in between a 3D printer and an injection molder, as it can print a dozen of the same thing, speeding up that print time.

Continue reading “Tiny Homemade Injection Molder”

Molding complex lenses

Molding Complex Optics In A Completely Fluid System

Traditional lensmaking is a grind — literally. One starts with a piece of glass, rubs it against an abrasive surface to wear away the excess bits, and eventually gets it to just the right shape and size for the job. Whether done by machine or by hand, it’s a time-consuming process, and it sure seems like there’s got to be a better way.

Thanks to [Moran Bercovici] at Technion: Israel Institute of Technology, there is. He leads a team that uses fluids to create complex optics quickly and cheaply, and the process looks remarkably simple. It’s something akin to the injection-molded lenses that are common in mass-produced optical equipment, but with a twist — there’s no mold per se. Instead, a UV-curable resin is injected into a 3D printed constraining ring that’s sitting inside a tank of fluid. The resin takes a shape determined by the geometry of the constraining ring and gravitational forces, hydrostatic forces, and surface tension forces acting on the resin. Once the resin archives the right shape, a blast of UV light cures it. Presto, instant lenses!

The interface between the resin and the restraining fluid makes for incredibly smooth lenses; they quote surface roughness in the range of one nanometer. The use of the fluid bed to constrain the lens also means that this method can be scaled up to lenses 200-mm in diameter or more. The paper is not entirely clear on what fluids are being used, but when we pinged our friend [Zachary Tong] about this, he said he’s heard that the resin is an optical-grade UV adhesive, while the restraining fluid is a mix of glycerol and water.

We’re keen to see [Zach] give this a try — after all, he did something similar lately, albeit on a much smaller scale.

Continue reading “Molding Complex Optics In A Completely Fluid System”