Some Useful Notes On The 6805-EC10 Addressable RGB LED

LEDs are getting smaller and smaller, and the newest generations of indexable RGB LEDs are even fiddlier to use than their already diminutive predecessors. [Alex Lorman] has written some notes about the minuscule SK6805-EC10 series of LEDs, which may be helpful to those wanting to learn how to deal with these in a more controlled manner.

Most hardware types will be very familiar with the 5050-sized devices, sold as Neopixels in some circles, which are so-named due to being physically 5.0 mm x 5.0 mm in the horizontal dimensions. Many LEDs are specified by this simple width by depth manner. As for addressable RGB LEDs (although not all addressable LEDs are RGB, there are many weird and wonderful combinations out there!) the next most common standard size down the scale is the 2020, also known as the ‘Dotstar.’ These are small enough to present a real soldering challenge, and getting a good placement result needs some real skills.

[Alex] wanted to use the even smaller EC10 or 1111 devices, which measure a staggering 1.1 mm x 1.1 mm! Adafruit’s product page mentions that these are not intended for hand soldering, but we bet you want to try! Anyway, [Alex] has created a KiCAD footprint and a handy test PCB for characterizing and getting used to handling these little suckers, which may help someone on their way. They note that hot air reflow soldering needs low temperature paste (this scribe recommends using MG Chemicals branded T3 Sn42Bi57Ag1 paste in this application) and a very low heat to avoid cracking the cases open. Also, a low air flow rate to prevent blowing them all over the desk would also be smart. Perhaps these are more suited to hot plate or a proper convection oven?

As a bonus, [Alex] has previously worked with the slightly larger SK6805-1515 device, with some good extra notes around an interesting nonlinearity effect and the required gamma correction to get good colour perception. We’ll leave that to you readers to dig into. Happy soldering!

We’ve not yet seen many projects using these 1111 LEDs, but here’s one we dug up using the larger 1515 unit.

RGB LED Display Simply Solves The Ping-Pong Ball Problem

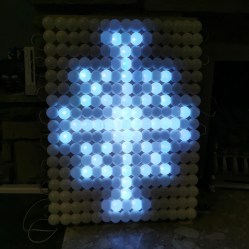
A few years ago [Brian McCafferty] created a nice big RGB LED panel in a poster frame that aimed to be easy to move, program, and display. We’d like to draw particular attention to one of his construction methods. On the software end of things there are multiple ways to get images onto a DIY RGB panel, but his assembly technique is worth keeping in mind.

The diameter of ping pong balls is a mismatch for the spacing of LEDs on a strip. The solution? A bit of force.

The technique we want to highlight is not the fact that he used table tennis balls as the diffusers, but rather the particular manner in which he used them. As diffusers, ping-pong balls are economical and they’re effective. But you know what else they are? An inconvenient size!

An LED strip with 30 LEDs per meter puts individual LEDs about 33 mm apart. A regulation ping-pong ball is 40 mm in diameter, making them just a wee bit too big to fit nicely. We’ve seen projects avoid this problem with modular frames that optimize spacing and layout. But [Brian]’s solution was simply to use force.

Observing that ping-pong balls don’t put up much of a fight and the size mismatch was relatively small, he just shoved those (slightly squashy) 40 mm globes into 33 mm spacing. It actually looks… perfectly fine!

We suspect that this method doesn’t scale indefinitely. Probably large displays like this 1200 pixel wall are not the right place to force a square peg into a round hole, but it sure seemed to hit the spot for his poster-sized display. Watch it in action in the video below, or see additional details on the project’s GitHub repository.

Continue reading “RGB LED Display Simply Solves The Ping-Pong Ball Problem”

Very Tiny Cube Has 384 RGB LEDs

When it comes to making things that glow, there are two ways to stand out from the crowd. You can make something very big, or something very small. [DIY GUY Chris] has done the latter, producing a tiny LED cube that he says is the world’s smallest.

As is so often the way, the build relies on tiny WS2812B-compatible LEDs in a 1 mm x 1 mm form factor. They’re mounted on a series of teeny interlocking PCBs that come together to build a cube that’s just 8 cubic centimeters in volume. Power is courtesy of a small lithium-ion cell that lives inside the cube. Data and power signals flow around the cube via solder connections along the edges of the faces of the cube.  Running the show is an ATmega328P, the same microcontroller you’d find in an Arduino Uno. It’s responsible for sending out commands to the LEDs to create various animations.

We can’t speak to [Chris’s] claim about being the world’s smallest, but it is small. We’ve seen other builds in a similar vein, like this barely-larger D20 with a full 2400 LEDs, though. Video after the break.

Continue reading “Very Tiny Cube Has 384 RGB LEDs”

An RGB LED clock that resembles a color blindness test.

RGB LED HexaClock Doesn’t Actually Light Up The Night

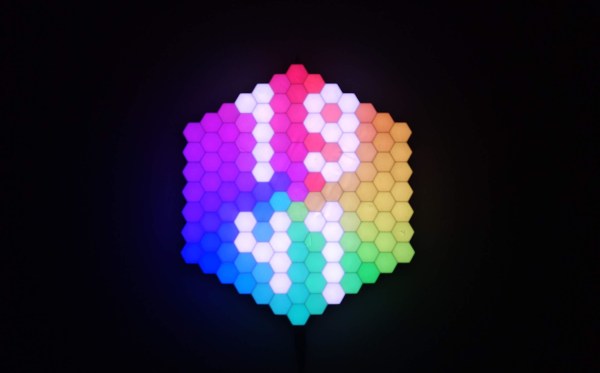
Who says a clock can’t be both useful and beautiful? That seems to be the big idea behind the lovely little HexaClock from [Bulduper]. And boy, is it both.

Probably the most important part of this well-illuminated clock is the light sensor, which allows it to adjust the brightness automatically. If you’re not into that, well, there’s a really nice web app that’ll let you program the dickens out of it.

The brains of this thing is an ESP8266 on a custom PCB which controls the 127 individually addressable RGB LEDs. The clock may look large, but the big printed parts just fit on the bed of a Prusa i3. [Bulduper] used ABS because the LED strip and the PCB might get a little warm; they didn’t want to risk using PLA and having it turn into a Salvador Dali clock (although that could be cool).

Speaking of heat, make sure to use 18 AWG or thicker wires as [Bulduper] advises. LEDs may be efficient, but this clock uses lots of them! If you want to build one of these to bathe your wall in useful light, everything you need is available on GitHub. Watch HexaClock do its thing in the brief demo and walk-through video after the break.

If this is a little too bright for your tastes, check out this synesthesia clock.

Continue reading “RGB LED HexaClock Doesn’t Actually Light Up The Night”

RGB LED Disco Ball Reacts To Sound And Color

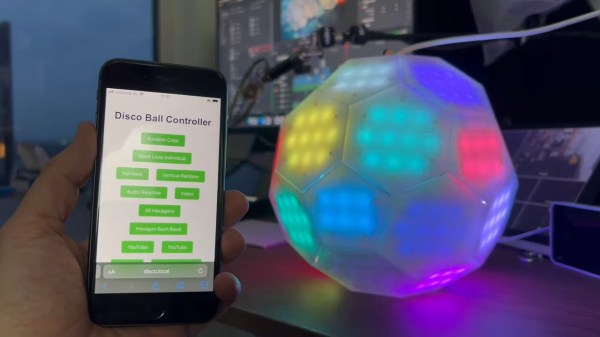
Although disco music and dancing may be long dead, the disco ball lives on as a staple of dance parties everywhere. [Tim van de Vathorst] spent a considerable amount of time reinventing the disco ball into something covered with RGB LEDs that reacts to sound and uses a color sensor to change hue based on whatever it’s presented with.

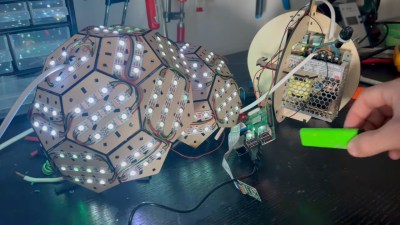
[Tim] started by modeling the disco ball after a soccer ball with a mixture of pentagons and hexagons. Then it was off to the laser cutter to cut it out of 3mm plywood sheets. Once assembled, [Tim] added LED strips across all the faces and wired them up. Then it was time to figure out how to hold the guts together inside of the ball. Back to the drawing board and laser cutter [Tim] went to design a simple two-piece skeleton to hold the Raspberry Pi and the power supply.

In order to do some of the really interesting effects, [Tim] had to make sure that the faces were divvied up correctly in code. That was difficult and involved a really big array, but the result looks worth the trouble. Finally, [Tim] covered the ball in white acrylic to diffuse the LEDs. As you will see in the build/demo video after the break, the ball turned out really well. The only real problem is that the camera doesn’t work very well without light, which is something good parties are usually short on. [Tim] might add a spotlight or something in the future.

Do you prefer the mirrored look of the standard disco ball? Peep the tiny one in this Disco Containment Unit.

Continue reading “RGB LED Disco Ball Reacts To Sound And Color”

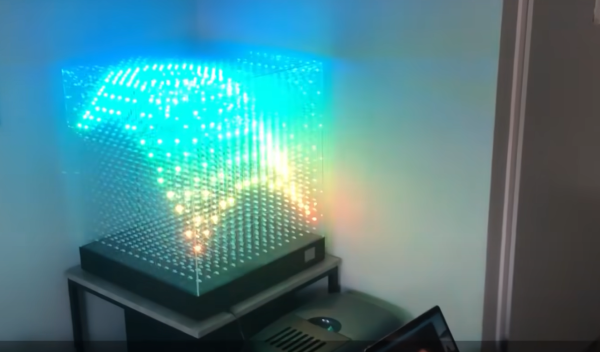
Big RGB LED Cube You Can Build Too

LED cubes are really nothing new, many of us consider the building of a good sized one almost an electronics rite of passage that not so many manage to find the time or have the skill to pull off. It’s our pleasure to draw your attention to a lovely build, showing all the processes involved, the problems and the solutions found along the way.

Building a small cube is somewhat of a trivial affair, especially without considering PWM colour mixing, however as simple maths will illustrate, as you increase the number of LEDs on each side, the total number will quickly get quite large. More LEDs need more power and increase control complexity considerably. A larger matrix like this 16 x 16 x 16 LED build, has a total of 4096. This would be a nightmare to drive with plain RGB LEDs, even with cunning multiplexing, but luckily you can buy indexable LEDs in a through-hole package similar to the ubiquitous WS2812-based SMT LEDs you see around. These are based on the PD9823 controller, which can be programmed as if they were a WS2812, at least according to this analysis. Now you can simply chain a column of LEDs, with the control signal passed from LED to nearest neighbour.

Early on in the video build log, you will note there are four power supply modules needed to feed this juice. If we assume each LED consumes 60 mA on full-white (the data for this product link shows a peak value of 100 mA) that is still a total of 246 A or around 1 kW of power. The video does shows a peak power measurement of around this figure, for the whole array on full white, so the maths seems about right.

Control is via a Teensy 4.0 using the FlexIO function of the IMXRT1060RM CPU, and a bunch of 74AHCT595 shift registers giving 32 channels of up to 1000 LEDs per channel if needed. Roughly speaking, using the DMA with FlexIO, the Teensy can drive up to 1 Million LED updates per second, which works out about 32 channels of 100 LEDs per channel updated at 330 frames/sec, so plenty of resource is available. All this is with almost no CPU intervention, freeing that up for handling the 2.4-inch LCD based UI and running the animations, which looks pretty darn slick if you ask us. You can checkout the description of the firmware in the firmware section of the GitHub project. 3D printed jigs allowed for bending and clipping the LEDs leads as well as fixing and aligning the LED column units, so there really is enough detail there to allow anyone so inclined reproduce this, so long as you can swallow the cost of all those LEDs.

For a different approach to LED cubes, checkout this sweet panel based approach, and here’s a really small 4x4x4 module for those with less space to spare.

Continue reading “Big RGB LED Cube You Can Build Too”

Etch-a-sketch made with LEDs

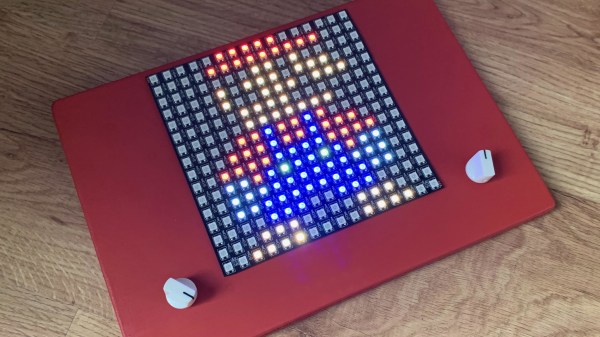
RGB LED Matrix Helps Etch-a-Sketch Scratch Out A 21st Century Existence

We never did crack open our Etch-a-Sketch, but we did scrape out a window large enough to really check out the mechanism inside. [MrLangford] is bringing the Etch-a-Sketch into the 21st century while at the same time, bringing an even bigger air of mystery, at least for the normies.

Instead of scraping aluminum powder off of plastic by driving a stylus on an x-y gantry with a pair of knobs, this bad boy uses rotary encoders to move the cursor around and put down squares of colored light. The familiar movements are there — the left knob moves the cursor left and right, and the right knob moves it up and down. But this wouldn’t be a 21st century toy without newfangled features. Push the left encoder down and it cycles through eight color choices, or push the right one down to go through them backwards. We hope one of the colors is setting it back to darkness in case you screw up. And while we’re dreaming up improvements, it would be awesome to add an accelerometer so you could shake it clear like a standard Etch-a-Sketch.

Inside the requisite red enclosure with white knobs are an Arduino Nano and a 16×16 RGB LED matrix. The enclosure is four sheets of 6mm MDF glued together, and we like the use of protoboard to distribute GND and 5 V in the name of keeping the thing slim.

If you’re not much of an artist, here’s a TV-sized Etch-a-Sketch build that can draw by itself.