Robot Arm Gives Kids The Roller Coaster Ride Of Their Lives

Unfortunately, [Dave Niewinski]’s kids are still too little to go on a real roller coaster. But they’re certainly big enough to be tossed around by this giant robot arm roller coaster simulator.

As to the question of why [Dave] has a Kuka KR 150 robot in his house, we prefer to leave that unasked and move forward. And apparently, this isn’t his first attempt at using the industrial robot as a motion simulator. That attempt revealed a few structural problems with the attachment between the rider’s chair and the robot’s wrist. After redesigning the frame with stouter metal and adding a small form-factor gaming PC and a curved monitor in front of the seat, [Dave] was ready to figure out how to make the arm simulate the motions of a roller coaster.

Now, if you ever thought the world would be a better place if only we had a roller coaster database complete with 4k 60 fps video captured from real coasters, you’re in luck. CoasterStats not only exists, but it also includes six-axis accelerometer data from real rides of coasters across Europe. That gave [Dave] the raw data he needed, but getting it translated into robot motions that simulate the feeling of the ride was a bit tricky. [Dave] goes into the physics of it all in the video below, but suffice it to say that the result is pretty cool.

More after the break.

Continue reading “Robot Arm Gives Kids The Roller Coaster Ride Of Their Lives”

Gesture-Controlled Robot Arm Is A Nifty Educational Build

Traditionally, robot arms have been controlled either by joysticks, buttons, or very carefully programmed routines. However, for [Narongporn Laosrisin’s] homebrew build, they decided to go with gesture control instead.

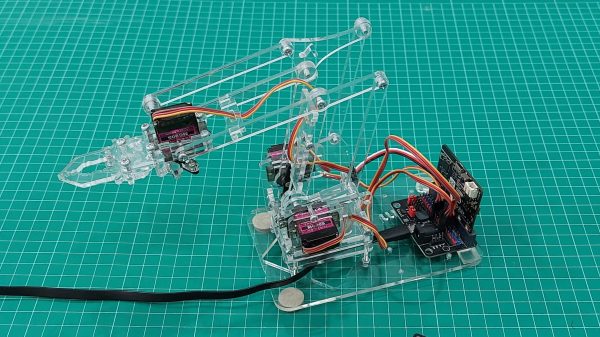
The MeArm robotic arm is built using laser cut acrylic parts, and can be had in a kit if so desired. It features four servo motors, charged with rotating the arm’s base, pushing the arm forwards and backwards, up and down, and actuating its gripper. The servos are under the command of a micro:bit microcontroller board, which itself receives signals from a second micro:bit which is strapped to the human wishing to control the arm. The second micro:bit detects gestures with its accelerometer, and then sends the relevant commands to the robotic arm’s micro:bit over its built-in radio link. The arm controller then commands the servos to execute the maneuver.

It may be a small robotic arm that doesn’t have the capacity to lift much, but that’s not the point. This project is a great way to teach students how to program microcontrollers, work with sensor inputs, and just generally how to solve engineering puzzles. To that end, it looks like [Narongporn] has a great project on hand for teaching their students. Video after the break.

Continue reading “Gesture-Controlled Robot Arm Is A Nifty Educational Build”

MeArm 3.0: The Pocket-Sized Robot Arm

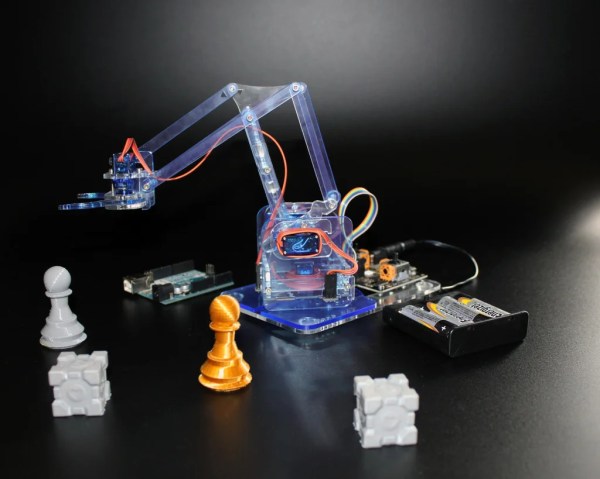
We all might dream of having an industrial robot arm at our disposal, complete with working controller that doesn’t need constant maintenance and replacement parts, and which is able to help us with other projects with only a minimum of coding or instruction. That’s a pipe dream for most of us, as without a large space, sufficient funding, or unlimited amounts of troubleshooting time we’ll almost always have to look for something smaller and simpler. Perhaps something even as small as this pocket-sized robotic arm.

This isn’t actually the first time we’ve seen the MeArm; the small robot has been around since 2014 and has undergone a number of revisions and upgrades. Even this revision has been out for a little while now but this latest in the series is now available with a number of improvements over the older models. The assembly time required has been reduced from two hours to about 30 minutes and the hardware has even been fully open-sourced as well which allows virtually anyone with the prerequisite tools to build this tiny robot for whatever they happen to need it for, due to its very permissive licensing.

The linked Instructable goes into every detail needed for building the robot as well as documenting all of the parts needed, although you will need access to some specialty tools to make a lot of them. We also featured a Friday Hack Chat about these robots back in 2018 that has some interesting details about these robots in it, and although this is a relatively small robot in the grand scheme of things it’s always possible to upgrade to something larger in the future.

Continue reading “MeArm 3.0: The Pocket-Sized Robot Arm”

Arctos Robotics: Build A Robot Arm Out Of 3D Printer Spares?

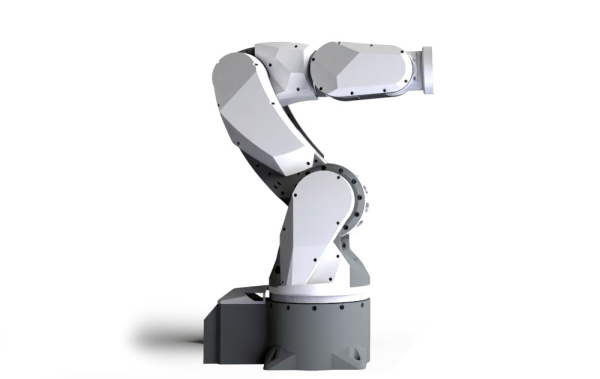
ARCTOS is a 6-DOF robot arm based upon 3D printed mechanics running a modified version of GRBL firmware. Let’s get this straight now, the firmware is open source, but the hardware plans are a paid download, but for less than forty euros, we reckon the investment would be well worth it, judging from the quality of the build instructions and the software support already in place. Continue reading “Arctos Robotics: Build A Robot Arm Out Of 3D Printer Spares?”

$60 Robot Arm Is Compact

Thanks to 3D printing and inexpensive controllers, a robot arm doesn’t need to break the bank anymore. Case in point? [Build Some Stuff] did a good-looking compact arm with servos for under $60. The arm uses an interesting control mechanism, too.

Instead of the traditional joystick, the arm has a miniature arm with potentiometers at each joint instead of motors. By moving the model arm to different positions, the main arm will mimic your motions. It is similar to old control systems using a synchro (sometimes called a selsyn), but uses potentiometers and servo motors.

Continue reading “$60 Robot Arm Is Compact”

How Home Made Robot Arms Used To Be Made

With laser cutters and 3D printers in our arsenal as well as the global toy shop of mass-produced parts and single-board computers, building a robotic project has almost never been easier. In times past though, there was more of a challenge, with a computer likely meaning a chunky desktop model and there being no plethora of motors at low prices, a robot arm required more ingenuity. [Marius Taciuc] shares with us an arm he built from the most minimal of parts back in 2003, and it’s a beautiful exercise in creative reuse.

The arm itself uses metal and FR4 for its structure, and borrows extensively from cassette tape mechanisms for motors and gears. The stronger motor for the forearm is a geared unit from a heating system, and to control all this, a relay board is hooked up to a computer’s parallel port. This last assembly is particularly ingenious, having no optocouplers handy he made his own by coupling LEDs to metal can transistors with their lids removed.

The arm was entered in a competition, and he relates a tale with which we’ll all be familiar — at the critical moment, it didn’t work. Fortunately a last-minute accidental covering of the board with a floppy disk solved the problem, as it turned out that enough light was leaking into those home-made optocouplers to trigger them. The prize was won not just on the strength of the arm, but on his explanation of the lessons learned along the way.

The once-ubiquitous parallel port is now absent from most computers, but there’s still plenty of scope for experimentation if you have one.

3-DOF Robot Arm Wrist Without The Motor Weight

A major challenge of robotic arms is the weight of the actuators, especially closer to the end of the arm. The long lever arm means more torque is required from the other actuators, and everything flexes a bit more. To get around this, [RoTechnic] moved the wrist stepper motors off the arms entirely.

He built a push-pull mechanism that uses braided fishing line to transfer motion to the robot arm’s wrist using Bowden tubes. The motors are mounted on the arm’s base, with a drum and two lengths of fishing line on the shafts. The lines pass through an adjustable tensioner before entering the Bowden tubes. This drum mechanism is also present on each of the three rotating axes of the wrist.

[RoTechnic] used an Arduino-powered RAMPS board as a controller, which is programmed to accept over the serial interface. He created a simple GUI and scripting interface in Jupyter Labs to generate and send command, which seems like an excellent solution for testing.

We can see this mechanism being a useful for a variety of motion applications, and definitely something to add to the idea toolbox. It is somewhat similar to some other cable-operated joints we’ve seen in humanoid robots and other 3D printed arms.

Continue reading “3-DOF Robot Arm Wrist Without The Motor Weight”