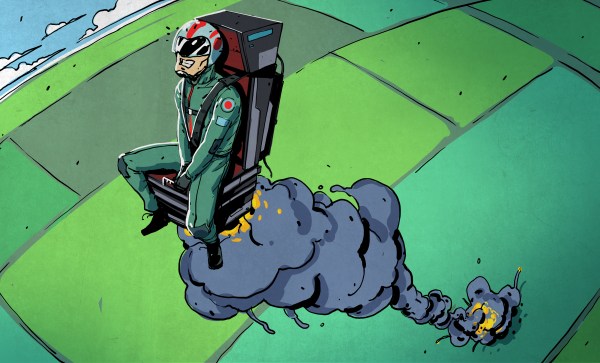
This Retro Game Console Puts Vacuum Fluorescent Display To Good Use

Small in size, low-resolution, blocky segments, and a limited color palette — all characteristics of the typical vacuum fluorescent display, any of which would seem to disqualify them as the display of choice for a lot of applications. But this is Hackaday, and we don’t really pay much attention to what we’re supposed to do, but rather to what’s fun and cool to do. So when we see something like a VFD game console, we just have to sit up and take notice.

In a lot of ways, the design of [Simon Boak]’s Arduino-based VFD console is driven by his choice of display. The Noritake Itron GU20X8-301 VFD is a “tricolor” display with eight rows of 20 rectangular pixels. Each pixel is composed of six short linear segments, with alternating red and blue colors. Turning on either set of segments yields one of the two base colors, while turning on both yields a sorta-kinda whitish color, if you squint a bit.

[Simon] chose a two-piece design for his console, with a separate controller and display. The controller holds the Arduino Nano and all the controls, plus a piezo buzzer for fun. The display case connects to the controller with a ribbon cable and holds the VFD power supply and driver. To celebrate the retro look of the VFD, both cases are decked out with woodgrain side panels. [Simon] chose appropriately blocky games for the console, like Snake, Conway’s Game of Life, and the venerable snow demo. We’d imagine Pong would be a good choice too, as well as perhaps Tetris if the display were flipped on its side.

We really like the look of this console, and we appreciate putting an otherwise obsolete display to use in a creative way. If you want to learn a little more about these displays, check out this love letter to the VFD.

Continue reading “This Retro Game Console Puts Vacuum Fluorescent Display To Good Use”

Laptop Motherboard? Let’s Boot And Tinker

Last time, I’ve shared my experience on why you might want to consider a laptop motherboard for a project of yours, and noted some things you might want to keep in mind if buying one for a project. Now, let’s go through the practical considerations!

Making It Boot

Usually, when you plug some RAM and a charger into a board, then press the power button, your board should boot up and eventually show the BIOS on the screen. However, there will be some caveats – it’s very firmware-dependent. Let me walk you through some confusing situations you might encounter.

If the board was unpowered for a while, first boot might take longer – or it might power on immediately after a charger has been plugged in, and then, possibly, power off. A bit of erratic behaviour is okay, since boards might need to do memory training, or recover after having lost some CMOS settings. Speaking of those, some boards will not boot without a CMOS battery attached, and some will go through the usual ‘settings lost’ sequence. Sometimes, the battery will be on a daughterboard, other times, especially with new boards, there will be no CR2032 in sight and the board will rely on the main battery to provide CMOS settings saving functions – in such case, if you don’t use the battery, expect the first boot to take longer, at least. Overall, however, pressing the power switch will cause the board to boot. Continue reading “Laptop Motherboard? Let’s Boot And Tinker”

Probably The Most Over-Specified Calculator To Ever Be Manufactured

It’s possible quite a few of our older readers will remember the period from the 1960s into the ’70s when an electronic calculator was the cutting edge of consumer-grade digital technology. By the 1980s though, they were old hat and could be bought for only a few dollars, a situation that remains to this day. But does that mean calculator development dead?

Perhaps not, as [Li Zexi] writes for CNX Software, when he reviews a simple non-scientific calculator that packs an Alwinner A50 tablet SoC and the Android operating system. As shipped they lack the Android launcher, so they aren’t designed to run much more than the calculator app. Of course that won’t stop somebody who knows their way around Google’s mobile operating system for very long — at the end of the review, there’s some shots of the gadget running Minecraft and playing streaming video.

These devices can be had for not a lot on the Chinese second-hand electronics market, and after an extensive teardown he comes to the conclusion that besides their novelty they’re an older specification so not really worth buying.

But it does beg the question as to why such a product was put into production when the same task could have been performed using very cheap microcontroller. Further, having done so they make it a non-scientific machine, not even bestowing it with anything that could possibly justify the hardware. Is there a use case he, and us, have missed? We’d love to know.

We cover a lot of calculator stories here at Hackaday. Sometimes they’re classic machines, but more often they’re modern takes on an old idea.


Displaying The Time Is Elemental With This Periodic Table Clock

We see a lot of clocks here at Hackaday, so many now that it’s hard to surprise us. After all, there are only so many ways to divide the day into intervals, as well as a finite supply of geeky and quirky ways to display the results, right?

That’s why this periodic table clock really caught our eye. [gocivici]’s idea is a simple one: light up three different elements with three different colors for hours, minutes, and seconds, and read off the time using the atomic number of the elements. So, if it’s 13:03:23, that would light up aluminum in blue, lithium in green, and vanadium in red. The periodic table was designed in Adobe Illustrator and UV printed on a sheet of translucent plastic by an advertising company that specializes in such things, but we’d imagine other methods could be used. The display is backed by light guides and a baseplate to hold the WS2812D addressable LEDs, and a DS1307 RTC module gives the Arduino Nano a sense of time. The 3D printed frame of the clock has buttons for setting the time and controlling the clock; the brief video below shows it going through its paces.

We really like the attention to detail [gocivici] showed here; that UV printing really gave some great results. And what’s not to like about the geekiness of this clock? Sure, it may not be as action-packed as a game of periodic table Battleship, but it would make a great conversation starter.

Continue reading “Displaying The Time Is Elemental With This Periodic Table Clock”

Assembly Language 80’s Minicomputer Style

In the days before computers usually used off-the-shelf CPU chips, people who needed a CPU often used something called “bitslice.” The idea was to have a building block chip that needed some surrounding logic and could cascade with other identical building block chips to form a CPU of any bit width that could do whatever you wanted to do. It was still harder than using a CPU chip, but not as hard as rolling your own CPU from scratch. [Usagi Electric] has a Centurion, which is a 1980s-vintage minicomputer based on a bitslice processor. He wanted to use it to write assembly language programs targeting the same system (or an identical one). You can see the video below.

Truthfully, unless you have a Centurion yourself, the details of this are probably not interesting. But if you have wondered what it was like to code on an old machine like this, you’ll enjoy the video. Even so, the process isn’t quite authentic since he uses a more modern editor written for the Centurion. Most editors from those days were more like CP/M ed or DOS edlin, which were painful, indeed.

The target program is a hard drive test, so part of it isn’t just knowing assembly but understanding how to interface with the machine. That was pretty common, too. You didn’t have a lot of help from canned routines in those days. For example, it was common to read an entire block from a hard drive, tape, or drum and have to figure out what part of it you were actually interested in instead of, say, opening a file and reading a stream of characters.

If nothing else, fast forward over to the 25-minute mark and see what a hard drive from that era looked like. Guess how much storage was on that monster? If you guessed more than 10 MB, you probably didn’t live through the 1980s. We won’t even guess what the price tag was, but you can bet it was spendy.

If you think entering programs like this is painful, try a front panel. That made paper tape seem like a great thing.

Continue reading “Assembly Language 80’s Minicomputer Style”

The Eyes Have It: Stare Down Your Lighting

You know how you can feel when someone is looking at you? Thanks to a person detector, [Michael Rigsby’s] little robotic light switch also knows when you are looking at it. As you can see in the video below, when it notices you are looking at it, it lights up an LED. If you continue to gaze at it, it will turn to stare back at you. Keep staring it down and it will toggle the state of a remote control light switch.

This all works because of the person sensor module by Useful Sensors. The little module has a camera and face detection built into it. It doesn’t draw much power at 150 milliwatts. It can sense faces, including where they are and how many people are looking.

Continue reading “The Eyes Have It: Stare Down Your Lighting”

Your Phone Is A 200X Microscope — Sort Of

[A. Cemal Ekin] over on PetaPixel reviewed the Apexel 200X LED Microscope Lens. The relatively inexpensive accessory promises to transform your cell phone camera into a microscope. Of course, lenses that strap over your phone’s camera lens aren’t exactly a new idea, but this one looks a little more substantial than the usual piece of plastic in a spring-loaded clip. Does it work? You should read [Cemal’s] post for the details, but the answer — as you might have expected — is yes and no.

On the yes side, you can get some pretty neat photomicrographs from the adapter. On the negative side, your phone isn’t made to accommodate microscope samples. It also isn’t made to stay stable at 200X.

Continue reading “Your Phone Is A 200X Microscope — Sort Of”