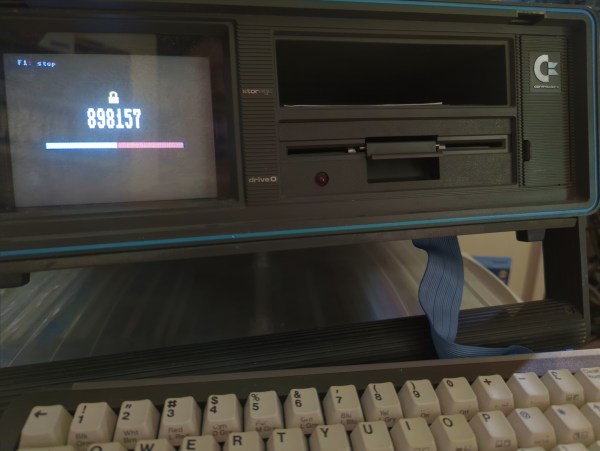
If you’ve used a corporate VPN or an online-banking system in the past fifteen years or so, chances are you’ve got a few of those little authenticator key fobs lying around, still displaying a new code every 30 seconds. Today such one-time codes are typically sent to you by text message or generated by a dedicated smartphone app, which is convenient but a bit boring. If you miss having a dedicated piece of hardware for your login codes, then we’ve got good news for you: [Cameron Kaiser] has managed to turn a Commodore SX-64 into a two-factor authenticator. Unlike a key fob that’s one gadget you’re not likely to lose, and any thief would probably need to spend quite some time figuring out how to operate it. Continue reading “Generating Two-Factor Authentication Codes With A Commodore 64”
LEGO Race Car Simulator Is Like A Mechanical Arcade Game
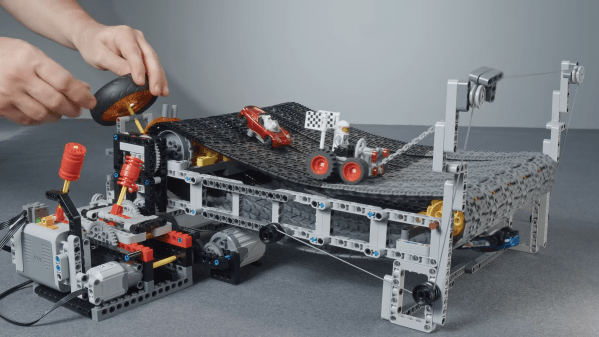
We’ve all played some variant of that simple old racing video game. It’s the one that involves swerving around cars in front without crashing, as the pace steadily increases further. [Dr. Engine] has recreated that very game in the physical world, with the help of LEGO Technic.
The design uses what appears to be a LEGO tank tread to create a treadmill for a LEGO car. The initial design is hand-cranked, but [Dr. Engine] soon upgrades this with a motor. The wide treadmill is then fitted with a steering wheel. This steers the car laterally along the treadmill via a simple pulley system. From there, it was a simple job of adding gearbox to change the speed of the treadmill, and obstacles for the car to dodge. Double-sided table affixed small die-cast cars to the track to fit the theme of the build.
It’s great fun watching the car buck and weave over the undulating track, and we’d certainly love to compete with friends for the high score. We’ve seen similar builds before, too, like this all-LEGO suspension dyno. Video after the break.
Continue reading “LEGO Race Car Simulator Is Like A Mechanical Arcade Game”
Automatic Lens Cover Helps Cameras Cover Space Launches
Shooting space launches often requires the use of remote cameras for safety reasons. However, that means there’s no photographer on hand to wipe lenses down if they happen to get condensation from the prevailing weather conditions. [Michael Baylor] was having issues with atmospheric moisture interfering with his launch shots, so built a custom automatic lens cap to help solve the issue.
The design is simple, consisting of a large shutter that pivots to cover the camera lens when photos aren’t being taken, controlled by an impressively-beefy servo. Not only does the automatic cap protect the lens from condensation prior to the moment of launch, it also closes to cover the lens as the rocket leaves the frame. This protects the lens from all the dust and debris flying its way, kicked up by the rocket exhaust on takeoff.
[Michael] found that the lens cap easily outperformed his usual anti-condensation solution. While his camera with the auto-cap shot mostly-clean pics, another camera fitted with 18-hour handwarmers suffered significantly from condensation. The plan is to add just a little heat to the auto-cap setup to stave off condensation for good, even when shooting at pads like Vandenburg, California.
Details on the build are slim, but the basic concept is all there. Throw together a servo with some 3D-printed components and a microcontroller and you can build a setup custom-tailored to your own rig and use case. If you find yourself needing a capable long-range camera remote, too, we’ve seen those before as well! Video after the break.
Continue reading “Automatic Lens Cover Helps Cameras Cover Space Launches”
ColecoVision Barn Find Gets Wireless Makeover
Few things are more satisfying than finding an old, forgotten piece of technology somewhere and bringing it back to life. And while it’s great to see a rare sports car or an Apollo Flight Computer being restored, even not-very-successful game consoles from the 1980s can make for some great repair stories. Just look at how [Discreet Mayor] describes his restoration and modification efforts on a ColecoVision that he literally found in a barn.
Given that the ColecoVision was on the market between 1982 and 1985, we can assume that [Discreet Mayor]’s console had been sitting on a shelf for at least three decades, and the machine was definitely showing its age. Several components had failed due to corrosion, including the clock crystal, a 7400 series logic chip and a capacitor in the power supply, but since these are all standard components it was rather straightforward to replace them.
The controllers however were sadly beyond repair. Replacing them with standard joysticks wasn’t really an option because the ColecoVision controllers included a numeric keypad, which was mainly used to select game options. Making something completely new was the way to go, and [Discreet Mayor] decided to go for a wireless system while he was at it. After all, he had already developed a modular wireless IoT system based on the IEEE 802.15.4 standard, which turned out to be a perfect fit for this system.
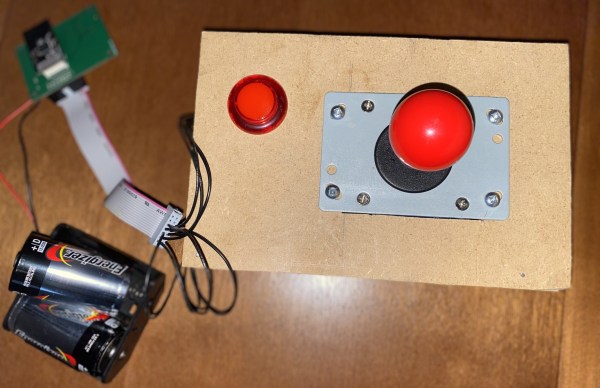
 [Discreet Mayor] built a simple joystick-plus-fire-button setup on a piece of MDF and equipped it with his IoT transmitter. Instead of adding a replacement numeric keypad he decided to use the joystick to simulate the most commonly-used buttons: “right” for “1”, “down” for “2” and so on. The receiver module uses digital switches to mimic keypresses to the console’s input port. The end result might look a bit hacky, but the console is fully functional again and runs its games just like it did over thirty years ago.
We’ve seen several projects that add wireless controllers to a variety of classic consoles. If you’ve got a ColecoVision that turns out to be beyond salvaging, you can always just build your own from scratch.
On Getting A Computer’s Attention And Striking Up A Conversation
With the rise in voice-driven virtual assistants over the years, the sight of people talking to various electrical devices in public and in private has become rather commonplace. While such voice-driven interfaces are decidedly useful for a range of situations, they also come with complications. One of these are the trigger phrases or wake words that voice assistants listen to when in standby. Much like in Star Trek, where uttering ‘Computer’ would get the computer’s attention, so do we have our ‘Siri’, ‘Cortana’ and a range of custom trigger phrases that enable the voice interface.
Unlike in Star Trek, however, our virtual assistants do not know when we really desire to interact. Unable to distinguish context, they’ll happily respond to someone on TV mentioning their trigger phrase. This possibly followed by a ludicrous purchase order or other mischief. The realization here is the complexity of voice-based interfaces, while still lacking any sense of self-awareness or intelligence.
Another issue is that the process of voice recognition itself is very resource-intensive, which limits the amount of processing that can be performed on the local device. This usually leads to the voice assistants like Siri, Alexa, Cortana and others processing recorded voices in a data center, with obvious privacy implications.
Continue reading “On Getting A Computer’s Attention And Striking Up A Conversation”
Arduino Brings A MicroPython IDE
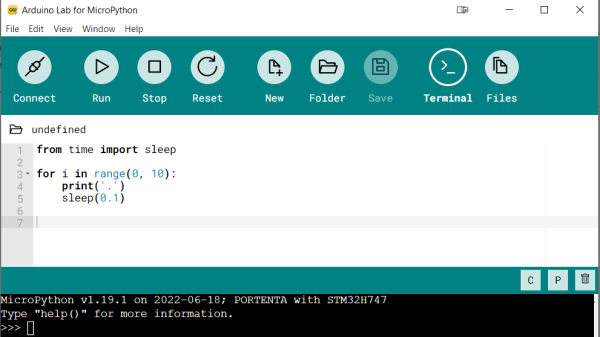
Both Arduino and MicroPython are giants when it comes to the electronics education area, and each one of them represents something you can’t pass up on as an educator. Arduino offers you a broad ecosystem of cheap hardware with a beginner-friendly IDE, helped by forum posts explaining every single problem that you could and will stumble upon. MicroPython, on the other hand, offers a powerful programming environment ripe for experimentation, and doesn’t unleash a machine gun fire of triangle brackets if you try to parse JSON slightly incorrectly. They look like a match made in heaven, and today, from heaven descends the Arduino Lab for MicroPython.
This is not an Arduino IDE extension – it’s a separate Arduino IDE-shaped app that does MicroPython editing and uploads code to your board from a friendly environment. It works over a serial port, and as such, the venerable ESP8266-based boards shouldn’t be be left out – it even offers file manager capabilities! Arduino states that this is an experimental effort – it doesn’t yet have syntax checks, for instance, and no promises are made. That said, it already is a wonderful MicroPython IDE for beginner purposes, and absolutely a move in the right direction. Want to try? Download it here, there’s even a Linux build!
High-level languages let you build projects faster – perfect fit for someone getting into microcontrollers. Hopefully, what follows is a MicroPython library manager and repository! We’ve first tried out MicroPython in 2016, and it’s come a long way since then – we’ve seen quite a few beginner-friendly MicroPython intros, from a gaming handheld programming course, to a bipedal robot programming MicroPython exploration. And, of course, you can bring your C libraries with you.
3D Printer Z Sensor Claims 0.01 Mm Resolution
Early 3D printers usually had a microswitch that let you know when the Z axis was at the zero point. There was usually an adjustment screw so you could tune for just the right layer height. But these days, you most often see some sort of sensor. There are inductive sensors that work with a metal bed and a few other styles, as well. However, the most common is the “BL touch” style sensor that drops a probe below the nozzle level, measures, and then retracts the probe. However, nearly all of these sensors work by detecting a certain height over the bed and that’s it.
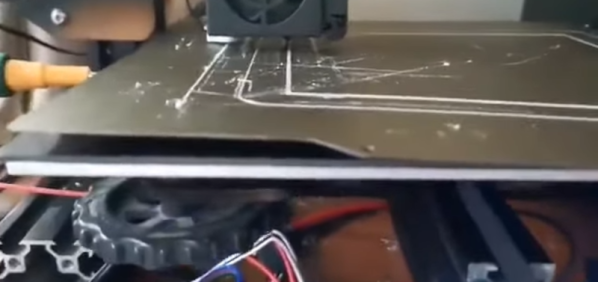
A new probe called BDsensor is inductive but can read the height over the bed in real time. According to information from the developer, it achieves a resolution of 0.01 mm and a repeatability of +/- 0.005mm. We don’t know if that’s true or not, but being able to take real-time soundings of the nozzle height leads to some interesting possibilities such as real-time adjustments of Z height, as seen in the video below.
Continue reading “3D Printer Z Sensor Claims 0.01 Mm Resolution”

