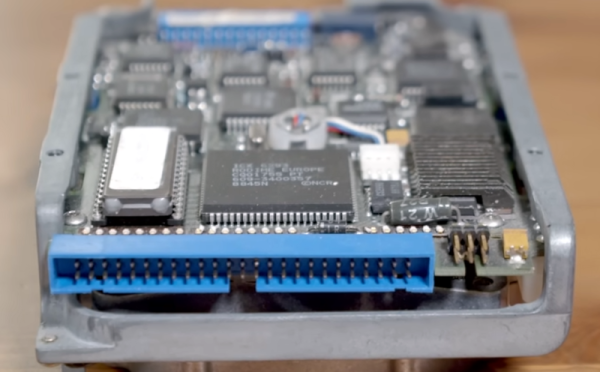
Early home PCs usually had a floppy disk and a simple hard drive controller. Later, IDE hard drives became the defacto standard. Of course, these days, you are more likely to find some version of SATA and — lately — NVME connectors. But a standard predating all of this was very common in high-end systems: SCSI. [RetroBytes] recently did a video on the bus which he calls the “USB of the 80s.”
Historically, Shugart — a maker of disks — was tired of producing custom drive electronics for each device they made. Instead, they made disks with a standard interface and then produced a single interface board for each computer they wanted to support. The interface was very generic, and they were able to get it standardized with ANSI — an early example of the benefit of opening up a standard.
We’ve said many times that while woodworking is a bit outside our wheelhouse, we have immense respect for those with the skill and patience to turn dead trees into practical objects. Among such artisans, few are better known than the legendary Norm Abram — host of The New Yankee Workshop from 1989 to 2009 on PBS.
So we were pleased when the official YouTube channel for The New Yankee Workshop started uploading full episodes of the classic DIY show a few months back for a whole new generation to enjoy. The online availability of this valuable resource is noteworthy enough, but we were particularly impressed to see the channel start experimenting with AI enhanced versions of the program recently.
Note AI Norm’s somewhat cartoon-like appearance.
Originally broadcast in January of 1992, the “Child’s Wagon” episode of Yankee Workshop was previously only available in standard definition. Further, as it was a relatively low-budget PBS production, it would have been taped rather than filmed — meaning there’s no negative to go back and digitize at a higher resolution. But thanks to modern image enhancement techniques, the original video could be sharpened and scaled up to 1080p with fairly impressive results.
That said, the technology isn’t perfect, and the new HD release isn’t without a few “uncanny valley” moments. It’s particularly noticeable with human faces, but as the camera almost exclusively focuses on the work, this doesn’t come up often. There’s also a tendency for surfaces to look smoother and more uniform than they should, and reflective objects can exhibit some unusual visual artifacts.
Even with these quirks, this version makes for a far more comfortable viewing experience on today’s devices. It’s worth noting that so far only a couple episodes have been enhanced, each with an “AI HD” icon on the thumbnail image to denote them as such. Given the computational demands of this kind of enhancement, we expect it will be used only on a case-by-case basis for now. Still, it’s exciting to see this technology enter the mainstream, especially when its used on such culturally valuable content. Continue reading “Norm Abram Is Back, And Thanks To AI, Now In HD”→
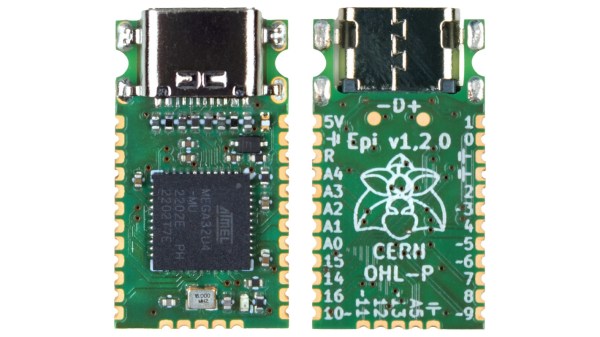
Integrated circuits, chipsets, memory modules, and all kinds of other transistor-based technology continues to get smaller, cheaper, and more energy efficient as time moves on. Not only are the components themselves smaller, but their supporting infrastructure is as well. Computers like the Raspberry Pi are about the size of a credit card and have computing power on the order of full-sized PCs from a few decades ago. The Arduino is no exception to this trend, either, and this new dev board called the Epi 32U4 might be the smallest ATmega platform we’ve seen so far.
As the name suggests, the board is based around the ATmega32U4 which is somewhat unique among Atmel chips in that it includes support for USB within the chip itself rather than relying on external translating circuitry. This makes it an excellent choice for any project which involves sending keyboard, mouse, or other peripheral information to a computer. This goes a few steps further with eliminating “bloat” compared to other boards, too — there’s no on-board voltage regulator, and just a single LEDs on pin 13.
One of the other features this board boasts over other small form factor boards is on-board USB-C, which is definitely a perk as more and more devices switch away from the various forms of older USB-type plugs. The project’s specifications are also available on this GitHub page for anyone that wants to produce their own. And, if you don’t have a 32U4 on hand and still want to build a keyboard project, it’s possible to get some other Arduinos to support these features but it’ll take a little more work.
If you grew up in a snowy climate, chances are you’ve ridden a sled or toboggan when you were young. The downhill part of sledding is great fun, but dragging the thing back up gets boring quickly. [Luis Marx] had been dreaming of sledding uphill since he was a child, and decided to make his dream come true by building himself a motorized sled (video, in German, embedded below).
The sled is powered by two DC electric motors driving a continuous track, like a rudimentary snowmobile. The motors were originally designed for electric bikes, and can develop 30 newton-meters of torque each. [Luis] designed and 3D-printed a custom set of drive wheels to link the track to the bike motors. Two motor controllers enable basic speed control, while a beefy battery carries enough juice for multiple trips up and down a slope.
The motorized track is mounted on a clever frame that can swing up or down and is held in place by two spring-loaded pins. This way, you can simply lift the system off the snow when you’re ready to slide downhil, and swing it down again when you want the sled to do the pulling.
With winter nearing its end, the snow near [Luis]’s home in southern Germany was too soft to get much traction, but subsequent tests in a ski resort up in the Alps showed the system working perfectly. It even had enough traction to pull a second sled behind it. Perhaps some proper suspension could make it go faster on the downhill run, too.
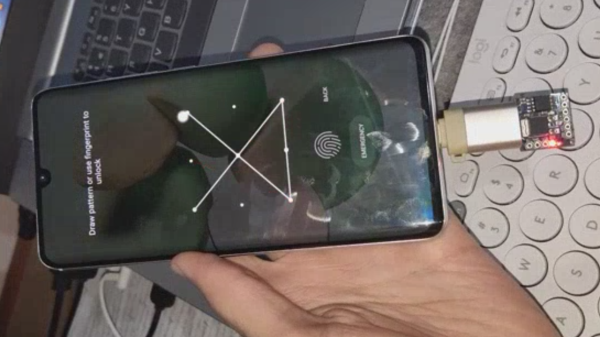
It might not seem too impressive these days, but when microcontrollers with hardware USB support were more expensive and rare, the VUSB library was often used to create USB devices with an ATtiny85. It became so popular that the ATtiny85 even got packaged into USB dongle formfactors, like the DigiSpark boards. Well, you might not know this, but your Android smartphones can also work with USB mice and touchscreens in lieu of the built-in touchscreen display. [ErfanSn] combined these two ideas, creating a library to automate smartphone touchscreen events and keyboard input with an ATtiny85 — open for all of us to use, and with examples to spare.
The library is called DigiCombo, and it comes with plenty of examples for any screen touch event emulation that you might want. For instance, check out the README — it has video examples for Instagram page scrolling, unlock screen brute-forcing with random coordinates, playing the Stack rhythm game, and pinch zoom — all the building blocks for your smartphone touch emulation needs are covered pretty well! Of course, all of these have example code corresponding to them, that you can download and base your own ideas on. What’s more, the library is available in current Arduino IDE under the DigiCombo name. So if you need to, say, make a quick autoclicker for your phone, the library is a few steps away!
If your smartphone project was stalled because you needed to emulate touchscreen input, this library is your chance to get it done! We appreciate projects that let us get more from smartphones — there’s a lot of those laying around, they’re pretty functional and self-sufficient devices, so it makes sense that some projects of ours could do with a phone instead of a Raspberry Pi. Some manufacturers let us get a bit more of our phones, but this hasn’t really caught on, which means we have to make do with help of libraries like these. Or, perhaps, you rely on your phone day-to-day, and you’d like to add a touchpad to its back?
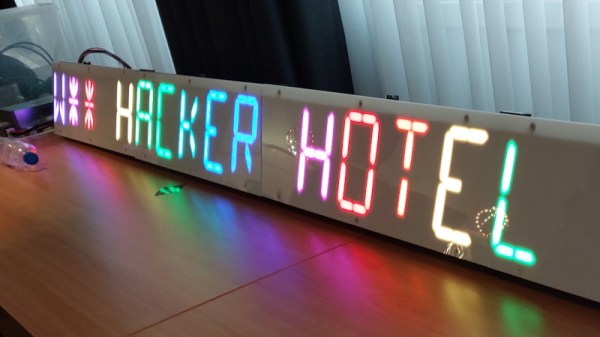
After three years, it’s odd to think back to those few weeks before the COVID-19 pandemic morphed from something on the news into an immediate and ever-present threat which kept us isolating for so long. For me, some of the last moments of normality were a trip to the Netherlands for Hacker Hotel, a hacker event in the comfort of a resort hotel. Now three years later and after two cancelled events, Hacker Hotel is back, and I made the same journey to Garderen to hang out for a weekend with a bunch of hacker friends over some good Dutch beer and a lot of bitterballen. Continue reading “Hacker Hotel 2023: Back Again!”→
While bicycle gearboxes date back to at least the 1920s, they’re relatively unseen in bike racing. One exception is Honda’s race-winning mid-drive gearboxes, and [Alee Denham] gives us a look at what makes these unique drives tick.
Honda has developed three generations of bicycle gearbox as part of their company’s R&D efforts, but none have ever been released as a commercial product. Designed as a way for their engineers to stretch their mental muscles, the gearboxes were only used in bike races and seen at a few trade shows. In 2004, the third gen “derailleur in a box” led to the first gearbox victory in the Downhill World Cup Circuit.
The third gen gearbox differs significantly from the CVT drivetrains in the first and second generation gearboxes, but it is unclear why Honda abandoned the CVT. [Denham] has a nice animation detailing the inner workings of these CVTs based on information from the original patents for these rarely seen gearboxes.
Derailleurs remain the primary drivetrain in racing due to their lighter weight and higher overall efficiency. While still expensive, the decreased maintenance of gearbox drivetrains make a lot of sense for more mundane cycling tasks like commuting or hauling cargo, but only time will tell if the derailleur can be supplanted on the track and trail.