Compromise is key to keeping a team humming along. Say one person wants an inrunner electric motor, and the other prefers outrunner. What to do? Well, if you work at [Deep Drive], the compromise position is a dual-rotor setup that they claim can be up to 20% more efficient than standard designs. In a recent video, [Ziroth] provides a deep dive into Deep Drive’s Twin-Rotor Motor.
This is specifically a radial flux permanent magnet motor, like most used in electric vehicles today — and don’t let talk of inrunners and outrunners fool you, that’s the size of motor we’re talking about here. This has been done before with axial flux motors, but it’s a new concept for team radial. As the names imply, the difference is the direction the magnetic field is orientated: axial flux motors have all the magnetism oriented along the axis, which leads to the short wide profile that inspired the nickname “pancake motors”. For various reasons, you’re more likely to see those on a PCB than in an electric car.
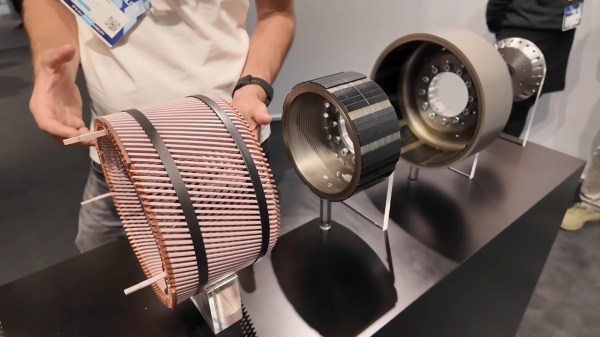
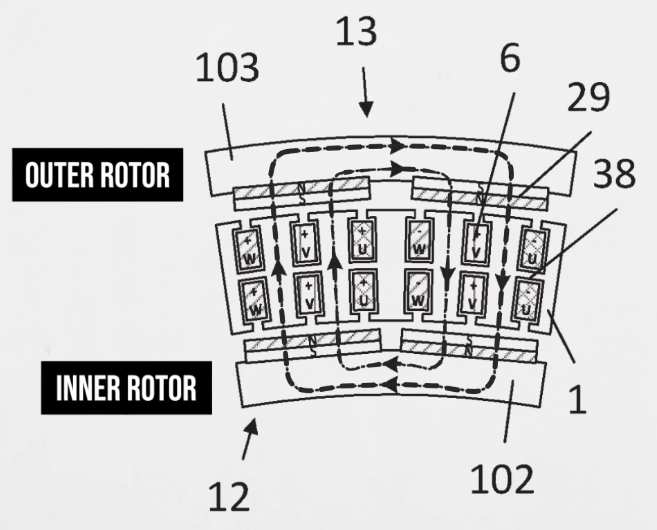
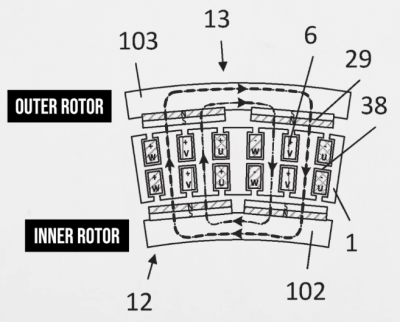 In a radial flux motor, the flux goes out the radius, so the coils and magnets are aligned around the shaft of the motor. Usually, the coils are held by an iron armature that directs their magnetic flux inwards (or outwards) at the permanent magnets in the rotor, but not here. By deleting the metal armature from their design and putting magnets on both sides of the stator coil, Deep Drive claims to have built a motor that is lighter and provides more torque, while also being more energy-efficient.
Of course you can’t use magnet wire if your coil is self-supporting, so instead they’re using hefty chunks of copper that could moonlight as busbars. In spite of needing magnets on both inner and outer rotors, the company says they require no more rare-earths than their competitors. We’re not sure if that is true for the copper content, though. To make the torque, those windings are beefy.
Still, its inspiring to see engineers continue to innovate in a space that many would have written off as fully-optimized. We look forward to seeing these motors in upcoming electric cars, but more than that, hope they sell a smaller unit for an air compressor so after going on a Deep Drive deep dive we can inflate our rubber raft with their twin rotor motor boater bloater. If it works as well as advertised, we might have to become twin-rotor motor boater bloater gloaters!
Continue reading “A Deep Drive Deep Dive Into A Twin-Rotor Motor” →