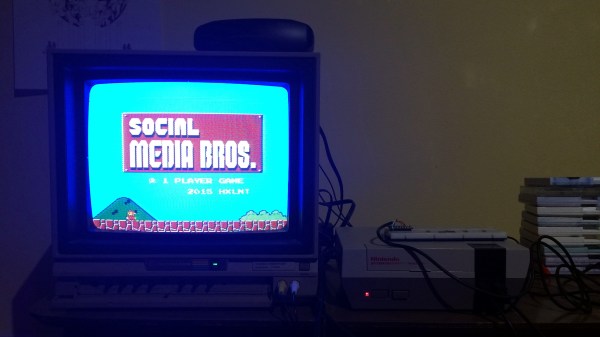
A large PCB with empty sockets

Sensor Playground Keeps Track Of Indoor Air Quality Through The Cloud

When [tdw] wasn’t feeling well one day, his wife suggested that it might be due to poor air quality in their home. While an ordinary person could have simply opened a window after hearing such an idea, [tdw] instead showed his true hacker spirit and set about measuring the indoor air quality. He began by designing a simple PCB to measure CO2 and volatile organic compound (VOC) levels, but eventually broadened his scope to end up with the Sensor Playground: a plug-and-play platform to read out various sensors and store the results in the cloud.

A large PCB with several sensor modules and a microcontrollerDeliberately designed to be easy to assemble with minimal soldering skills, the Sensor Playground consists of a big two-layer PCB onto which various modules can be plugged. It supports either an ESP32 DevKit or an Adafruit Feather module to provide processing power, and provides sockets for a bunch of sensors, conveniently wired with power and SPI or I2C. It also provides a rotary encoder and two buttons for user input. All source files are available on [tdw]’s GitHub page, ready to be applied to any kind of sensing task.

[tdw] set up his Sensor Playground with sensors measuring CO2, VOC, PM2.5 (particulate matter), as well as temperature and relative humidity. A web interface allows anyone to track these measurements in real-time. The open and modular design should make it easy to extend this system with various other sensor types: we can imagine that things like solar irradiation, outside temperature and wind speed would also add useful data to the mix. Perhaps even a Geiger counter to keep track of radiation levels?

As indoor air quality sensors go, this one is definitely comprehensive and easy to use. We’ve featured other air quality sensors before, some of which also link their data to the cloud.

World’s Worst I/O Dock Doesn’t Deserve Elegant Fix

Even spendy commercial products can end up being lemons. This is something [Mike Buss] is familiar with, as he had the misfortune of being stuck using what he declares is the world’s worst USB hub, and it’s not even a mystery discount device from overseas: it’s an HP Thunderbolt Dock G2. It is a sort of combination I/O dock and USB hub, and it caused him no end of frustration until he “fixed” it with a crude workaround.

The problems with [Mike]’s dock come down to two major issues. The first is that the USB-C connection will, if moved even the slightest amount, instantly trigger a disconnect from the host computer. Frankly, that sounds like a defect, but that’s not all. The other issue is that the whole top of the device is actually a giant, hyper-sensitive button. Even a stern gaze seems to be enough to cause it to activate. What does the button do? It puts the host computer to sleep; something that we all agree should suffer from as few false activations as possible.

We’ll spoil the surprise by revealing that the “fix” was nothing more than putting a 3D printed enclosure around the troublesome device, as shown in the image above. Keeping the dock covered and perfectly still at least prevents the two aforementioned issues, and that’s good enough for [Mike].

The curious part of all this is just how badly the device’s design affected normal use. We’d suspect a defect or malfunction, but a cursory search of reviews online suggests [Mike]’s experience isn’t unique. It’s certainly not the first poorly-designed product we’ve seen fixed by a new enclosure, but some problems just aren’t worth the effort of a more elegant solution.

Welcome To The Future, Where Your Microwave Thinks It’s A Steam Oven

It’s fair to say that many of us will have at some time inadvertently bricked a device by applying the wrong firmware by mistake. If we’re lucky then firing up some low-level reflashing tools can save the day and return the item in question to health, but we’re guessing that among you will be plenty of people who’ve had to discard a PCB or replace an inaccessible microcontroller chip as a result.

Spare a thought then for the consumer appliance manufacturer Electrolux, whose AEG subsidiary has bricked combi microwave ovens acrosss a swathe of Western Europe (Dutch, Google Translate link). They managed this improbable feat by distributing an over-the-air update that contains the firmware for a steam oven instead. Worse still, the update has disabled over-the-air updates, meaning that any fix requires physical access to the oven.

We can’t help sympathising with whichever poor AEG engineer has had the ultimate in bad days at work, but at the same time we should perhaps consider the difference between a computer and an appliance, and whether there should be a need for an oven to phone home in the first place. Sure, such devices have been computer-controlled for decades, but should a microcontroller doing a control task need constant updates?

We’re guessing this oven has some kind of cloud aspect to it which allows AEG to slurp customer data the user to control it via their app, but even so it should serve as a warning to anyone tempted by an internet-connected kitchen appliance. If the internet isn’t necessary for the food to be cooked, don’t connect it.

We feel sorry for anyone who might have put a pizza in the oven just before it was bricked, and watched in disappointment as their tasty meal remained uncooked.

Great Computer Hacks Make Hackers Hacker Computers

In the year 1995, computers were, well… boring. The future wasn’t here yet, and computers were drab, chunky beige boxes. Sure, there were some cool-ish computers being sold, but the landscape was still relatively barren. But as you’ll see in the video below the break, it doesn’t have to be that way, and the [Hackers Curator] shows us the way by recreating Johnny Lee Miller’s computer from the 1995 movie Hackers.

Hackers wasn’t popular when it came out, but over the years it has gained quite a following. It portrayed computers and the people who loved them in completely new ways, representing a culture that has never existed. Even so, it inspired so many young hacker types. Among those inspired is the crew over at [Hackers Curator] and they have taken it upon themselves to, uh… curate… the props, costumes, and stories surrounding the movie.

Recreating Dade’s iconic camo “luggable” computer came with quite a lot of difficulty. It turns out that the original movie props were working custom computers that used hacked together customized cases and Mac Powerbook 180c internals. Dade’s (aka Zer0 Cool and Crash Override) was mashup of the a Compaq Portable 486c and the aforementioned Mac. [HackersCurator] have lovingly recreated this prop from two broken computers, but chose to run the internals with a Raspberry Pi.

The techniques used in the creation of this beastly cyberdeck are ones that can be used in building so many other projects, even if you’re not a Hackers hacker. Customizing the plastics and placing a trackball in the most awkward of spots was expertly done, and we’ll be referring to it in the future for guidance when doing similar projects.

Are movie replica hacks your thing? You’re in luck! It turns out that this isn’t [Hackers Curator]’s first build. In 2019 they tackled Lord Nikon’s laptop, and of course, we covered that one too!

Continue reading “Great Computer Hacks Make Hackers Hacker Computers”

Throttle Your Solid Rocket Motors With This One Simple Trick!

For decades, mankind was content to launch payloads into orbit and then watch hundreds of thousands of hours of blood sweat and tears just crash into the ocean. Then, partially because of huge advancements in being able to throttle rocket engines, we started landing our first stage boosters. [Joe] over at the BPS.space YouTube channel is tired of watching SpaceX have all the booster landing fun, but he’s not quite at the throttled liquid engine stage yet. So in the video below the break he asked the question: Can you throttle solid rocket motors? Yes. No. Sort of.

Throttling liquid rocket engines is actually not that different from throttling any other engine- by limiting the amount of fuel and oxidizer. This is challenging all on its own because well… it’s rocket science. With liquid rocket engines though, the concept is at least straightforward. But model rocketry hobbyists only use liquid fueled engines on the extreme high end. The vast majority instead use solid fueled rockets where the fuel is pre-mixed and isn’t variable at all.

These obvious hurdles didn’t stop [Joe] from trying. And trying again. Then, again. And once more for good measure. And then again for repeatability. There are definitely some failures along the way, and we applaud [Joe] for even admitting that he didn’t know how to use a drill properly. Hackers of any age can relate to the time when the didn’t know how to do something, although we also tend to not talk about that part too much.

We won’t spoil the ending except to say that the video is definitely worth a watch to see how [Joe] essentially solves the problem of limiting the effective thrust of a solid rocket engine without actually throttling the engine, and learns about a new issue he’d never seen before.

Of course you can also make rocket engines at home out of a plethora of ingredients, just be sure to do it in somebody else’s kitchen!

Continue reading “Throttle Your Solid Rocket Motors With This One Simple Trick!”

High Tech Pancake Tesla Coil Brings The Lightning

For several years now we’ve been following [Jay Bowles] as he brings high-voltage down to Earth on his Plasma Channel YouTube channel. From spark gaps made of bits of copper pipe to automotive ignition coils driven by the stalwart 555 timer, he’s got a real knack for keeping his builds affordable and approachable. But once in a while you’ve got to step out of your comfort zone, and although the dedicated DIY’er could still replicate the solid state “pancake” Tesla coil he documents in his latest video, we’d say this one is better left for the professionals.

The story starts about nine months ago, when [Jay] was approached by fellow YouTuber [LabCoatz] to collaborate on a PCB design for a solid state Tesla coil (SSTC). Rather than a traditional spark gap, a SSTC uses insulated-gate bipolar transistors (IGBTs) triggered by an oscillator, which is not only more efficient but allows for fine control of the primary coil. The idea was to develop an AC-powered coil that was compact, easy to repair, and could be controlled with just a couple dials on the front panel. The device would also make use of an antenna feedback system that would pick up the resonant frequency of the secondary coil and automatically adjust the IGBT drive to match.

Being considerably more complex than many of the previous builds featured on Plasma Channel, it took some time to work out all the kinks. In fact, the majority of the video is [Jay] walking the viewer through the various failure modes that he ran into while developing the SSTC. Even for somebody with his experience in high-voltage, there were a number of headscratchers that had to be solved.

For example, the first version of the design used metal bolts to attach the primary and secondary coils, until he realized that was leading to capacitive coupling and replaced them with acrylic blocks instead. If his previous videos surprised you by showing how easy it could be to experiment with high-voltages, this one is a reminder that it’s not always so simple.

But in the end [Jay] does get everything sorted out, and the results are nothing short of spectacular. Even on the lower power levels it throws some impressive sparks, but when cranked up to max, it offers some of the most impressive visuals we’ve seen so far from Plasma Channel. It was a lot of work, but it certainly wasn’t wasted effort.

Fascinated by the results, but not quite ready to jump into the deep end? This affordable and easy to build high-voltage generator featured on Plasma Channel back in 2020 is a great way to get started. If you still need more inspiration, check out the fantastic presentation [Jay] gave during the 2021 Remoticon.

Continue reading “High Tech Pancake Tesla Coil Brings The Lightning”

A small circuit board glowing purple inset with computer code

Power Cycling Museum Computers On The Cheap

Flicking a circuit breaker to power cycle hundreds of desktop computers inside interactive museum exhibits is hardly ideal. Computers tend to get cranky when improperly shutdown, and there’s an non-zero risk of data loss. However, financial concerns ruled out commercial computer management solutions, and manually shutting down each exhibit at the end of the day is not practical. Tasked with finding a solution, [Jeff Glass] mixed off-the-shelf UPS (uninterruptible power supply) hardware, a Featherwing and some Python to give the museum’s computer-run exhibits a fighting chance.

Without drastically changing the one-touch end-of-day procedure, the only way to properly shutdown the hundreds of computers embedded in the museum exhibits involved using several UPS units, keeping the PCs briefly powered on after the mains power was cut. This in itself solves nothing – while the UPS can trigger a safe shutdown via USB, this signal could only be received by a single PC. These are off-the-shelf consumer grade units, and were never intended to safely shut down more than one computer at a time. However, each 300 watt UPS unit is very capable of powering multiple computers, the only limitation is the shutdown signal and the single USB connection.

To get around this, the Windows task scheduling service was setup to be triggered by the UPS shutdown signal, which itself then triggered a custom Python script. This script then relays the shutdown signal from the UPS to every other computer in the museum, before shutting itself down for the evening.

While many computers can be enabled to boot on power loss, the UPS and safe shutdown scripts meant that this wasn’t an option. To get around this, an ESP32 Featherwing and a little bit if CircuitPython code sends out WOL (wake-on-LAN) signals over Ethernet automatically on power up. This unit is powered by a non-UPS backed power outlet, meaning that it only sends the WOL signal in the morning when mains power is restored via the circuit breaker.

There are undoubtedly a variety of alternative solutions that appear ‘better’ on paper, but these may gloss over the potential costs and disruption to a multi-acre museum. Working within the constraints of reality means that the less obvious fix often ends up being the right one. How would you have tackled this problem? Sound off in the comments below. And while you’re here, make sure to check out our coverage of other UPS solutions, like this supercap UPS.