Dot Matrix Printer Gets An Epson Ribbon Transplant

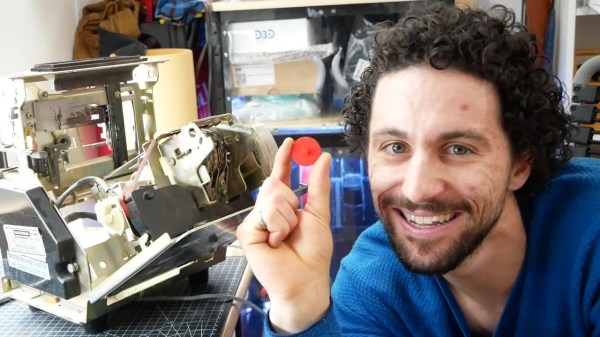
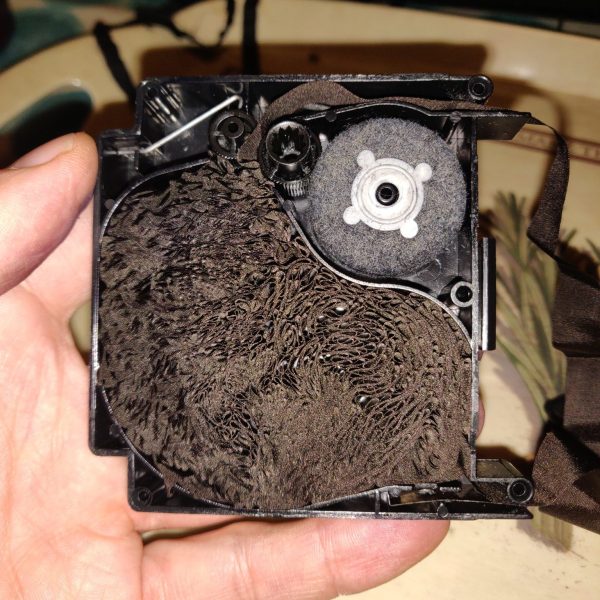
What do you do when your dot matrix printer’s ribbon is torn to shreds after decades of use, and no new cartridges are available? You might like to attempt a ribbon transplant from another printer’s cartridge, and that’s just what [Chris Jones] did.

[Chris] was hoping to find a new ribbon for his Canon PW-1080A after the 33-year-old ribbon had been hammered to bits. With replacements unavailable, he instead turned to the more popular Epson FX80, for which new ribbons can still be found. Thankfully, the FX80’s ribbon is the same width as the one used in the Canon printer, even if the cartridge is of a completely different design.

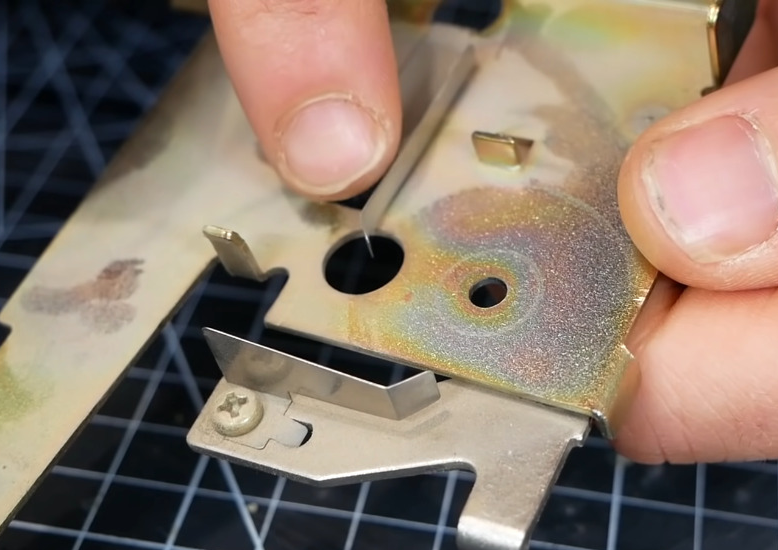
The first step was to crack open the Canon cartridge to dump out the old ribbon. With that done, the Epson ribbon could be looped into the Canon cartridge and wound in using the built-in winder. With this done, [Chris] attempted a test print, but found results to be poor. The ribbon wasn’t advancing properly and there was a rather horrible noise.

The problem was that the Epson ribbon was significantly longer than the Canon part, and thus was getting jammed inside the cartridge housing. [Chris] was able to fix this by cutting out a slice of the Epson ribbon and sticking the two ends back together with superglue. With that done, the printer was happily up and running once more.

If you’ve got a dot matrix printer ribbon that’s dried up but not yet falling apart, you can always try reinking it. Video after the break.

Continue reading “Dot Matrix Printer Gets An Epson Ribbon Transplant”

Screech Owl Is A Tribute To The Eowave Persephone

The Eowave Persephone was a beautiful thing—a monophonic ribbon synth capable of producing clean, smoothly varying tones. [Ben Glover] used to own a nice example that formerly belonged to Peter Christopherson, but lost it in the shifting sands of time. His solution was to build one of his own from scratch.

It’s a simple build, but the final result puts out a nice pleasant sound.

Known as the Screech Owl, the build is based around a custom shield designed to suit the Arduino Leonardo. The primary control interface is a Softpot 500 mm membrane potentiometer, layered up with a further thin film pressure sensor which provides aftertouch control. The Leonardo reads these sensors and synthesizes the appropriate frequencies in turn.

All the electronics is wrapped up inside a tidy laser-cut enclosure that roughly approximates the design of the original Eowave device. [Ben] noted the value of services like Fiverr and ChatGPT for helping him with the design, while he also enjoyed getting his first shield design professionally manufactured via JLCPCB.

It’s a tidy build, and in [Ben’s] capable hands, it sounds pretty good, too. We’ve seen some other great ribbon controlled synths before, too. Video after the break.

Continue reading “Screech Owl Is A Tribute To The Eowave Persephone”

Falling Down The Labyrinth With Wooden Microphone Design

It used to be that when we featured one of [Frank Olson]’s DIY ribbon microphone builds, it was natural to focus on the fact that he was building them almost exclusively from wood. But despite how counterintuitive it may seem, and for as many comments as we get that his microphones shouldn’t work without metal in the ribbon motors, microphones like this wooden RCA Model 77 reproduction both look and sound great.

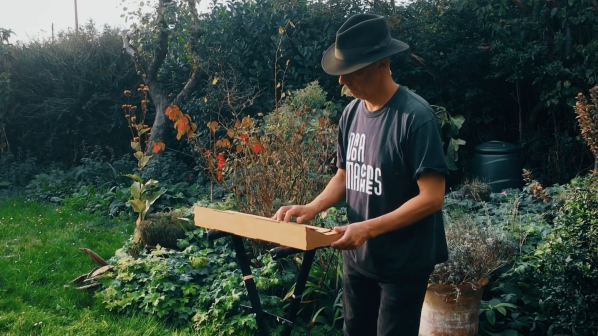
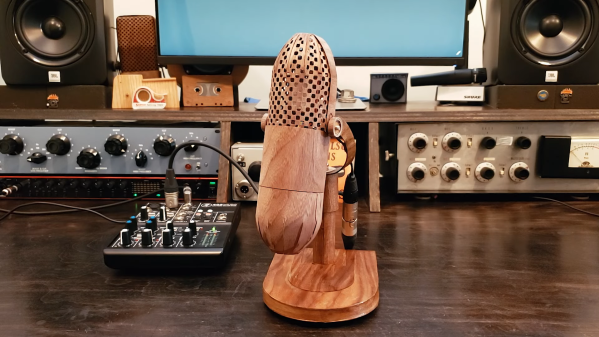
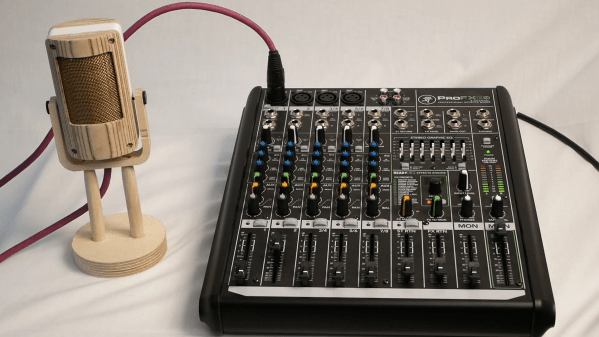
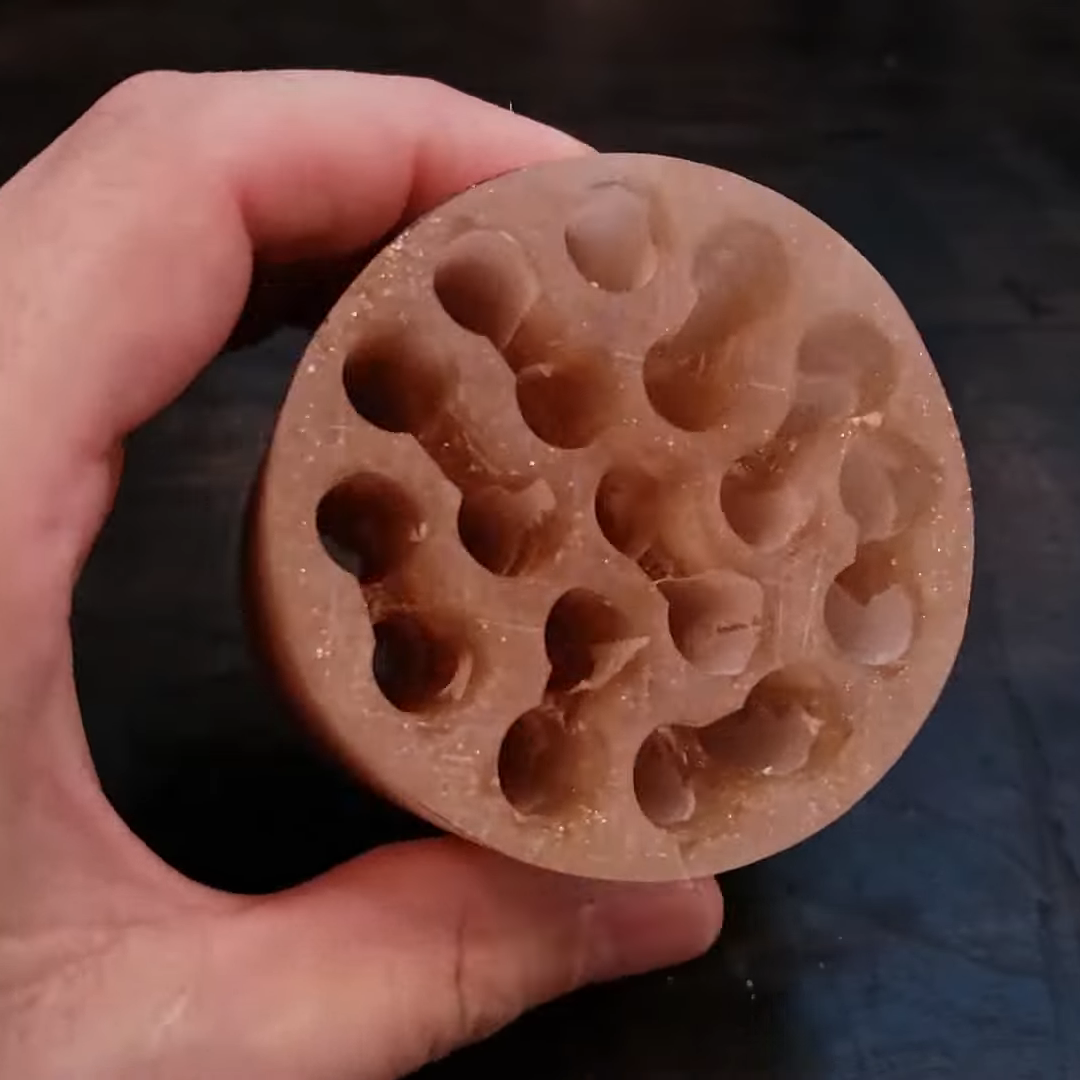
But ironically, this homage features a critical piece that’s actually not made of wood. The 77’s pickup pattern was cardioid, making for a directional mic that picked up sound best from the front, thanks to an acoustic labyrinth that increased the path length for incoming sound waves. [Frank]’s labyrinth was made from epoxy resin poured into a mold made from heavy paper, creating a cylinder with multiple parallel tunnels. The tops and bottoms of adjacent tunnels were connected together, creating an acoustic path over a meter long. The ribbon motor, as close to a duplicate of the original as possible using wood, sits atop the labyrinth block’s output underneath a wood veneer shell that does its best to imitate the classic pill-shaped windscreen of the original. The video below, which of course was narrated using the mic, shows its construction in detail.

If you want to check out [Frank]’s other wooden microphones, and you should, check out the beautiful Model 44 replica that looks ready for [Sinatra], or the Bk-5-like mics he whipped up for drum kit recording.

Continue reading “Falling Down The Labyrinth With Wooden Microphone Design”

Printable Fix For Time Card Clock Has Owner Seeing Red Again

When [Morley Kert] laid eyes on a working time card-punching clock, he knew he had to have it for a still-secret upcoming project. The clock seemed to work fine, except that after a dozen or so test punches, the ink was rapidly fading away into illegibility. After a brief teardown and inspection, [Morley] determined that the ribbon simply wasn’t advancing as it should.

This clock uses a ribbon cassette akin to a modern typewriter, except that instead of a feed spool and a take-up spool, it has a short length of ribbon that goes around and around, getting re-inked once per revolution.

When a card is inserted, a number of things happen: a new hole is punched on the left side, and an arm pushes the card against the ribbon, which is in turn pushed against the mechanical digit dials of the clock to stamp the card.

Finally, the ribbon gets advanced. Or it’s supposed to, anyway. [Morley] could easily see the shadow of a piece that was no longer there, a round piece with teeth with a protrusion on both faces for engaging both the time clock itself and the ribbon cassette. A simple little gear.

After emailing the company, it turns out they want $95 + tax to replace the part. [Morley] just laughed and fired up Fusion 360, having only caliper measurements and three seconds of a teardown video showing the missing part to go on. But he pulled it off, and pretty quickly, too. Version one had its problems, but 2.0 was a perfect fit, and the clock is punching evenly again. Be sure to check it out after the break.

Okay, so maybe you don’t have a time card clock to fix. But surely you’ve had to throw out an otherwise perfectly good coat because the zipper broke?

Continue reading “Printable Fix For Time Card Clock Has Owner Seeing Red Again”

A New Wrinkle On Wooden Ribbon Microphones

Not too many people build their own microphones, and those who do usually build them out of materials like plastic and metal. [Frank Olson] not only loves to make microphones, but he’s also got a thing about making them from wood, with some pretty stunning results.

[Frank]’s latest build is a sorta-kinda replica of the RCA BK-5, a classic of mid-century design. Both the original and [Frank]’s homage are ribbon microphones, in which a thin strip of corrugated metal suspended between the poles of magnets acts as a transducer. But the similarities end there, as [Frank] uses stacked layers of walnut veneer as the frame of his ribbon motor. The wood pieces are cut with a vinyl cutter, stacked up, and glued into a monolithic structure using lots of cyanoacrylate glue. The video below makes it seem easy, but we can imagine getting everything stacked neatly and lined up correctly is a chore, especially when dealing with neodymium magnets. Cutting and corrugating the aluminum foil ribbon is no mean feat either, nor is properly tensioning it and making a solid electrical contact.

The ribbon motor is suspended in a case made of yet more wood, all of which contributes to a warm, rich sound. The voice-over for the whole video below was recorded on a pair of these mics, and we think it sounds just as good as [Frank]’s earlier wooden Model 44 build. He says he has more designs in the works, and we’re looking forward to hearing them, too. Continue reading “A New Wrinkle On Wooden Ribbon Microphones”

The hairclip-embedded tool being used on a Tiger 99x game console, clipped onto a spot where the plastic ribbon meets the LCD panel itself, heating it up

World’s Smallest Hair Straightener For Fixing Old LCD Ribbons

[Stephen] writes to us about an LCD repair tool he has created. We’ve all seen old devices with monochrome LCDs connected by thin film, where connections between the PCB and the LCD have deteriorated and the LCD would no longer show parts of the picture. This is a connection heating gadget, that [Stephen] affectionately dubs as World’s Smallest Hair Straightener, made specifically to bring cool old tech back to life.

A resin-printed mold houses a coil of Kanthal wire, easy to source and simple to make. He reuses a hair clip as a housing for the heating element, which also provides pressure needed to squish the film-printed conductive traces into the LCD as the adhesive melts. High-temperature epoxy brings the two together, and with a variable power supply, this tool successfully brought an old Tiger 99x handheld back to life.

This hack was made possible, in part, because of [JohnDevin Duncan] in Hackaday comment section sharing his experience on repairing LCD ribbons back in 2015, giving valuable insights on the problem that we initially thought would be solve-able with a soldering iron. The knowledge shared was distilled by [Stephen] into a tool that we all can now use when we encounter a device we really, really want to revive.

Last time we covered this topic, quite a few hackers popped up with their stories and suggestions. Old game console fix stories are a staple here on Hackaday, a few pop to mind – this high-effort trace repair of a water-damaged GameBoy cartridge, a badly designed NES cartridge socket reinvention, and this GameBoy LCD sunburn damage restoration guide.

Wood Enclosure Lends Warmth To This DIY Ribbon Microphone

We love it when someone takes an idea they’ve seen on Hackaday and runs with it, taking it in a new and different direction. That’s pretty much what we’re here for, after all, and it’s pretty gratifying to see projects like this wooden ribbon microphone come to life.

Now, we’re not completely sure that [Maya Román] was inspired by our coverage of [Frank Olson]’s homage to the RCA Model 44 studio mic rendered in walnut veneer, but we’re going to pat ourselves on the back here anyway. The interesting thing with [Maya]’s build is that she chose completely different materials and design styles for her project. Where [Frank] built as much of his mic from wood as possible, [Maya] was fine with a mixed media approach — CNC-milled plywood for the case and stand, laser-cut acrylic for the ribbon motor frame, and 3D-printed pieces here and there as needed. The woven brass cloth used as a windscreen is a nice detail; while the whole thing looks — and sounds — great, we think it would be even better with a coat of dark stain to contrast against the brass, as well as a nice glossy coat of polyurethane.

The video below shows the whole design and build process, which was a final project for [Maya]’s audio production class this semester at college. Here’s hoping that it got as good a grade as we would give it.

Continue reading “Wood Enclosure Lends Warmth To This DIY Ribbon Microphone”