Sarrus Linkage 3d Printer

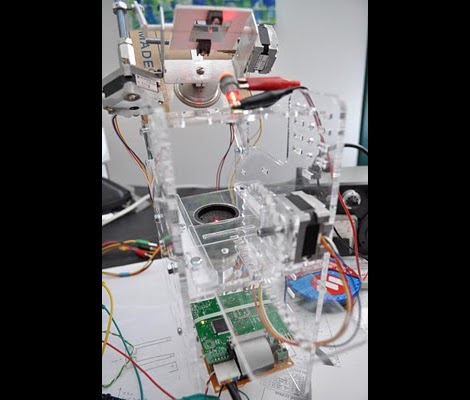
[fdavies] has been working on his own 3d printer. He is using printed parts, but unlike the RepRap he’s purposed Sarrus linkages in his design. If it works, this should remove the need for precision rods in building these types of CNC based machines. He’s also recovered DC motors and optical encoders from some inkjek printers. Given that many retailers require you to take junky inkjets home when you purchase a computer we’re betting you’ll find friends happy to part with their unused hardware. We’re impressed with the motion of the prototype seen after the break. Let’s hope this leads to the next generation of affordable 3d printers.

Continue reading “Sarrus Linkage 3d Printer”

RepRap Milling Machine

three axis cnc robot with vacuum attachment

[Chris] liked Cartesian RepRap idea so much that he decided to design his master’s diploma project around it. Though it uses most of the same parts as the RepRap (even the PCBs), [Chris] has adapted it so it does milling rather than 3D printing.  Most of the parts (such as the stepper motors) were harvested from old inkjet printers and typewriters. The thee-axis CNC machine can already etch and carve styrofoam at an impressively high resolution. To deal with all of the debris that comes with milling, a vacuum attachment (shown attached) was created. [Chris] is considering adapting it so it can work with wood and aluminum as well. Best of all, it uses standard G-code files, just like the RepRap. A publication by [Chris] on the project is also available through his website. No plans to release a kit have been announced yet, but we’ll wait and see. If any commenter knows of an open source CNC milling machine available as a kit, feel free to post a link to it below.

RepRap Wedge

reprap_wedge

Generation 2.0 of RepRap, the self replicating 3d printer, is approaching realization. Code named “Mendel”, the new design will be wedge shaped rather than a box which offers a few benefits. The overall design is smaller than the original RepRap but the printable area is larger. This means more functionality with less building material. With each new generation of this project the assembly gets easier and total parts price drops making the RepRap available to a much wider audience.

The RepRap blog has put forth some design specs, a picture of the assembled prototype, and has links for general assembly information (ZIP). We won’t see a finished version of this released for a few months but so far it looks like a big leap forward.

Printing A RepRap

repstrap

The RepRap project has been working on bringing 3D printing to the masses by creating a extrusion printer that can also make the majority of its own parts. For the most part, these print ABS or HDPE plastics which are strong and recyclable. In order to create these replicating printers, similar machines called RepStraps are built out of either laser-cut parts or machined elements. They are functionally equivalent to RepRap printers, but are not made of printed parts. [nophead] documented his RepStrap, HydraRaptor, that is based off a milling machine. He had already printed a set of RepRap parts, and he documented printing a second set. The machine worked for about 100 hours over the course of 2 weeks, printing about 1.5 kg of parts. He made a few adjustments, such as replacing ABS bearings with HDPE to reduce friction. The parts are for Factor e Farm so they can get started with 3D printing.

Related: RepRap pinch wheel extruder

3D Printing At Home

3dprint

We’ve seen a lot of 3d printing lately, with the RepRap and Cupcake, both the fused deposition modeling type. We don’t often see the Inkjet method. This is a great example of one, built in someones home. Instead of laying down layers of molten plastic, he uses the inkjet system to deposit glue like substances into layers of plaster. This project is much higher resolution than the other two, as you can see in the video of it making an RC engine case below. He is currently rebuilding it to be even better and larger.

Continue reading “3D Printing At Home”

RepRap Pinch Wheel Extruder

pinchwheel

What you see above is the culmination of [Zach Smith]’s work building a pinch wheel style extruder for the RepRap. The current RepRap 3D printer uses a screw mechanism to push 3mm polymer filament into a heating barrel where it is melted and then extruded through a fine nozzle. [Zach]’s new version uses a drive gear from SDP/SI mounted directly to the DC motor we saw him teardown earlier. He’s redesigned the carrier for the extruder as well. It’s now much lighter and has provisions for mounting current and future controller electronics along with a magnetic rotary encoder. In the last two days, he’s been doing real world testing. It’s been doing well, but he’s learning to do things like always using a full spool and not trying to run short lengths back to back.

Lasercut RepRap Kit

The RepRap is a self-copying 3D printer. The project has published plans for creating a lasercut acrylic version of the device. They call it a RepStrap since once assembled it could produce printed plastic versions of the machine components, bootstrapping true RepRaps. The plans are available for Ponoko an on-demand product service, and it would cost ~$380 if you used their service. The plans are free, so you could get them manufactured by other means. [vik] is still putting together the assembly instructions. He hopes to have an all inclusive electronics kit at some point too. This is another great step towards putting desktop manufacturing within reach of everyone.