Use Your Ears As An Oscilloscope

image

When work on an engine control circuit [Scott] found himself in need of a way to compare the performance of two control circuits at once. The hobby quality oscilloscope he owns wasn’t up to the task. After thinking about it for a bit he ended up using his ears as the oscilloscope.

The signals he was measuring are well suited for the challenge as they fell within the human range of hearing. He used some wire wrapped around each of the three conductors on the jack of his headphones in order to connect them to a breadboard. Then he simply connected each channel to one of the motor driver circuits, and connected the common ground. Listening to the intonation of the pitches in each ear he was literally able to tune them up.

If he had been looking for a specific frequency he could have used his sound card to take and analyze a sample. But balance was what he needed here and you must admit that this was an easy and clever way to get it!

Wireless Microcontroller/PC Interface For $3

uc

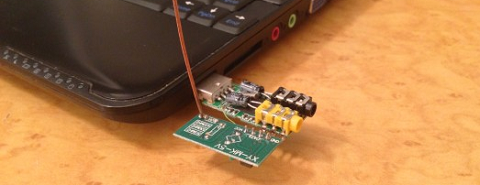
Sending data from a microcontroller to a PC usually requires some sort of serial connection, either through fiddly on-chip USB, FTDI chips, or expensive radio ICs. [Scott] didn’t want to deal with this when creating a network of wireless temperature sensors, so he hacked up a few cheap 433 MHz radio transmitters and receivers to transmit data to a PC for about $3.

After sensor data is collected on a microcontroller and sent over radio, there’s still the issue of getting it into a PC. For this, [Scott] piped the data into the microphone port of a cheap USB sound card. We’ve seen this trick before both in the world of microcontrollers and loading programs onto a Commodore 64 via a cassette interface.

Once the data is sent into the sound card, it’s decoded with a a small Python app. Given the range and quality of the RF transmitters and receivers  [Scott] says it’s not an extremely reliable way to send data to a PC. It is cheap, though, and if you need to read sensors wirelessly on a budget, it’s hard to do much better.

Check out [Scott]’s demo of his creation below.

[youtube=http://www.youtube.com/watch?v=GJHFldPwZvM&w=580]

Console Radio Given New Life With A WiFi Router Retrofit

tube-radio-wifi-router-retrofit

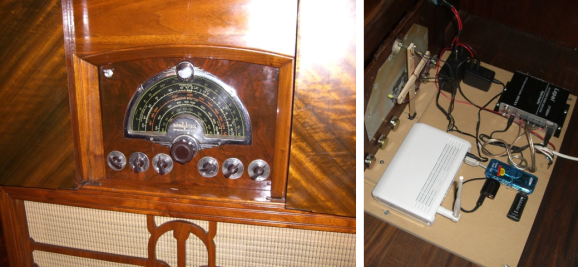
[Craig] did a great job of restoring the case of his antique console radio. But he wanted to bring the guts up to modern standards. The fix ended up being rather easy when it comes to hardware. He based his internet radio retrofit around a wireless router.

We laughed when we heard that he removed about eighty pounds of original electronics from this beast. He then cut a piece of MDF to serve as a mounting platform for the replacement hardware. The WiFi router takes care of audio playback from several sources and offers him the ability to control the stereo from a smart phone or a computer. It has a USB port to which he connected a hub to make room for the USB sound card and a thumb drive which holds his music library. The black box in the upper right is an amp which feeds the NHT stereo speakers housed in the lower half of the cabinet.

It doesn’t make use of the original knobs like the recent tube-amp conversion we looked at. But [Craig] did add some LEDs which illuminate the dial to help keep that stock look.

Pulse Oximeter From LM324, LED, And Photodiode

This pulse oximeter is so simple and cheap to build it’s almost criminal. The most obvious way to monitor the output of the sensor is to use an oscilloscope. The poor-man’s stand-in for that is a sound card, which is what [Scott Harden] demonstrates in his write-up.

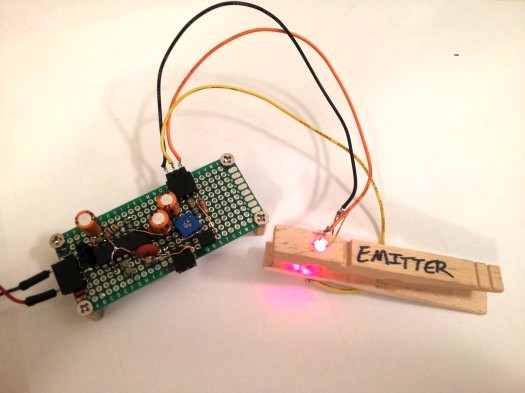
It uses a concept we’ve seen a few times before. The light from an LED shines through your finger and is measured on the other side by a phototransistor. It’s that light grey plastic thing you see on a patient’s finger when they’re in the hospital. [Scott] went with a common wooden clothes pin as a way to mount and align the sensor with your finger. It is monitored by the simplest of circuits which uses just one chip: an LM324 op-amp. There are three basic stages which he explains well in the video after the jump. The incoming signal is decoupled before being fed to the first amplifier stage. From there it is fed to an adjustable low-pass filter to help eliminate 60Hz noise from AC power in the room. The last stage amplifies the signal again while using another low-pass filter in parallel.

Continue reading “Pulse Oximeter From LM324, LED, And Photodiode”

Raspberry Pi: The Perfect Machine For Old DOS Games

DOS

There’s a treasure trove of excellent yet ancient games made for DOS that are nearly unplayable on modern computers. Awesome games like the Lucasarts SCUMM adventures, the original Civilization and SimCity, Starflight, the King’s Quest series and even Leisure Suit Larry aren’t played much today because of the near impossibilities of getting them to run on modern hardware or setting up an emulator with proper sound.

[Patrick] has been doing his best to help out classic gamers with an x86 emulator for the Raspberry Pi. It’s designed to be a very capable DOS box with 20 MB of extended memory, a 640×480 display with 256 colors, an ~20MHz 486 emulated CPU, and a Soundblaster 2.0 sound card.

There’s still a lot of work to be done, but outside of finding a 20-year-old computer, emulation on a Raspberry Pi it probably the most authentic DOS gaming experience you’ll get.

UC Davis Students Build Coffee Can Radar Project Inspired By MIT

student-built-coffee-can-radar

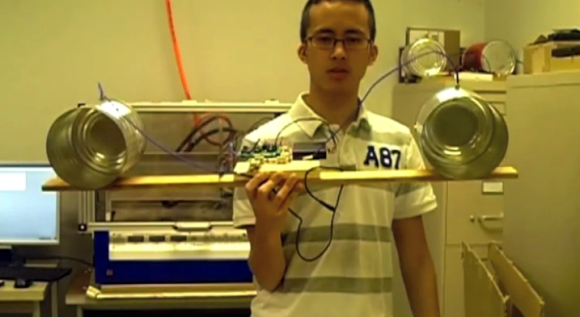
Blinking lights is a lot of fun, but if you’re getting an EE degree the cool stuff becomes a bit more involved. In this case, building your own radar is the thing to do. Here’s a coffee can radar setup being shown off by a group of UC Davis students. Regular readers will recognize the concept as one we looked at in December. The project was inspired by the MIT OpenCourseware project.

One of the cans is being used as a transmitter, the other as the collector. The neat thing about this rig is that the analysis is performed on a PC, with the sound card as the collection device. The video after the break shows off the hardware as well as the results it collected. About a minute and a half into the clip they show a real-time demonstration where a student walks in front of the apparatus while another takes a video of the plot results. As the subject moves away from the receiver the computer graph changes accordingly. The rest of the video covers some operational theory and pcb assembly.

Continue reading “UC Davis Students Build Coffee Can Radar Project Inspired By MIT”

The Keypad Contest

Keypad

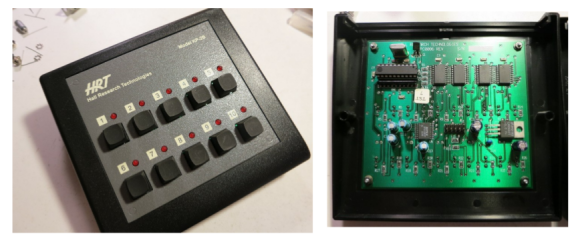
What can you do with ten buttons and ten lights? A lot.

[Andrew] and [Nathan] found a collection of Hale Research keypads being thrown out, and decided to host the Keypad Contest. The goal of the contest was to create something nifty using the ten buttons and ten lights on the keypad, and an ATtiny2313 that replaced the original 8051-compatible microcontroller in the device.

[Andrew] wanted to try making PCBs with his home-built CNC machine, so he milled out USBtinyISP programmers for the ATtiny2313. Then he gave out eleven development kits to a group, and explained how to develop on the hardware.

After a month of hacking, seven people completed projects. The winner was an internet radio controller, which had the keypad sending serial data to a TP-Link WR703N router. The router used a USB sound card and OpenWRT firmware to stream music. The runner up was a timing game called “Capture”.

The contest write up has details on all seven projects. [Andrew] and [Nathan] were successful in getting software engineers to try hardware with this contest, resulting in some neat hacks. After the break, check out a video demo of the internet radio controller.

Continue reading “The Keypad Contest”