If you’re looking at CNC machines, or machine tools in general, heavier is better. That old drill press or mill made of a few hundred pounds of cast iron isn’t just better because it’s stood the test of time for a hundred years — greater mass equals less vibration. Thanks to modern epoxy resins, we now have a replacement for tons and tons of iron. Epoxy granite, or chips of granite bound together with epoxy resin, is a viable and very good base for CNC machines, mills, and other tools that are served well with a ton of mass. [Joerg Beigang] is building his own CNC router, and he’s building the base out of epoxy granite. Here’s how he’s doing it.
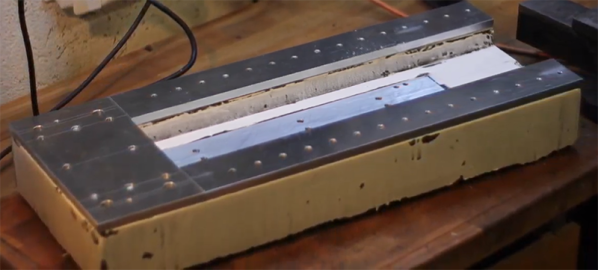
Before you pour epoxy into a mold, you’ll need to figure out how you’re going to attach your ways, linear rails, and ball screws. [Joreg] is bolting these parts to pieces of aluminum he cut on his home made panel saw before carefully drilling and tapping them to accept the linear rails. These aluminum plates were then mounted to the bottom panel of the mold, in this case melamine-coated plywood.
As you would expect, the most intricate part of this build isn’t globbing up a mold with epoxy resin. No, the real trick here is making sure the rails of the CNC are aligned perfectly before the epoxy goes in. This was done by bolting the linear rails to the mold box and checking everything with a dial indicator. Once that was done it was time to pour.
The bed itself is made of 18kg of epoxy granite, with the entire pour done in four batches. The best way to settle a big pour of epoxy granite is through vibration, just like concrete, but it looks as though [Joreg] is getting some good results by tamping it down with a few sticks. You can check out the first part of this build series below.
If we’ve captured your interest, it’s worth reminding you that this isn’t the first epoxy granite CNC machine we’ve featured.
Continue reading “Casting The Bed Of A CNC Machine In Granite”