Cable Bots, Arise! Domination Of The Universe Is At Hand

Most CNC robots people see involve belts and rails, gantries, lead screws, linear bearings, and so forth. Those components need a rigid chassis to support them and to keep them from wobbling during fabrication and adding imperfections to the design. As a result, the scale is necessarily small — hobbyist bots max out at cabinet-sized, for the most part. Their rigid axes are often laid out at Cartesian right angles.

One of the exceptions to this common configuration is the delta robot. Deltas might be the flashiest of CNC robots, moving the end effector on three arms that move to position it anywhere in the build envelope. A lot of these robots are super fast and precise when charged with carrying a light load, and they get put to work as pick-and-place machines and that sort of thing. It doesn’t hurt that delta bots are also parallel manipulators, which means that the motors work together to move the end effector, with one motor pulling while the matching motor pulls.

But while Cartesian CNC bots are sturdy workhorses, and deltas are fly-weight racehorces, neither can really cut it when you want to go gigantic. In terms of simplicity and scale, nothing beats cable bots.

Cable Bots

Cable bots use wires or strings pulled by reel-mounted motors, with dimensions limited only by the room to mount the motors and the tensile strength of the cables used. When the strings are tensioned you can get a surprising degree of accuracy. Why not? Are they not computer-controlled motors? As long as your kinematic chain accounts for the end effector’s movement in one direction by unwinding another cable (for instance) you can very accurately control the end effector over a very wide scale.

The following are some fun cable bots that have caught my eye.

Continue reading “Cable Bots, Arise! Domination Of The Universe Is At Hand”

Supercon Badge Hacking Quick-Start

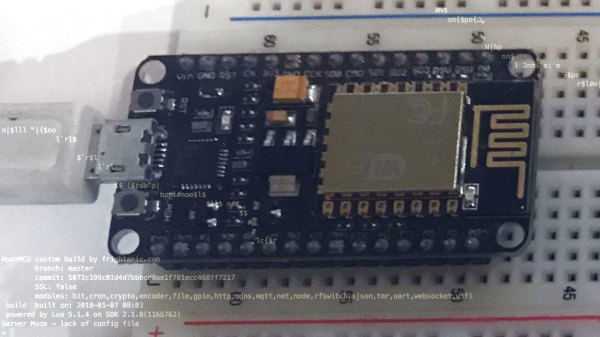
The hardware badge Mike Harrison designed for this year’s Hackaday Superconference is begging to be hacked. Today, I wanted to help get you up and running quickly.

The Hacker Village atmosphere of Supercon is starting up a day early this year. On Friday, November 10th badge pick-up starts at noon and badge hacking continues throughout the afternoon, followed by a party at Supplyframe HQ that evening. Plan to get to town on Friday and join in the fun. Of course, you need to grab a Supercon ticket if you haven’t already.

Check out the 2017 Superconference Badge project page for full documentation that Mike has put together during his development process.

Continue reading “Supercon Badge Hacking Quick-Start”

Artificial Intelligence At The Top Of A Professional Sport

The lights dim and the music swells as an elite competitor in a silk robe passes through a cheering crowd to take the ring. It’s a blueprint familiar to boxing, only this pugilist won’t be throwing punches.

OpenAI created an AI bot that has beaten the best players in the world at this year’s International championship. The International is an esports competition held annually for Dota 2, one of the most competitive multiplayer online battle arena (MOBA) games.

Each match of the International consists of two 5-player teams competing against each other for 35-45 minutes. In layman’s terms, it is an online version of capture the flag. While the premise may sound simple, it is actually one of the most complicated and detailed competitive games out there. The top teams are required to practice together daily, but this level of play is nothing new to them. To reach a professional level, individual players would practice obscenely late, go to sleep, and then repeat the process. For years. So how long did the AI bot have to prepare for this competition compared to these seasoned pros? A couple of months.

Continue reading “Artificial Intelligence At The Top Of A Professional Sport”

DIY Nintendo Switch May Be Better Than Real Thing

Nintendo’s latest Zelda-playing device, the Switch, is having no problems essentially printing money for the Japanese gaming juggernaut. Its novel design that bridges the gap between portable and home console by essentially being both at the same time has clearly struck a chord with the modern gamer, and even 8 months after its release, stores are still reporting issues getting enough of the machines to meet demand.

But for our money, we’d rather have the Raspberry Pi powered version that [Tim Lindquist] slaved over for his summer project. Every part of the finished device (which he refers to as the “NinTIMdo RP”) looks professional, from the incredible job he did designing and printing the case down to the small details like the 5 LED display on the top edge that displays volume and battery level. For those of you wondering, his version even allows you to connect it to a TV; mimicking the handheld to console conversion of the real thing.

[Tim] has posted a fascinating time-lapse video of building the NinTIMdo RP on YouTube that covers every step of the process. It starts with a look at the 3D model he created in Autodesk Inventor, and then goes right into the post-printing prep work where he cleans up the printed holes with a Dremel and installs brass threaded inserts for strength. The bulk of the video shows the insane amount of hardware he managed to pack inside the case, a true testament to how much thought was put into the design.

For the software side, the Raspberry Pi is running the ever popular RetroPie along with the very slick EmulationStation front-end. There’s also a Teensy microcontroller on board that handles the low-level functions such as controlling volume, updating the LED display, and mapping the physical buttons to a USB HID device the Raspberry Pi can understand.

The Teensy source code as well as the 3D models of the case have been put up on GitHub, but for a project like this that’s just the tip of the iceberg. [Tim] does mention that he’s currently working on creating a full build tutorial though; so if Santa doesn’t leave a Switch under the tree for you this year, maybe he can at least give you a roll of filament and enough electronics to build your own.

While this isn’t the first time a Raspberry Pi has dressed up as a Nintendo console, it may represent the first time somebody has tried to replicate a current-generation gaming device with one.

Continue reading “DIY Nintendo Switch May Be Better Than Real Thing”

Amiga Gets A PS/2 Keyboard Port

Name any retrocomputer — Apple II, Sinclair, even TRS-80s — and you’ll find a community that’s deeply committed to keeping it alive and kicking. It’s hard to say which platform has the most rabid fans, but we’d guess Commodore is right up there, and the Amiga aficionados seem particularly devoted. Which is where this Amiga PS/2 mouse port comes from.

The Amiga was a machine that was so far ahead of its time that people just didn’t get it. It was a true multimedia machine before multimedia was even a thing, capable of sound and graphics that hold up pretty well to this day. From the looks of [jtsiomb]’s workstation, he’s still putting his Amiga to good use, albeit with an inconvenient amount of cable-swapping each time he needs to use it. The remedy this, [jtsiomb] put together an emulator that translates scancodes from an external PS/2 keyboard into Amiga keyboard signals. Embedded inside the Amiga case where it can intercept the internal keyboard connector, the emulator is an ATmega168 that does a brute-force translation by way of lookup tables. A switch on the back allows him to choose the internal keyboard or his PS/2 keyboard via a KVM switch.

Are Amigas really still relevant? As of two years ago, one was still running an HVAC system for a school. We’re not sure that’s a testament to the machine or more a case of bureaucratic inertia, but it’s pretty impressive either way.

[via r/electronics]

The Nixie Tube Killer That Never Was

With the wealth of Nixie projects out there, there are points at which Hackaday is at risk of becoming Nixieaday. Nixie clocks, Nixie calculators, Nixie weather stations, and Nixie power meters have all graced our pages. And with good reason – Nixie tubes have a great retro look, and the skills needed to build a driver are a cut above calculating the right value for a series resistor for an LED display.

But not everyone loved Nixies back in the day, and some manufacturers did their best to unseat the venerable cold cathode tubes. [Fran Blanche] came across one of these contenders, a tiny cathode ray tube called the Nimo, and after a long hiatus in storage, she decided to put the tube to the test. After detailing some of the history of the Nimo and its somewhat puzzling marketing — its manufacturer, IEE, was already making displays to compete with Nixies, and seven-segment LEDs were on the rise at the time — [Fran] goes into the dangerous details of driving the display. With multiple supply voltages required, including a whopping 1,700 V DC for the anode, the Nimo was anything but trivial to integrate into products, which probably goes a long way to explaining why it never really caught on.

If you happen to have one of these little bits of solid unobtanium, [Fran]’s video below will go a long way to bringing back its ghostly green glow. You might say that [Fran] has a thing for oddball technologies of the late 60s — after all, she’s recreating the Apollo DSKY electroluminescent display, and she recently helped a model Sputnik regain its voice.

Continue reading “The Nixie Tube Killer That Never Was”

FoTW: LED Strips Make Awful Servo Drivers

We must all have at some time or another spotted a hack that seems like an incredible idea and which just has to be tried, but turns out to have been stretching the bounds of what is possible just a little too far. A chunk of our time has disappeared without trace, and we sheepishly end up buying the proper part for the job in hand.

[Orionrobots] had a conversation with a YouTube follower about LED strips. An LED strip contains a length of ready-made PWM drivers, they mused. Wouldn’t it be great then, if each of the drivers on a strip could be connected to a servo, making the strip a ready-made single-stop SPI servo driver. With a large multi-servo robot to build, he set to work on a strip of WS2801s.

If you are in the Soldering Zone and have elite skills at the iron, then soldering a wire to a surface mount driver chip is something entirely possible. For mere mortals though it’s a bit of a challenge, and he notes just how much extra time it’s added to the project. The fun starts though when the servo is hooked up, the best that can be said is that it vibrates a bit. On paper, the LED drivers should be able to drive a servo, because they can create the correct waveform. But in practice the servo is designed to accept a logic level input while the driver is designed to sit in series with an LED and control its current. In practice therefore the voltages required for a logic transition can’t quite be achieved.

He concludes by recommending that viewers splash out on a servo driver board rather than trying an LED strip. We applaud him for the effort, after all it’s a hack any of us might have thought of trying for ourselves.

Continue reading “FoTW: LED Strips Make Awful Servo Drivers”