When you think about highly-precise actuators, stepper motors probably aren’t the first device that comes to mind. However, as [Diffraction Limited]’s sub-micron capable micro-manipulator shows, they can reach extremely fine precision when paired with external feedback.
The micro-manipulator is made of a mobile platform supported by three pairs of parallel linkages, each linkage actuated by a crank mounted on a stepper motor. Rather than attaching to the structure with the more common flexures, these linkages swivel on ball joints. To minimize the effects of friction, the linkage bars are very long compared to the balls, and the wide range of allowed angles lets the manipulator’s stage move 23 mm in each direction.
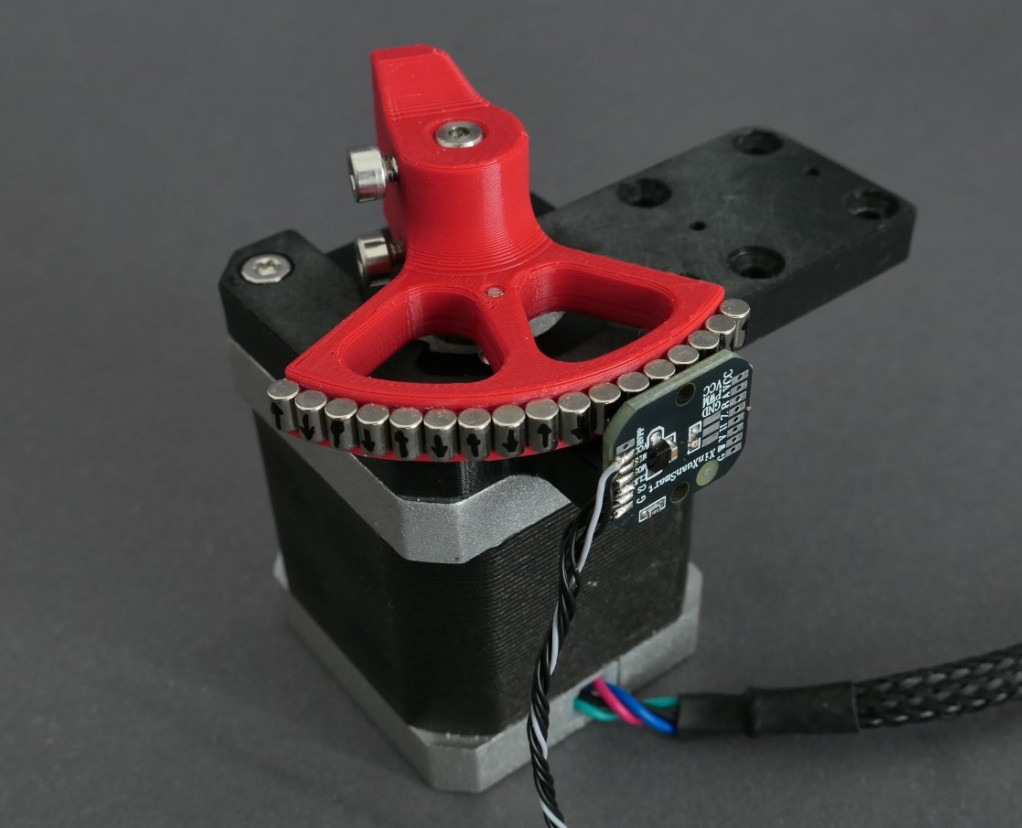
 To have precision as well as range, the stepper motors needed closed-loop control, which a magnetic rotary encoder provides. The encoder can divide a single rotation of a magnet into 100,000 steps, but this wasn’t enough for [Diffraction Limited]; to increase its resolution, he attached an array of alternating-polarity magnets to the rotor and positioned the magnetic encoder near these. As the rotor turns, the encoder’s local magnetic field rotates rapidly, creating a kind of magnetic gear.
A Raspberry Pi Pico 2 and three motor drivers control this creation; even here, the attention to detail is impressive. The motor drivers couldn’t have internal charge pumps or clocked logic units, since these introduce tiny timing errors and motion jitter. The carrier circuit board is double-sided and uses through-hole components for ease of replication; in a nice touch, the lower silkscreen displays pin numbers.
To test the manipulator’s capabilities, [Diffraction Limited] used it to position a chip die under a microscope. To test its accuracy and repeatability, he traced the path a slicer generated for the first layer of a Benchy, vastly scaled-down, with the manipulator. When run slowly to reduce thermal drift, it could trace a Benchy within a 20-micrometer square, and had a resolution of about 50 nanometers.
He’s already used the micro-manipulator to couple an optical fiber with a laser, but [Diffraction Limited] has some other uses in mind, including maskless lithography (perhaps putting the stepper in “wafer stepper”), electrochemical 3D printing, focus stacking, and micromachining. For another promising take on small-scale manufacturing, check out the RepRapMicron.
Continue reading “Designing An Open Source Micro-Manipulator” →