This KVM Runs A P4 Instead Of A Pi.

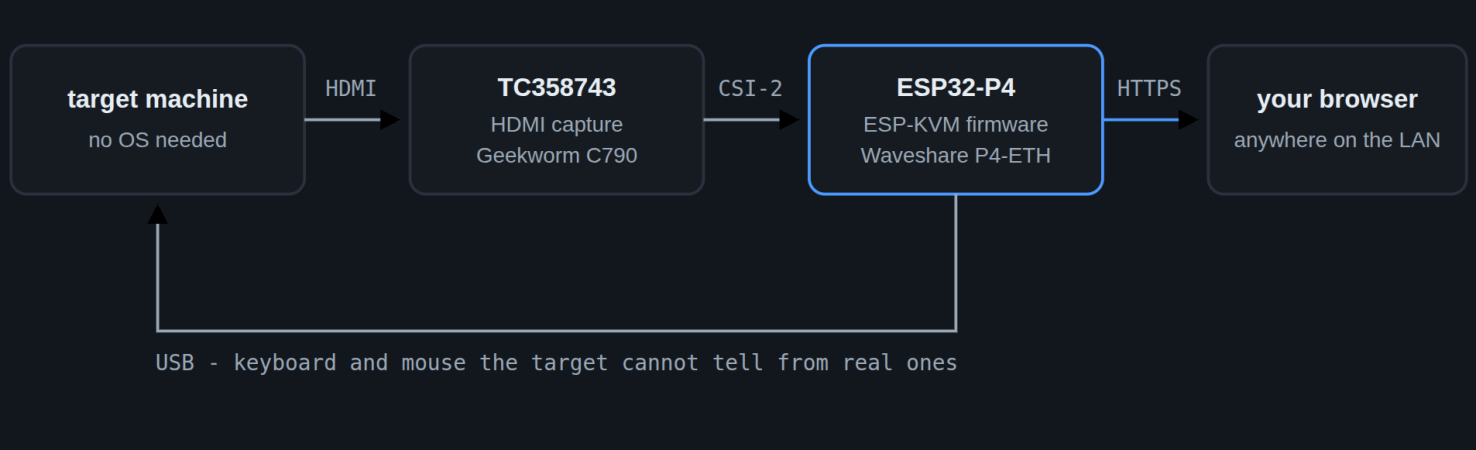
If you asked us to build you a KVM last week, we’d likely have reached for a Raspberry Pi. Now, thanks to [JonathanRowny], we’d seriously consider an ESP32-P4, because his IP KVM seems pretty capable.

He’s using the P4 hardware to its fullest, getting the supported 1080p graphics, and doing so in an interesting way– he’s got a commercial adapter board to try and translate HDMI signals to the camera input on his dev board. Conveniently enough, it’s the same ribbon-cable pinout as the RPi, which is not guaranteed by the CSI standard. Writing a driver to take that signal proved the hardest part– aside from the usual chip revision confusion that plagues this chip– and we can’t help but wonder if the client on the other side of the KVM-IP link might have an easier time doing the image processing that was required for a good image. Regardless, he’s got the code as it is now up on GitHub under the Apache license. 

As of this this writing, there’s no audio, and ironically for an ESP32 project networking is wired-only– but much more importantly, there is no security. So it’s a work in progress, but great to see the P4 in the wild doing something other than emulation. Not that we haven’t seen the P4 at work before–the Tanmatsu handheld also makes use of Expressif’s most powerful chip for a handy little terminal. Between the KVM and the handhelds, we cannot help but wonder how many of the projects that were once the provenance of a Pi will get squeezed into these overpowered microcontrollers. Sure, they can’t even match the original Pi in horsepower, never mind a modern Pi5, but how many times have you seen a Linux SBC seriously under-taxed in a project like this?

If you’re swapping Pi for P4– or doing anything else interesting– please let us know on the tips line.

Continue reading “This KVM Runs A P4 Instead Of A Pi.”

The ‘Hidden’ Microphone Inside The Sipeed NanoKVM

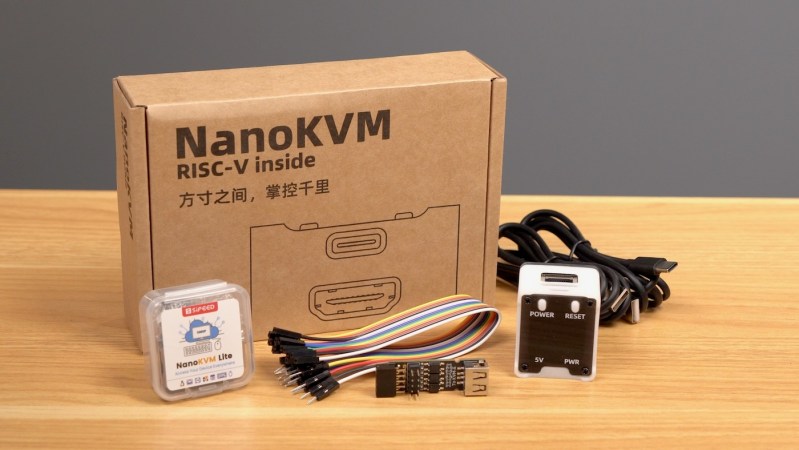
Recently, [Jeff Geerling] dropped into the bad press feeding frenzy around Sipeed’s NanoKVM, most notably because of a ‘hidden’ microphone that should have no business on a remote KVM solution. The problem with that reporting is, as [Jeff] points out in the video below, that the NanoKVM – technically the NanoKVM-Cube – is merely a software solution that got put on an existing development board, the LicheeRV Nano, along with an HDMI-in board. The microphone exists on that board and didn’t get removed for the new project, and it is likely that much of the Linux image is also reused.

Of course, the security report that caused so much fuss was published back in February of 2025, and some of the issues pertaining to poor remote security have been addressed since then on the public GitHub repository. While these were valid concerns that should be addressed, the microphone should not be a concern, as it’d require someone to be logged into the device to even use it, at which point you probably have bigger problems.

Security considerations aside, having a microphone in place on a remote KVM solution could also be very useful, as dutifully pointed out in the comments by [bjoern.photography], who notes that being able to listen to beeps on boot could be very useful while troubleshooting a stricken system. We imagine  the same is true for other system sounds, such as fan or cooling pump noises. Maybe all remote KVM solutions should have microphone arrays?

Of course, if you don’t like the NanoKVM, you could always roll your own.

Top image: the NanoKVM bundle from [Jeff]’s original review. (Credit: [Jeff Geerling])

Continue reading “The ‘Hidden’ Microphone Inside The Sipeed NanoKVM”

Linux Fu: Windows Virtualization The Hard(ware) Way

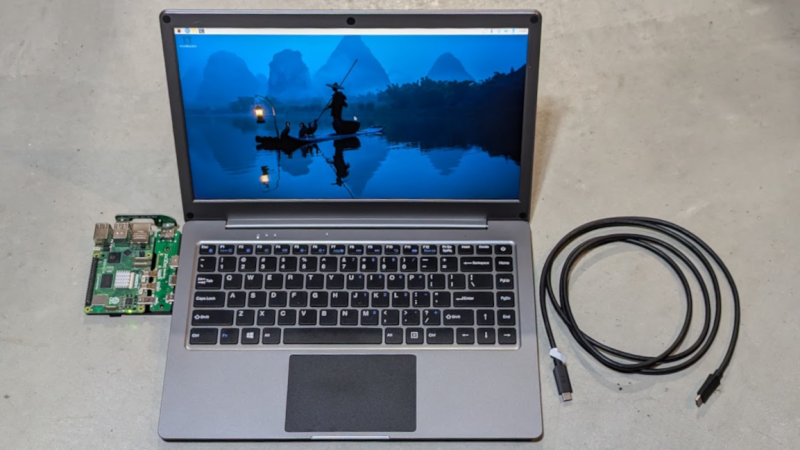
As much as I love Linux, there are always one or two apps that I simply have to run under Windows for whatever reason. Sure, you can use wine, Crossover Office, or run Windows in a virtual machine, but it’s clunky, and I’m always fiddling with it to get it working right. But I recently came across something that — when used improperly — makes life pretty easy. Instead of virtualizing Windows or emulating it, I threw hardware at it, and it works surprisingly well.

Once Upon a Time

First, a story. Someone gave me a Surface Laptop 2 that was apparently dead. It wouldn’t charge, and you can’t remove the keyboard without power. Actually, you can with a paper clip, and I suggested pulling it to see if the screen would charge by itself. They said they had already bought a new computer, so they didn’t care.

Unsurprisingly, once I popped the keyboard off, the computer charged and was fine. You just have to replace the keyboard or use another one. Or use it as a tablet, which it is set up for anyway. But I have plenty of laptops and computers of every description. What was I going to do with this nice but keyboardless computer? Continue reading “Linux Fu: Windows Virtualization The Hard(ware) Way”

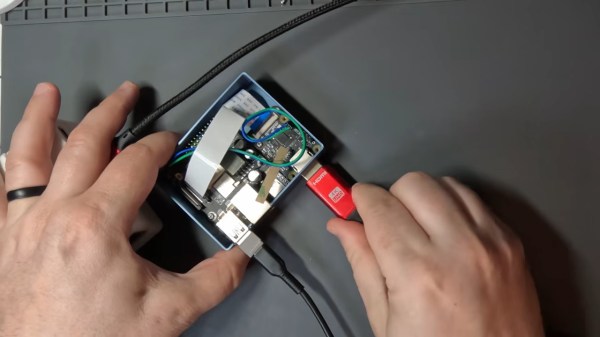
[rasteri] holding his HIDMan USB dongle

HIDman Brings Modern Input To Vintage PCs

Retro computing enthusiasts, rejoice! HIDman, [rasteri]’s latest open source creation, bridges the gap between modern USB input devices and vintage PCs, from the IBM 5150 to machines with PS/2 ports. Frustrated by the struggle to find functioning retro peripherals, [rasteri] developed HIDman as an affordable, compact, and plug-and-play solution that even non-techies can appreciate.

The heart of HIDman is the CH559 microcontroller, chosen for its dual USB host ports and an ideal balance of power and cost-efficiency. This chip enables HIDman’s versatility, supporting serial mice and various keyboard protocols. Building a custom parser for the tricky USB HID protocol posed challenges, but [rasteri]’s perseverance paid off, ensuring smooth communication between modern devices and older systems.

Design-wise, the project includes a thoughtful circuit board layout that fits snugly in its case, marrying functionality with aesthetics. Retro computing fans can jump in by building HIDman themselves using the files in the GitHub repository, or by opting for the ready-made unit.

Continue reading “HIDman Brings Modern Input To Vintage PCs”

This Is Not A Laptop, It’s A KVM Combo

A spare monitor and keyboard are handy things to have around, but they’re a bit of a hassle. They are useful for hardware development, plugging in to headless servers, or firing up a Raspberry Pi or similar single-board computer (SBC). If that’s something you do and portability and storage space are important to you, then you may be interested in the CrowView Note.

I got an opportunity to test and provide feedback on an early version of this unusual device, which is functionally a portable spare monitor plus keyboard (and touchpad) without the bulk and extra cables. Heck, it’s even giving me ideas as the guts of a Cyberdeck build. Let’s take a look.

What It Is

It really looks like a laptop, but it’s actually a 14″ 1920 x 1280 monitor and USB keyboard in a laptop form factor.

There is also an integrated trackpad, speakers and mic, and a rechargeable battery. That makes it capable of providing its own power, and it can even function as a power bank in a pinch. There’s an HDMI input on one side, and on the other is a full-featured USB-C port that accepts video input via the DisplayPort altmode.

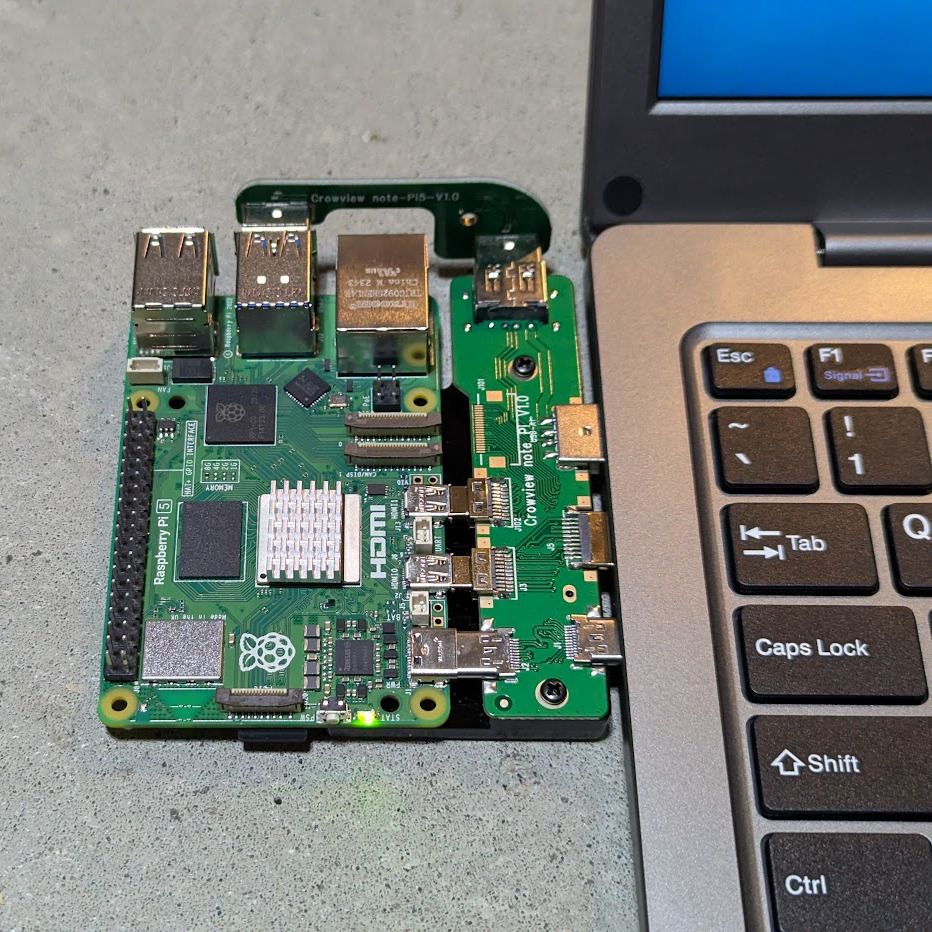
Pictured here is a Raspberry Pi 5 with optional PCB adapter to eliminate cables. The three ports (HDMI in, USB-C 5 V out, and USB-A for peripherals) provide all the board needs.

The CrowView Note is a pretty useful device for a workbench where one is often plugging hardware in for development or testing, because there’s no need to manage a separate monitor, keyboard, and mouse.

It is not a laptop, but attaching an SBC like a Raspberry Pi makes it act like one. The three ports conveniently located on the left-hand side (HDMI in, USB-C out for power to the SBC, and USB-A in for peripherals like keyboard and trackpad) are all that are needed in this case. Elecrow offers a “cable eliminator” PCB adapters to make the process of connecting a Raspberry Pi 5 or a Jetson Nano as simple as possible. The result is something that looks and works just like a laptop.

Well, almost. The SBC will still be a separate piece of hardware, whether connected by cables or by one of Elecrow’s PCB adapters. The result is OK for bench work, but especially in the case of the PCB adapter, not particularly rugged. Still, it’s a nice option and makes working on such boards convenient and cable-free.

Continue reading “This Is Not A Laptop, It’s A KVM Combo”

Custom Pneumatic Cylinders Lock This Monitor Arm In Place

Few consumer-grade PCs are what you’d categorize as built to last. Most office-grade machines are as likely as not to give up the ghost after ingesting a few too many dust bunnies, and the average laptop can barely handle a few drops of latte and some muffin crumbs before croaking. Sticking a machine like that in the shop, especially a metal shop, is pretty much a death sentence.

And yet, computers are so useful in the shop that [Lucas] from “Cranktown City” built this neat industrial-strength monitor arm. His design will look familiar to anyone with a swing-arm mic or desk light, although his home-brew parallelogram arm is far sturdier thanks to the weight of the monitor and sheet-metal enclosure it supports. All that weight exceeded the ability of the springs [Lucas] had on hand, which led to the most interesting aspect of the build — a pair of pneumatic locks. These were turned from a scrap of aluminum rod and an old flange-head bolt; when air pressure is applied, the bolt is drawn into the cylinder, which locks the arm in place. To make it easy to unlock the arm, a pneumatic solenoid releases the pressure on the system at the touch of a button. The video below has a full explanation and demonstration.

While we love the idea, there are a few potential problems with the design. The first is that this isn’t a fail-safe design, since pressure is needed to keep the arm locked. That means if the air pressure drops the arm could unlock, letting gravity do a number on your nice monitor. Second is the more serious problem [Lucas] alluded to when he mentioned not wanting to be in the line of fire of those locks should something fail and the piston comes flying out under pressure. That could be fixed with a slight design change to retain the piston in the event of a catastrophic failure.

Problems aside, this was a great build, and we always love [Lucas]’ seat-of-the-pants engineering and his obvious gift for fabrication, of which his wall-mount plasma cutter is a perfect example.

Continue reading “Custom Pneumatic Cylinders Lock This Monitor Arm In Place”

An exploded view render of a red 3D printed case with a green PCB is inside with visible USB-A connectors with a mouse and keyboard graphic above each and "A" and "B" labels above USB-C connectors on the other side.

Building A Better Keyboard And Mouse Switch

Switching inputs between desktops seems like something that should be simple but can prove to be a pain in reality. [Hrvoje Cavrak] decided to take matters into his own hands and build a better keyboard and mouse switch.

DeskHop is built from two Raspberry Pi Pico boards connected via UART and separated by an Analog Devices ADuM1201 dual-channel digital isolator. Through the magic of Pico-PIO-USB these RP2040s can be both host and device. To keep things simple, the PCB is single-sided, and the BOM only has five distinct components.

Once hooked up to your Windows, Mac, or Linux device, your mouse pointer “magically” goes from one screen to the other when dragged across the screen edge. Keyboard LEDs can be reprogrammed to indicate which device is active, and the real beauty of the device is that since it’s a hardware solution, you don’t have to install any software on a computer you might not have admin access to.

If you want to see some more ideas for keyboard and mouse switching, check out this Pi KVM with ATX signaling, this USB triplexer, or this Pi KVM on a PCIe card.