A Pair Of Steppers Are Put To Work In This Automatic Instrument Pickup Winder

For something that’s basically a coil of wire around some magnetic pole pieces, an electric guitar pickup is a complicated bit of tech. So much about the tone of the instrument is dictated by how the pickup is wound that controlling the winding process is something best accomplished with a machine. This automatic pickup winder isn’t exactly a high-end machine, but it’s enough for the job at hand, and has some interesting possibilities for refinements.

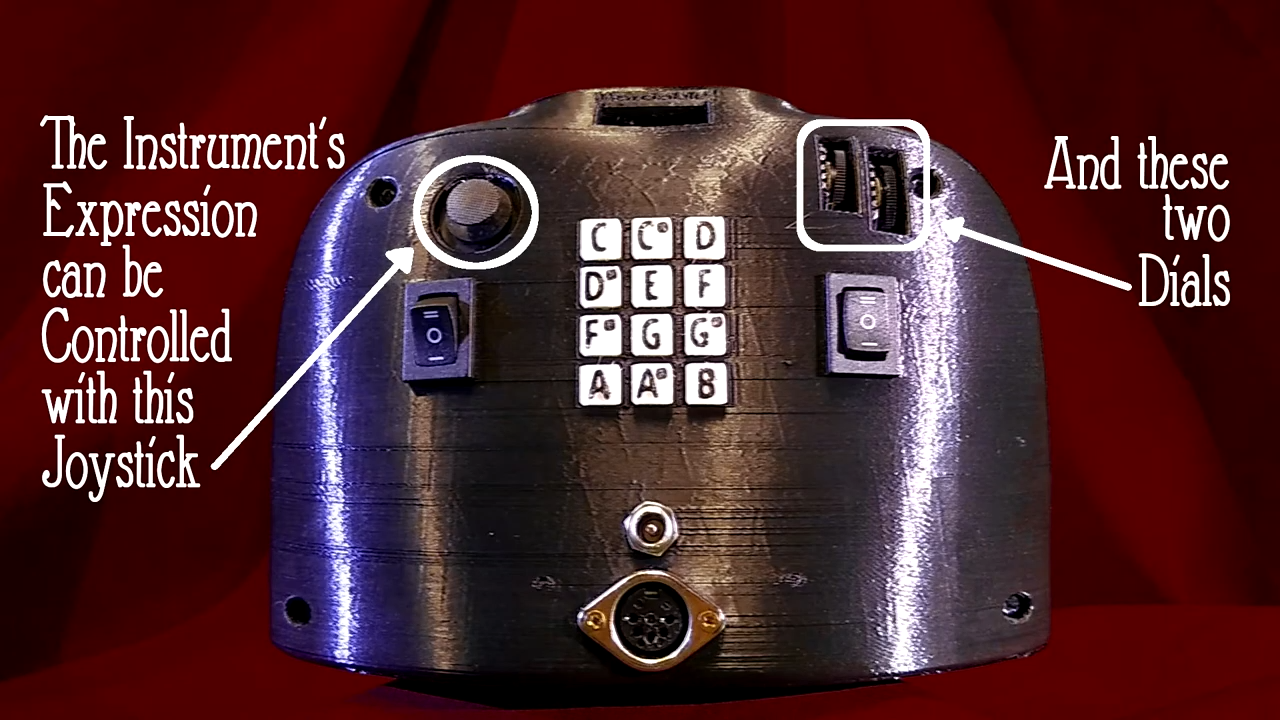
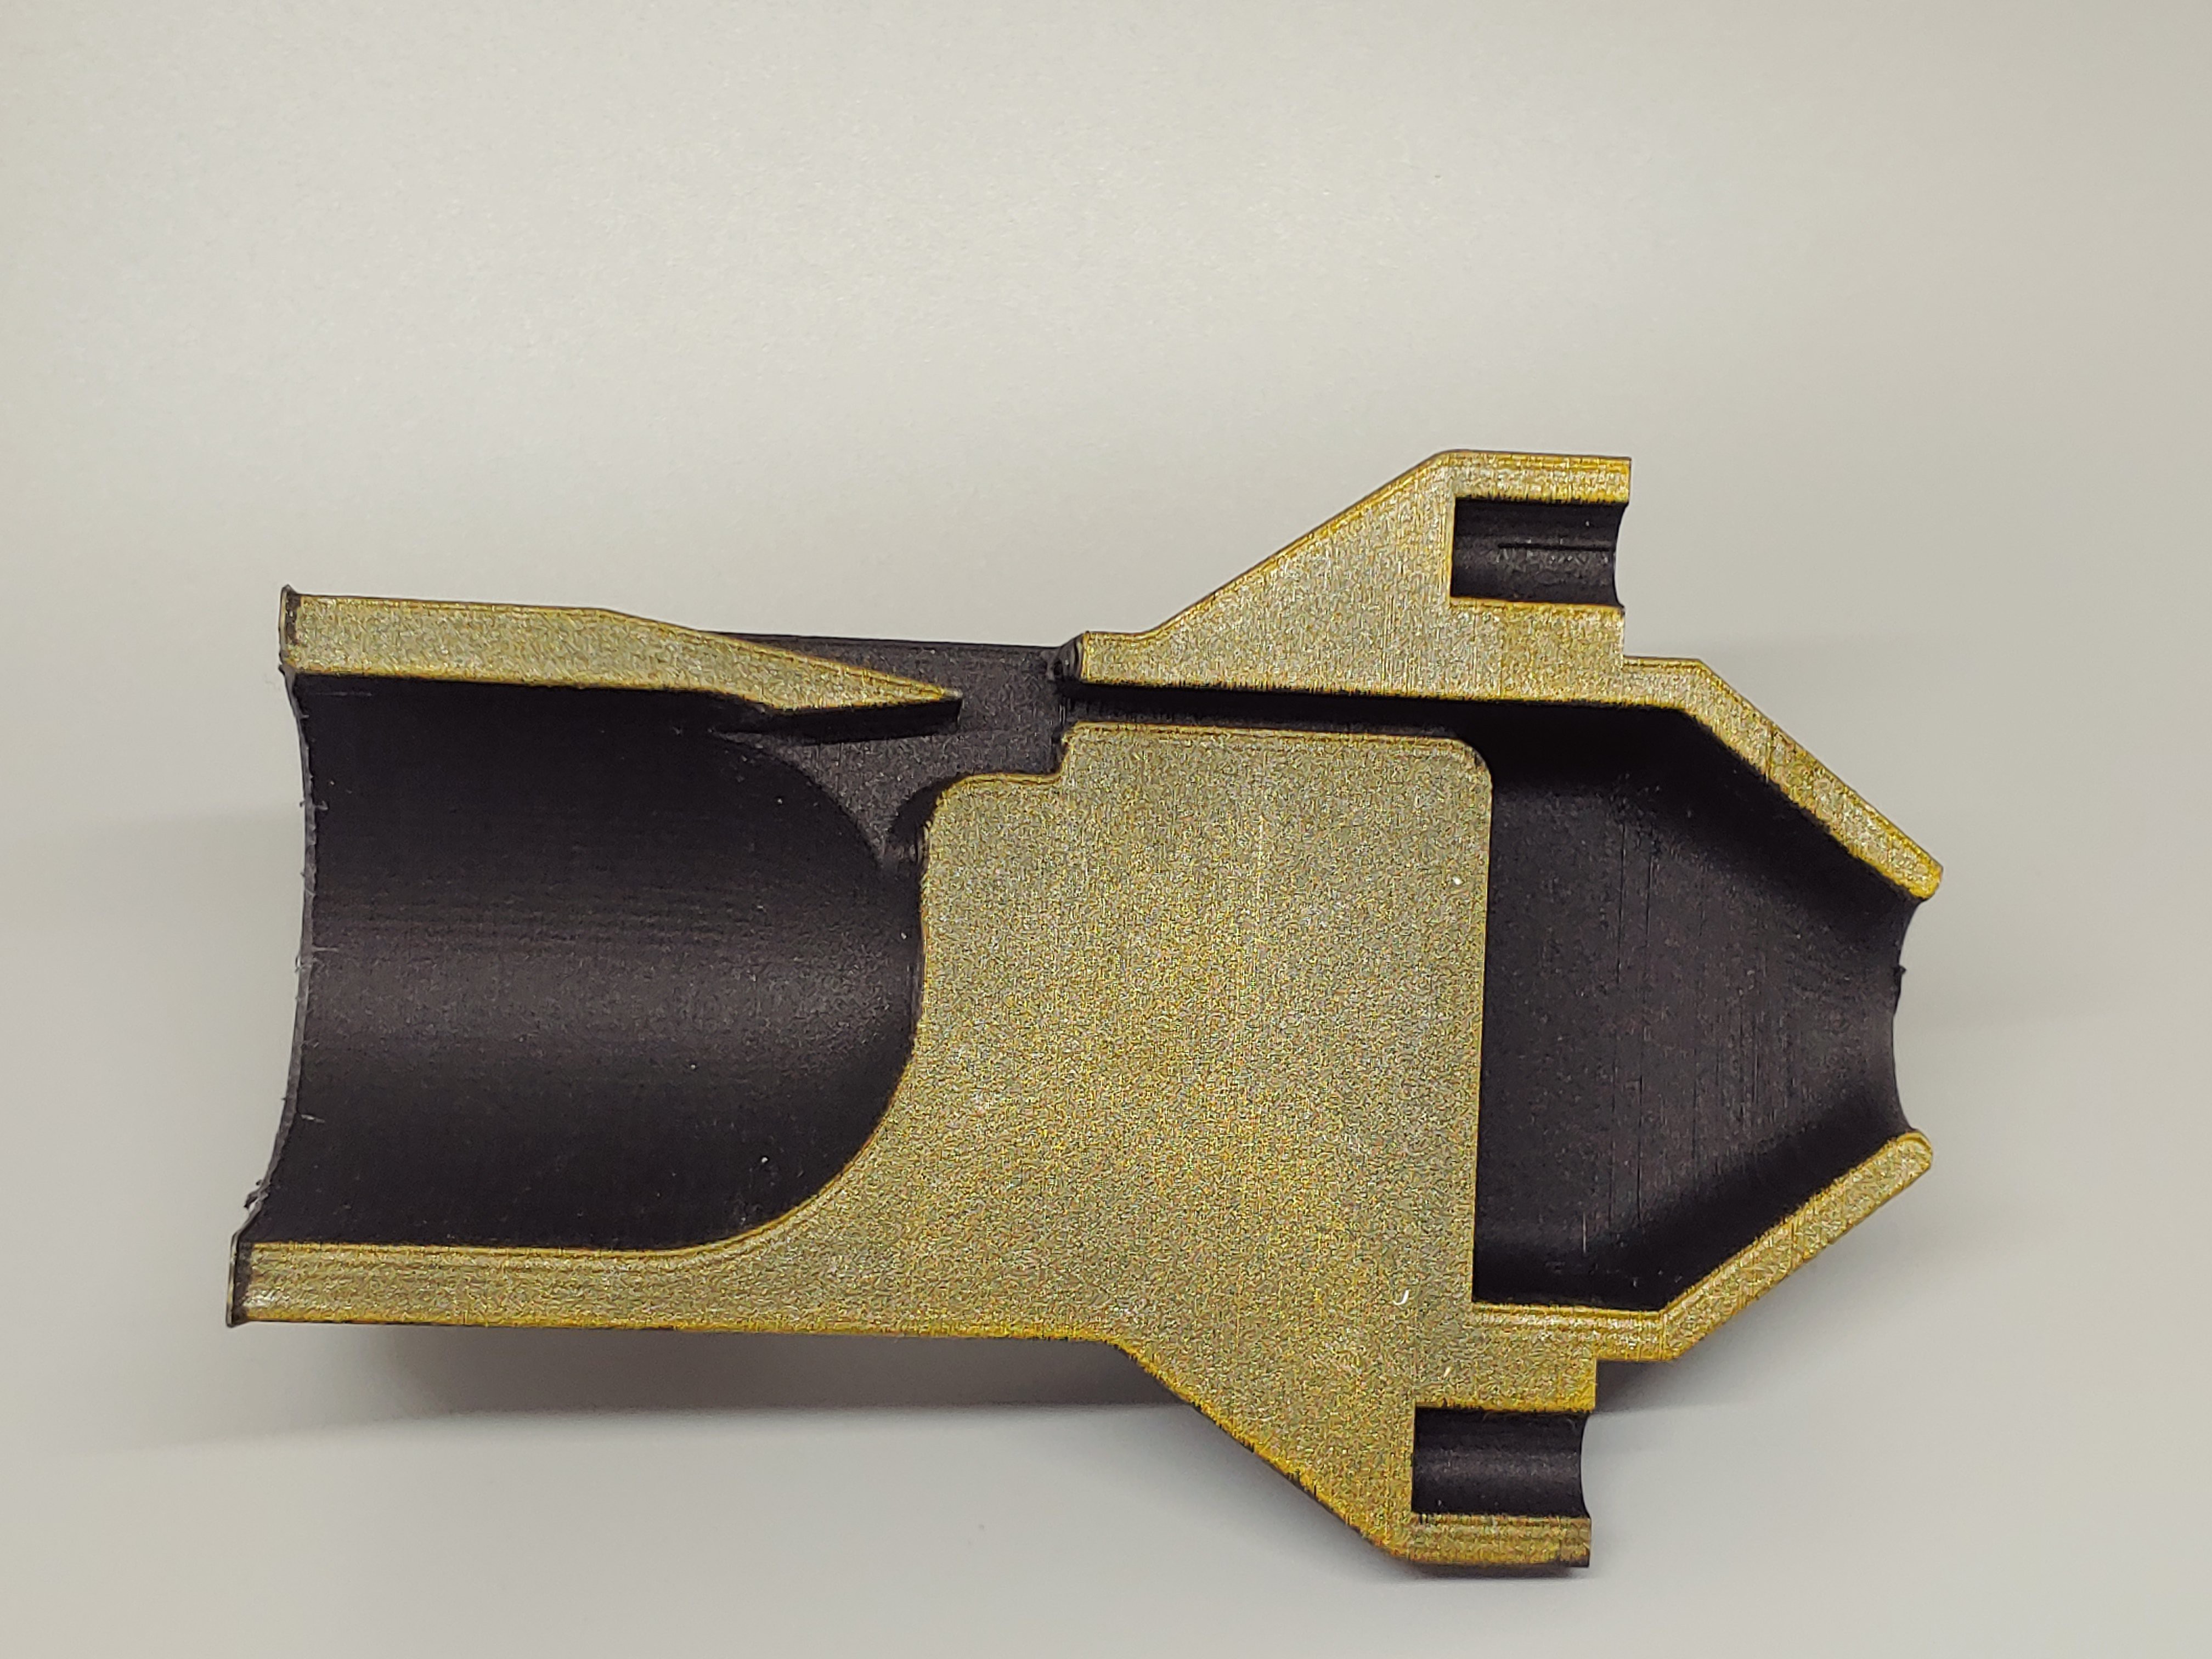
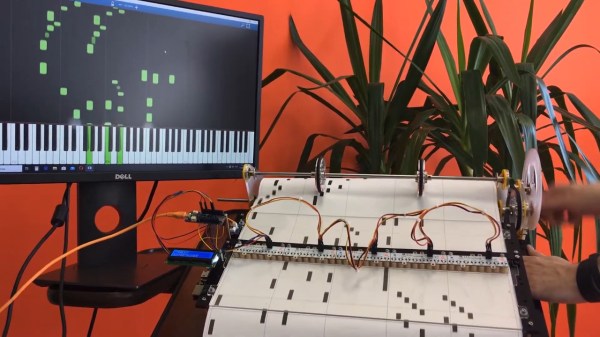
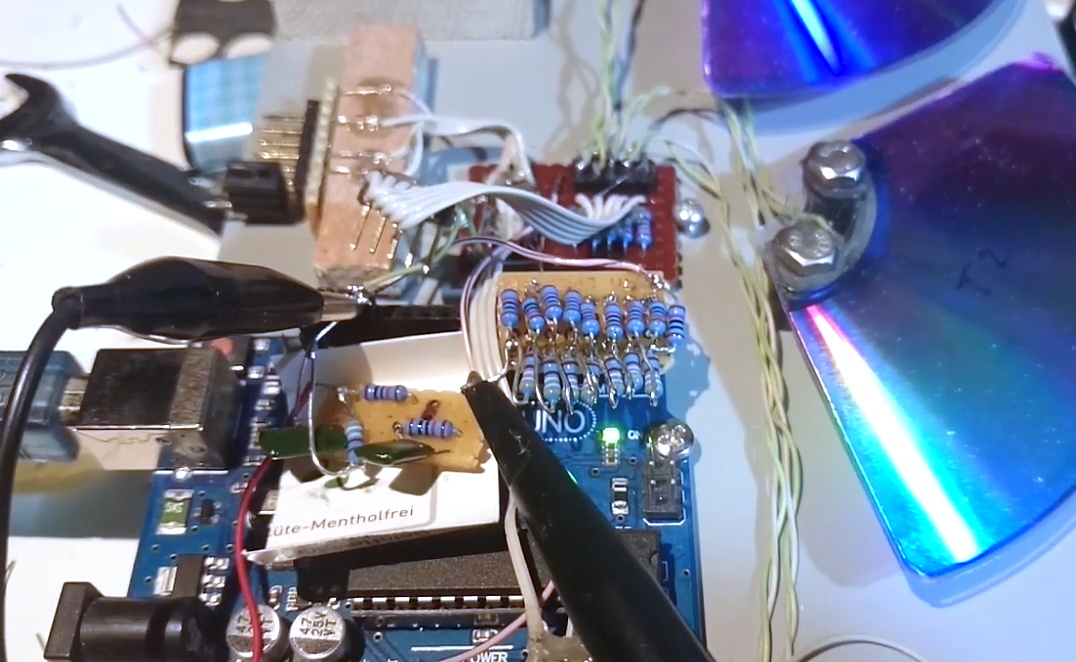
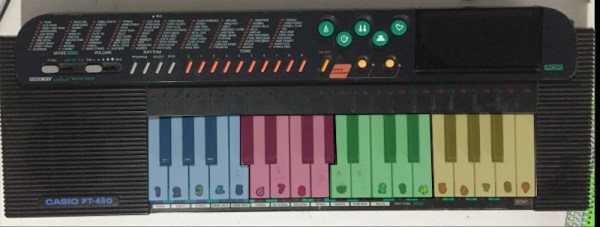
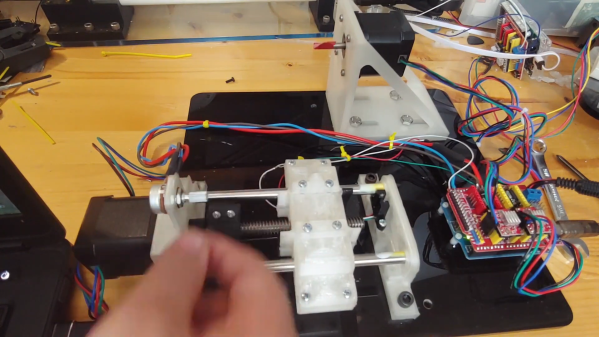
First off, as [The Mixed Signal] points out, his pickups aren’t intended for use on a guitar. As we’ve seen before, the musical projects he has tackled are somewhat offbeat, and this single-pole pickup is destined for another unusual instrument. That’s not to say a guitar pickup couldn’t be wound on this machine, of course, as could inductors, solenoids, or Tesla coils. The running gear is built around two NEMA-17 stepper motors, one for the coil spindle and one for the winding carriage. The carriage runs on a short Acme lead screw and linear bearings, moving back and forth to wind the coil more or less evenly. An Arduino topped with a CNC shield runs the show, allowing for walk-away coil winding.

We do notice that the coil wire seems to bunch up at the ends of the coil form. We wonder if that could be cured by speeding up the carriage motor as it nears the end of the spool to spread the wire spacing out a bit. The nice thing about builds like these is the ease with which changes can be made — at the end of the day, it’s just code.

Continue reading “A Pair Of Steppers Are Put To Work In This Automatic Instrument Pickup Winder”

Starshine Is A MIDI Controller For The Musically Shy

What keeps people from playing music? For one thing, it’s hard. But why is it hard? In theory, it’s because theory is confusing. In practice, it’s largely because of accidentals, or notes that sound sour compared to the others because they aren’t from the same key or a complementary key.

What if there were no accidentals? Instruments like this exist, like the harmonica and the autoharp. But none of them look as fun to play as [Bardable]’s Starshine, the instrument intended to be playable by everyone. The note buttons on the outside are laid out and programmed such that [Bardable] will never play off-key.

We love the game controller form factor, which was also a functional choice. On the side that faces the player, there’s a PSP joystick and two potentiometers for adding expression with your thumbs. The twelve buttons on this side serve several functions like choosing the key and the scale type depending on the rocker switch position. A second rocker lets [Bardable] go up or down an octave on the fly. There’s also an OLED to show everything from the note being played to the positions of the potentiometers. If you want to know more, [Bardable] made a subreddit for this and other future instruments, and has a full tour video after the break.

If this beginner-friendly MIDI controller isn’t big enough for you, check out Harmonicade’s field of arcade buttons.

Continue reading “Starshine Is A MIDI Controller For The Musically Shy”

MIDI Slide Whistle Shows The Value Of A Proper Fipple

We pride ourselves on knowing the proper terms for everyday things: aglet, glabella, borborygmi, ampersands. But we have to confess to never having heard of a “fipple” before finding this interesting MIDI-controlled slide whistle, where we learned that the mouthpiece of a penny whistle or a recorder is known as a fipple. The more you know.

This lesson comes to us by way of a Twitter post by [The Mixed SIgnal], which showed off the finished mechanism in a short video and not much else. We couldn’t leave that alone, so we reached out for more information and were happy to find that [The Mixed SIgnal] quickly posted a build log on Hackaday.io as well as the build video below.

The slide whistle is a homebrew version of the kind we’ve all probably annoyed our parents with at one time or another, with a 3D-printed fipple (!) and piston, both of which go into a PVC tube. Air is supplied to the pipe with a small centrifugal blower, while a 3D-printed rack and pinion gear of unusual proportions moves the piston back and forth. An Arduino Due with a CNC shield controls the single stepper motor. The crude glissandos of this primitive wind instrument honestly are a little on the quiet side, especially given the racket the stepper and rack and pinion make when queuing up a new note. Perhaps it needs more fipple.

While the humble author is new to fipple-isms, luckily the Hackaday editors see all and know that there two epic hacks featuring fipples to create bottle organs. These are far from the first weirdest instruments we’ve seen — a modulin, a Wubatron, and the Drum-Typeulator all fit that bill well. But we like what [The Mixed Signal] has done here, and we’re looking forward to more.

Continue reading “MIDI Slide Whistle Shows The Value Of A Proper Fipple”

Less Rock, More Roll: A MIDI Barrel Piano

Strolling around a park, pedestrian zone, or tourist area in any bigger city is rarely complete without encountering the sound of a barrel organ — the perfect instrument if arm stamina and steady rotation speed are your kind of musical skills. Its less-encountered cousin, and predecessor of self-playing pianos, is the barrel piano, which follows the same playing principle: a hand-operated crank rotates a barrel, and either pins located on that barrel, or punched paper rolls encode the strings it should pluck in order to play its programmed song. [gabbapeople] thought optocouplers would be the perfect alternative here, and built a MIDI barrel piano with them.

Keeping the classic, hand-operated wheel-cranking, a 3D-printed gear mechanism rolls a paper sheet over a plexiglas fixture, but instead of having holes punched into it, [gabbapeople]’s piano has simple markings printed on them. Those markings are read by a set of Octoliner modules mounted next to each other, connected to an Arduino. The Octoliner itself has eight pairs of IR LEDs and phototransistors arranged in a row, and is normally used to build line-following robots, so reading note markings is certainly a clever alternative use for it.

Each LED/transistor pair represents a dedicated note, and to prevent false positives from neighboring lines, [gabbapeople] 3D printed little collars to isolate each of the pairs. Once the signals are read by the Arduino, they’re turned into MIDI messages to send via USB to a computer running any type of software synthesizer. And if your hands do get tired, you can also crank it with a power drill, as shown in the video after the break, along with a few playback demonstrations.

It’s always fun to see a modern twist added to old-school instruments, especially the ones that aren’t your typical MIDI controllers, like a harp, a full-scale church organ, or of course the magnificently named hurdy-gurdy. And for more of [gabbapeople]’s work, check out his split-flip weather display.

Continue reading “Less Rock, More Roll: A MIDI Barrel Piano”

Raspberry Pi Plays A MIDI Tune Wherever You May Roam

MIDI controller keyboards are great because they let you control any synthesizer you plug them into. The only downside: you need a synthesizer to turn MIDI notes into actual sounds, slightly complicating some summer night campfire serenading. Not for [Geordie] though, who decided to build the nanoPi, a portable, MIDI instrument housing a Raspberry Pi.

Using a Korg nanoKEY2 USB MIDI controller as base for the device, [Geordie] took it apart and added a Raspberry Pi Zero W, a power bank to, well, power it, and a USB hub to connect a likewise added USB audio interface, as well as the controller itself. As the nanoKEY2 has a naturally slim shape, none of this would ever fit in it, so he designed and 3D printed a frame to extend its height. Rather than wiring everything up internally, he decided to route the power and data cable to the outside and connect them back to the device itself, allowing him to use both the power bank and the controller itself separately if needed.

On the software side, the Pi is running your common open source software synthesizer, Fluidsynth. To control Fluidsynth itself — for example to change the instrument — [Geordie] actually uses the Termius SSH client on his phone, allowing him also to shut down the Pi that way. While Fluidsynth’s built-in MIDI router could alternatively remap the nanoKEY2’s additional buttons, it appears the functionality is limited to messages of the same type, so the buttons’ Control Change messages couldn’t be remapped to the required Program Change messages. Well, there’s always the option to fit some extra buttons if needed. Or maybe you could do something clever in software.

As you may have noticed, the nanoPi doesn’t include any speaker — and considering its size, that’s probably for the best. So while it’s not a fully standalone instrument, it’s a nice, compact device to use with your headphones anywhere you go. And thanks to its flexible wiring, you could also attach any other USB MIDI controller to it, such as this little woodwind one, or the one that plays every pop song ever.

Continue reading “Raspberry Pi Plays A MIDI Tune Wherever You May Roam”

Arduino Drums Bring The Noise, No MIDI Required

When looking through existing Arduino drum kit projects, [joekutz] noticed that most of them just used the microcontroller as an input for an existing MIDI device. That’s fine if you’re just looking to build your own hardware interface, but he wondered if it would be possible to forgo the MIDI device completely and actually generate the audio internally.

To be sure, this is a lot to ask of an 8-bit microcontroller, which is probably why nobody does it this way. But [joekutz] wasn’t giving up without a fight. One of the trickiest aspects was storing the samples: the 8-bit, 11.025 KHz mono WAV files ultimately had to be converted into C data arrays with a custom Python script.

Unfortunately, since the samples are essentially part of the drum’s source code, he says distributing the firmware is something of a problem. Though it sounds as though there might be a solution to this soon for those who want to play along at home.

But don’t get the impression that this project is just software. Check out the custom impact sensors lovingly crafted from popsicle sticks and metal cut from soda cans, which have been mated with sections cut out of old DVD-Rs. Actually getting the beats out of the Arduino required the addition of a R2R DAC circuit and a TDA2822 amplifier. In the video after the break, you can hear the results for yourself.

[joekutz] is no stranger to homebrew electronic instruments. When we last heard from him, he was turning a very pink keyboard into his own personal circuit bending playground.

Continue reading “Arduino Drums Bring The Noise, No MIDI Required”

Adding MIDI To An Old Casio Keyboard

Not content to rule the world of digital watches, Casio also dominated the home musical keyboard market in decades past. If you wanted an instrument to make noises that sounded approximately nothing like what they were supposed to be, you couldn’t go past a Casio. [Marwan] had just such a keyboard, and wanted to use it with their PC, but the low-end instrumented lacked MIDI. Of course, such functionality is but a simple hack away.

The hack involved opening up the instrument and wiring the original keyboard matrix to the digital inputs of an Arduino Uno. The keys are read as a simple multiplexed array, and with a little work, [Marwan] had the scheme figured out. With the Arduino now capable of detecting keypresses, [Marwan] whipped up some code to turn this into relevant MIDI data. Then, it was simply a case of reprogramming the Arduino Uno’s ATMega 16U2 USB interface chip to act as a USB-MIDI device, and the hack was complete.

Now, featuring a USB-MIDI interface, it’s easy to use the keyboard to play virtual instruments on any modern PC DAW. As it’s a popular standard, it should work with most tablets and smartphones too, if you’re that way inclined. Of course, if you’re more into modular synthesizers, you might want to think about working with CV instead!