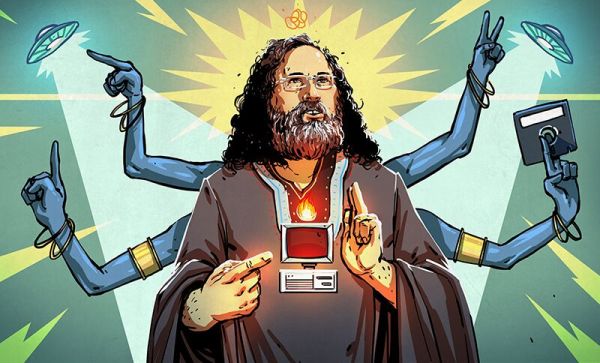
Fail Of The Week: Re-addressing Your RAM DIMM

It doesn’t work and we’re not surprised considering the can of worms that comes with RAM addressing. Right off the bat we assume timing problems due to variance in the trace lengths and EM issues. But you have to hand it to [cyandyedeyecandy] for even trying. The self-proclaimed upgrade seeks to readjust how the DIMM works without changing the edge pinout.

The stick shown here is a 512 MB module that, because of the computer using it (unspecified in the post), is only allowing access to 256 MB. The added chips and free-form circuit make up an AND for the chip-select line, and flip-flop for the bank address.

The post is a gorgeous cry for help. We already weighed in from the peanut gallery at the top (seriously, that’s somewhat baseless guessing) so step up to the computer-engineering plate and let us know what needs to be done to make this most-awesome-of-non-working hacks actually work.

Once you’ve figured this out, here’s another one to scratch at your brain with.

A Cellular Dev Kit With A Data Plan

After years of futzing around with 433 MHz radios and WiFi, we’re finally seeing a few dev boards that are focused on cellular radio modules. The Konekt Dash is the latest offering that puts a small u-blox SARA cellular module on a board with a small ARM Cortex M4 microcontroller for a complete cellular solution for any project you have in mind. Yes, until we get radios that make sense for an Internet of Things, this is the best you’re going to get.

If the Konekt sounds familiar, you’re right. A few months ago, Spark introduced the Electron, a cellular dev board based on the u-blox SARA-U260 module that includes a SIM with a 1MB of data a month. Practically, it’s not much different from the Konekt, but the Dash and Dash pro offer battery management and a battery connector, two power supplies, and encryption from the board to a server. There are slight differences for about the same price, but that’s what’s great about competition.

The Konekt Dash is now a few days in to a Kickstarter campaign that includes as rewards a board and a SIM with a six months to a year’s worth of data. There are a lot of things that can’t be done with WiFi, Bluetooth, or other radio modules, and if you have something like that in mind, you won’t do better than a Konekt or Spark Electron.

Trash Can Guitar Cab

Guitar Speaker Cabinet Actually Belongs In Garbage Can

[Dano] builds a lot of guitar pedals and amps. He needed a speaker cabinet dedicated to this task in order to be a consistent reference when checking out his electronic creations. He ordered a couple of 10″ guitar speakers…. and they sat around for a while.

Then one day at the craft store, he stumbled on an inexpensive wooden trash can. It had a tapered design and came with a lid. As would any normal person, [Dano] immediately thought these would make a perfect speaker cabinet so he bought two of them.

The trash cans would be used in an upside-down orientation. The intended lid makes for a well fitting bottom of the cabinet. Holes were cut for the speaker and two terminal blocks. Since these cabinets would be used for testing a bunch of different amps, two different terminal blocks were used to permanently have multiple connector types available.

A pair of modern kitchen cabinet handles were used as carrying handles for each of the two cabinets. If a speaker cabinet one speaker tall is cool, a cabinet two speakers tall must be twice as cool. To get there, the two cabinets were bolted together using electrical conduit as an industrial looking spacer. Those brackets bolted to the sides of the bottom cabinet are actually Ikea shelf brackets that [Dano] had bought and never used. The Ikea brackets support casters making for easy moving around the studio.

Overall, [Dano] is happy with how his cabinets sound. They are very unique and interesting at the least. We’d be happy to play some riffs through them!

Repurposing A Palm Portable Keyboard

Typing comfortably on a Smart Phone is best done using an external keyboard, especially if you spend a lot of time on IRC or use other chat apps. Obviously, the keyboard needs to be portable too. [cy384] felt the current crop of portable keyboards left a lot to be desired in terms of build quality and feel. That’s when the Palm Portable Keyboard (PPK) caught his eye. It’s small enough to fold up and fit in a pocket, yet unfolds to a size big enough to feel comfortable while typing. Unfortunately, the version he preferred to use did not have either a Bluetooth or a USB interface, so he built up this Palm keyboard adapter.

The portable keyboards have a serial interface and custom connectors depending on the Palm model they were designed to connect to. [cy384]’s goal was to adapt the PPK as a generic USB HID keyboard using an Arduino Pro Mini clone, with a 3D printed adapter for both of the keyboard types that he had. The keyboards  use inverted TTL logic at 9600 baud with no parity and one stop bit. Some handshaking needs to be taken care of and there’s a low power mode that needs to be managed via the Arduino code. He was lucky to get his hands on a reference document that provided the hardware and software details to help him crack all of this. His Github repository has the code and 3D printable files for the adapters.

An Introduction To Clock Dividers And Psychological Warfare

A while ago, [nsayer] was inspired by a Hackaday post to build one of the most insidious means of psychological warfare. I speak, of course, of the [Lord Vetinari] clock, a clock that ticks at random intervals, but still keeps accurate time. His build, the Crazy Clock, is a small controller board for off-the-shelf clock movements that adds the [Vetinari] feature to any clock by soldering only a few wires.

The Crazy Clock is a pretty simple device consisting of only a 32.768 kHz crystal, a microcontroller, and a few transistors to pulse the movement of a clock mechanism. While psyops is great, it recently occurred to [nsayer] that this device could be used for other build.

Since the output of the Crazy Clock doesn’t necessarily have to be connected to a clock movement, [nsayer] decided to connect a LED, generating a 60Hz flashing light for a phonograph strobe. This is easy with timer prescalers and clock dividers; the original 32.768 kHz signal is divided by 8 to produce a clock that ticks every 4.096 kHz.  Divide that again by 120, and you get 34 2/15. Yes, this is all stuff you learned in fourth grade, and if you’re smarter than a third grader you can eventually whittle a 32.768 kHz clock down to a nice, round, binary number – exactly what you need for computing time.

[nsayer] posted a 240 fps (vertical) video of his Crazy Clock blinking at 60 Hz. You can see that below.

Continue reading “An Introduction To Clock Dividers And Psychological Warfare”

DIY Seven Segment Displays

[Esai] wanted to build an electronic clock from scratch. A noble quest, but ordinary seven-segment displays are just that – incredibly ordinary. Instead of a few displays that can be bought from the usual retailers for a dollar a piece, [Esai] made his own four digit, seven-segment display on some perfboard.

Before soldering 58 SMD LEDs to a small rectangle of perfboard, [Esai] traced out each segment with a marker. Two LEDs make up each segment, and they’re all connected to a breadboard-friendly pin header with 30 gauge wire.

Each segment is connected as a single column in the LED matrix, and each digit is a row. It’s a simple design, but there aren’t any resistors on this board. Hopefully [Esai] will be using a proper LED driver with this display; you really don’t want LEDs to burn out twice a day at 1:11.

Tank Track Motorcycle Goes Anywhere, Slowly

There are just somethings you don’t see often when it comes to motorcycles, 2 wheel drive and tank tracks. Well, [jeep2003] has combined both those oddities into one project he calls the Track-Powered 2×2 MiniBike.

As his descriptive project name suggests, this minibike has tracks instead of wheels. The track assemblies originally came off a snow blower. As if just having tracks wasn’t difficult enough, both sets are powered. The back has a straight forward chain and sprocket setup while the front ads in a clever jack-shaft and universal joint contraption which is shown in the video after the break around the 3:08 mark.

Tank Track Mini Bike

[jeep2003] doesn’t say where the tubing for his custom made frame came from, but from the photos available it appears they were once old bicycle frames. The powerplant is a 6.75hp vertical shaft Briggs & Stratton engine. The output shaft connects to a Peerless 5 speed transmission that also has reverse. This transmission usually outputs to two rear drive wheels of a riding lawnmower. [jeep2003] dedicates each axle output from the transmission to power one of the two track systems.

Although this minibike won’t be breaking any land speed records anytime soon, we here at HaD still think it’s a pretty rad build.

Continue reading “Tank Track Motorcycle Goes Anywhere, Slowly”