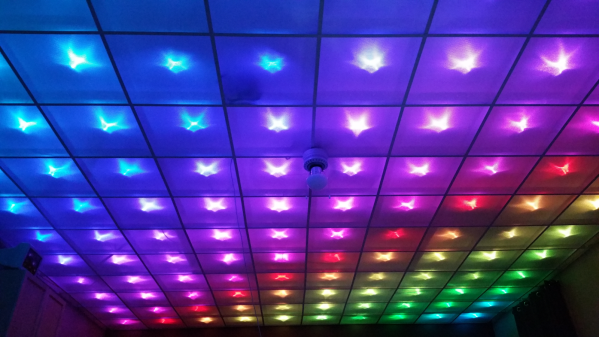
 Disco Floor’s are passé. [dennis1a4] turned them upside down and built an awesome RGB LED ceiling display using some simple hardware and a lot of elbow grease. His main room ceiling was exactly 32 ft x 20 ft and using 2 sq. ft tiles, he figured he could make a nice grid using 160 WS2812B RGB LEDs. A Teensy mounted in the ceiling does all the heavy lifting, with two serial Bluetooth modules connected to it. These get connected to two Bluetooth enabled NES game controllers. Each of the NES controller is stuffed with an Arduino Pro Mini, a Bluetooth module, Li-Ion battery and a USB charge controller.
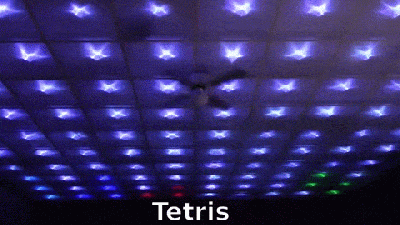
Bluetooth is in non-secure mode, allowing him to connect to the Teensy, and control the LEDs, from other devices besides the NES controllers. The Teensy is mounted at the centre of the ceiling to ensure a good Bluetooth link. Programming required a lot of thought and time but he did manage to include animations as well as popular games such as Snake and Tetris.
 The hard part was wiring up all of the 160 LED pixels. Instead of mounting the 5050 SMD LED’s on PCBs, [dennis1a4] wired them all up “dead bug” style. Each pixel has one LED, a 100nF decoupling capacitor, and 91 ohm resistors in series with the Data In and Data Out pins – these apparently help prevent ‘ringing’ on the data bus. Check the video for his radical soldering method. Each SMD LED was clamped in a machine shop vice, and the other three parts with their leads preformed were soldered directly to the LED pins.
The other tedious task was planning and laying out the wiring harness. Sets of 10 LEDs were first wired up on the shop bench. He then tacked them up to the ceiling and soldered them to the 14 gauge main harness. The final part was to put up the suspended ceiling and close the 2 sq. ft. grids with opaque plastic.
[dennis1a4] did some trials to figure out the right distance between each LED and the panel to make sure they were illuminated fully without a lot of light bleeding in to adjacent panels. This allowed him to get away without using baffles between the tiles.
Check out the video to see a cool time-lapse of the whole build.


 If your scope is relatively recent, like this side of the late 1990s, it might support National Instrument’s

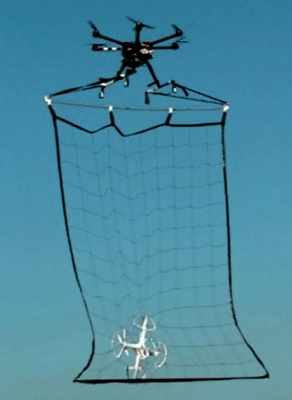 Simply shooting them down won’t do — think of the innocent bystanders on the ground subjected to a rain of quadcopter parts. The Tokyo police’s solution:


