[Chris] lives in South Sudan, where there are a lot of poor areas with terrible infrastructure. One of the bigger challenges for this area is getting people and materials over roads that are either bad or don’t exist. Normal vehicles aren’t built for the task, and a Hilux or Land Cruiser is much to expensive. For his Hackaday Prize entry, [Chris] is building a rugged low-cost utility vehicle platform for the developing world.
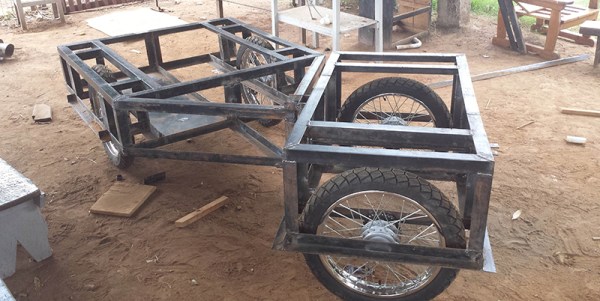
This battery-powered, four-wheel cart is made out of what [Chris] could find. The frame is made out of 50x50mm angle iron that’s welded together, with the body panels fabricated out of 1200x2400x1.2mm sheet that’s sourced locally. While [Chris] would like better wheels, the cheap Chinese motorcycle wheels are everywhere and cheap – $65, which includes the bearings, breaks, and sprockets. It even has higher ground clearance than the Land Cruiser.
[Chris] already has a prototype of his project built and it’s rolling around. You can check out a video of that below.
Continue reading “Hackaday Prize Entry: A Light Electric Utility Vehicle”

 Zero to Product Workshop
 Holding down an awesome booth at Maker Faire all day makes us weary. We’ll recharge our batteries on Saturday, June 20th starting at 7pm. Join us at Bionic Brew (please be kind and