Does your Gated Community make you feel secure due to the remote-controlled gate keeping the riffraff out? Residents of such Gated Communities in Poland are now shaking in fear since [Tomasz] has hacked into his own neighborhood by emulating the signal that opens the entrance gate. Shockingly, this only took about 4 hours from start to finish and only about $20 in parts.
Most of these type of systems use RF communication and [Tomasz’s] is no difference. The first step was to record the signal sent out by his remote. A USB Software Defined Radio transmitter/receiver coupled with a program called SDR# read and recorded the signal without a hitch. [Tomasz] was expecting a serialized communication but after recording and analyzing the signal from several people entering the community it became clear that there was only one code transmitted by everyone’s remote.
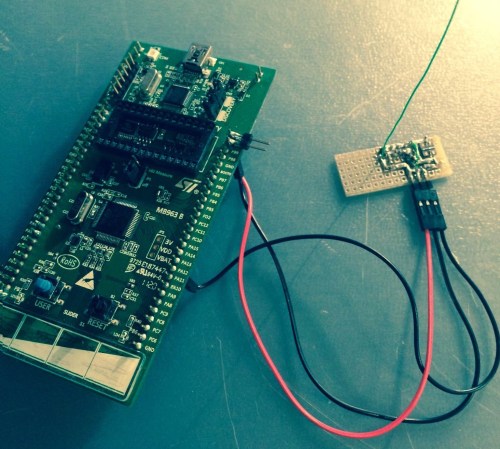
Now that he knows the code, [Tomasz] has to figure out a way to send that signal to the receiver. He has done this by making an RF transmitter from just a handful of parts, the meat and potatoes being a Colpitts oscillator and a power amplifier. This simple transmitter is connected to a DISCOVERY board that is responsible for the modulation tasks. [Tomasz] was nice enough to make his code available on his site for anyone that is interested in stopping by for a visit.