

This week we’re getting to know The Hackaday Prize Judge [Jack Ganssle] a little better. His depth of experience with embedded systems is formidable, and recently I was very interested to learn about his mission to improve the quality of the product in the embedded code universe. We’ll get to that in a little bit, but I wanted to start off with [Jack’s] answer to my final question.
![]() Is there anything else you’d like our audience to know about you?
Is there anything else you’d like our audience to know about you?
![]()
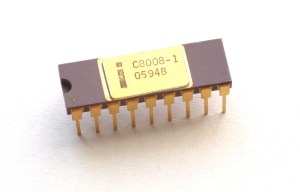 My entry into this field was when the first 8 bit processor (the 8008) came out, and still find it endlessly fascinating. I write a lot about embedded topics, and give talks and seminars, on all of the continents except Antarctica (so far!). We live in heavily-wooded Finksburg, MD, which is just stunning this time of year, and, since my office is in the house, the commute is pretty tolerable. Other passions include sailing; I wrote an on-line book (www.ganssle.com/jack) about racing alone across the Atlantic. Great trip, other than losing the boat.
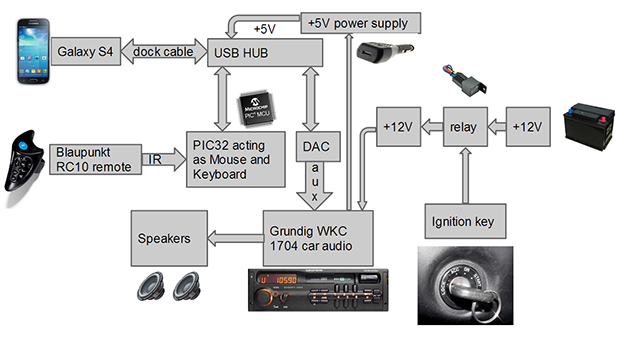
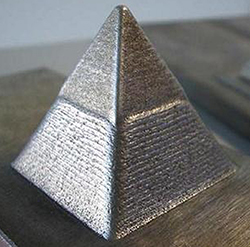 For years now, people have been trying to develop an affordable, RepRap-derived 3D printer that will create objects in metal. There has been a lot of work with crazy devices like high-powered lasers, and electron beams, but so far no one has yet developed a machine that can print metal objects easily, cheaply and safely. For The Hackaday Prize,