Disabling Under/over Voltage Protection On ATX Power Supplies

voltage

[C] just recently put together a RepRap. Not wanting to spend the money on a dedicated power supply, he looked around for a cheaper solution and found one in an off-the-shelf ATX computer power supply. These ATX supplies are actually a little finicky when not used in a computer, as [C] found, with voltage drops on the +12 line even when a load is connected to the supply. Undeterred, [C] eventually solved this problem by cutting some traces and grounding a few pins on the protection circuit.

The ATX supply [C] used could supply 25 amps on the 12 volt rail, more than enough for a simple RepRap. There was only one problem: the supply would randomly shut itself off, ruining the print. After a little googling, [C] found some people powering 12 volt amplifiers that were running into the same problem. Their solution was to ground a few pins on the protection circuit. Their supply wasn’t quite like [C]’s so he had to do a little experimentations.

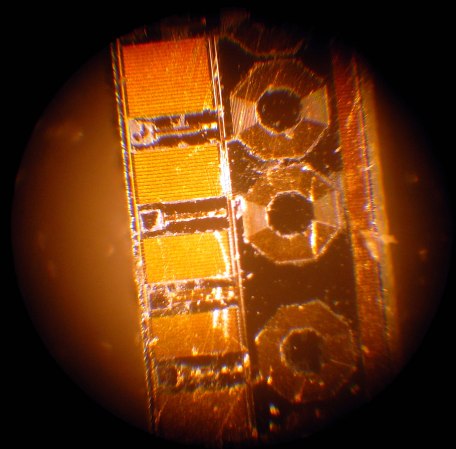
It took a few iterations to get right, but [C] managed to figure out exactly which pins on the “power supply supervisor” IC must be grounded to disable the undervoltage protection. With these pins grounded, the protection circuit of the supply is completely disabled, giving him and uninterrupted 25 amps at 12 volts. If you’re looking for a cheap source of power, it would be hard to go wrong with [C]’s tutorial and his power supply of choice.

Bluetooth Low Energy Weather Lamp

bluetooth_low_energy_ble_weather_lamp

This is a well-executed proof of concept which [Aaron Jeromin] threw together in a couple of hours. This lamp hosts a Bluetooth Low Energy weather display. The project was a way for him to get used to using the BLE module. But to make the most out of that hardware this should really be refined into an actual low energy circuit. We do think the timing is perfect to feature this project since we just looked at a BLE primer yesterday.

He’s using a BLE Mini board from RedBearLab. It uses a Texas Instruments CC2540 SoC. We’d love to see a follow-up that does away with the Arduino in lieu of code running on the TI chip. But we would have done the same thing (use the uC we were most familiar with) when testing the BLE board out for the first time. It gets weather data from an iPhone. The forecast is projected as one of three icons using an LED bulb and a stencil which is positioned by a hobby servo.

Other inanimate objects that can tell you if it’s storming include this color-coded umbrella stand.

Continue reading “Bluetooth Low Energy Weather Lamp”

24-hour Hackathon Produces Respectable Accelerometer Labyrinth

hackathon-labyrinth

We’re not sure if this was some type of corporate team building, but if it was sign us up for the next one. [Filipp], [Saluka], and [Michael] participated in a recent 24-hour hackathon hosted by Microsoft. They whipped up this labyrinth game controlled by a Nexus 4 Android phone.

This thing looks so well crafted we’re shocked that it’s a 24-hour build. Just putting together the walls of a maze that size takes some time. They then mounted it in a gimbaled frame which tilts the using servos. Check out the demo video below to get a look at the underpinnings. There are several elastic bands connecting the base to the maze. These act as shock absorbers to help keep the movement smooth and to prevent any oscillations from the frame flexing. For us this is an important design element that we’ll keep in mind (just in case we need to win another competition by designing a labyrinth).

An Arduino controls the servos, using Bluetooth to communicate with the phone. The team mentions some filtering used to help make the user experience more natural but we didn’t see many details on this aspect of the hack.

Continue reading “24-hour Hackathon Produces Respectable Accelerometer Labyrinth”

Many Iterations Of A Plywood Stool That Requires No Glue

cnc-router-stool-design

At his local hackerspace [Vincent Sanders] noticed an interesting problem. The stools that they had were great in most cases, but there was one workbench which was very much the wrong height for them. So began his quest to design and fabricate plywood stools which use no glue for their joints.

The Cambridge Makespace (in the UK) turns out to be a perfect environment for this type of project. They already had a CNC router which can cut the plywood pieces, and there are other members who were willing to help train [Vincent] on the equipment. He found a design on Thingiverse which fit the bill, except for the actual measurements. He needed metric units to match the sheet stock available to him. Once converted he put together a stool that didn’t work at all. The thickness of the plywood just didn’t mesh with the tolerances of the joints. After wandering around to different suppliers in town, digital calipers in hand, he came up with a range of actual thicknesses and adjusted his joint design accordingly.

Of course this wasn’t the last revision. Even with the joints working the seat was still a little rickety. He moved to the next plywood thickness offered, redesigning the files to match. His final stool works like a charm, with five or six of them fitting on one standard sheet of plywood.

Fail Of The Week: Motorizing A PCB Cutting Shear

This week’s fail is an attempt to retrofit a PCB cutting shear with a geared motor. The project was undertaken by [David Cook]. Incidentally he’s very near and dear to us as his book Robot Building for Beginners got us started with hacking in the first place.

This $200 shearing tool is hand-operated and can cut through boards up to 1/16″ thick. But [David] really had to crank on the thing to make a cut. This often resulted in crooked board edges. He decided to do the retrofit in order to achieve higher precision. He sourced a high-torque motor from eBay for around $50 delivered.

Continue reading “Fail Of The Week: Motorizing A PCB Cutting Shear”

As Millenials Grow Up Do They Demand Cooler LED Sneakers?

flora-LED-sneakers

We’re hoping that whomever came up with the idea of integrating LEDs into children’s shoes is kicking back on a beach somewhere living off the residuals of the idea. We see those things everywhere. Now the real question is, if you grew up with LEDs in your shoes do you expect cooler light up kicks as you age? [Becky Stern] must think so and that’s why she’s showing off Adafruit’s addressable LED strip shoe project called Firewalker.

This is prototype rather than product, so you can see the Arduino compatible Flora board on the ankle of the lit shoe above. There’s also a battery pack hitching a ride on the laces. But those worried about that fashion faux pas can work on a more finished driver that straps to your calf, or can be integrated in the insole.

Lighting patterns are set off by Velostat, a pressure-sensitive conductive sheet that goes in the heel of the insole. The Flora board measures the resistance, triggering a light show (embedded below) when it drops. Now we just need someone to integrate a power generator based on your movement.

Continue reading “As Millenials Grow Up Do They Demand Cooler LED Sneakers?”

Primer On Bluetooth Low Energy

We’re sure that, like us, you’ve heard at least something about Bluetooth Low Energy (BLE). Blutooth 4.0 is another name for BLE and it’s already available in some smartphones; starting with the iPhone 4S, BlackBerry 10, and with Android support added in 4.3 — Jelly Bean. Here’s your chance to get acquainted which what the specification brings to the table. The source material (which we’ll talk about below) provides a ton of background. But if you want a succinct overview check out [Gervasi’s] summary of Bluetooth Low Energy.

We won’t republish the technical details here as both articles do a great job of covering those. Here’s what you should take away from BLE: It’s meant for use with devices running off of a tiny power source. The one outlined in both articles is a coin-cell. But we prefer to think of the future that is energy harvesting. Peak current is limited to 15 mA. This does limit the throughput, but think sensors, not Bluetooth headsets. You just don’t need to push all that much data from these devices. A cleverly designed energy harvesting circuit should be able to implement BLE devices with no battery whatsoever.

We did mention a deeper exploration of the standard. The image above comes from this BLE Primer for Developers. Add it to your weekend reading.

[via Reddit]