Keys? Who needs them? Well, pretty much everyone. You can’t deny that there are some ridiculously crowded key chains out there. It’s clear that [Robb] wanted to hit the other side of that spectrum when he started working on his latest multi-key project.
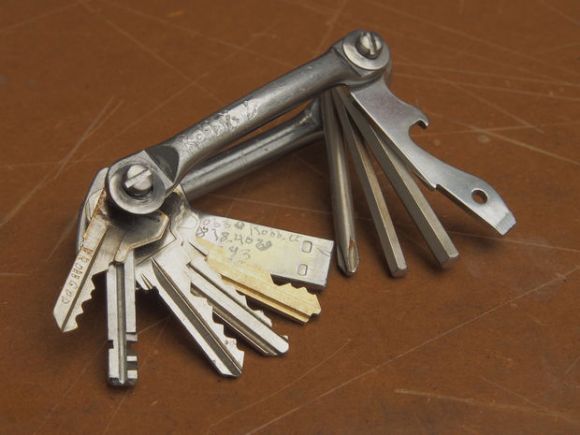
The term “multi-key” may be a little misleading as there are more than just keys on this tool. In addition to the bike lock, locker, work and house keys, there is a USB drive, bottle opener, screw driver and a couple of Allen wrenches. The side frames started out as part of an Allen key combo set; one not of the highest quality. The Allen keys started snapping off during use which left [Robb] with a set of otherwise useless side frames. These became the platform of which [Robb’s] project is based. Adding a couple new bolts, nuts and a few modified keys got him the rest of the way there. A lot of thought went into which items to put into this tool and [Robb] explains his thought process in his step-by-step instructions.
The simple nature and potential for customizing makes this a great utilitarian DIY project. Although this may not be Janitor worthy, it will certainly consolidate some of the bulk in our pockets.

 [Luke] isn’t able to declare total victory yet.