Imagine a line of affordable toys controlled by the player’s brainwaves. By interpreting biosignals picked up by the dry electroencephalogram (EEG) electrodes in an included headset, the game could infer the wearer’s level of concentration, through which it would be possible to move physical objects or interact with virtual characters. You might naturally assume such devices would be on the cutting-edge of modern technology, perhaps even a spin-off from one of the startups currently investigating brain-computer interfaces (BCIs).
 But the toys in question weren’t the talk of 2025’s Consumer Electronics Show, nor 2024, or even 2020. In actual fact, the earliest model is now nearly as old as the original iPhone. Such is the fascinating story of a line of high-tech toys based on the neural sensor technology developed by a company called Neurosky, the first of which was released all the way back in 2009.
Yet despite considerable interest leading up to their release — fueled at least in part by the fact that one of the models featured Star Wars branding and gave players the illusion of Force powers — the devices failed to make any lasting impact, and have today largely fallen into obscurity. The last toy based on Neurosky’s technology was released in 2015, and disappeared from the market only a few years later.
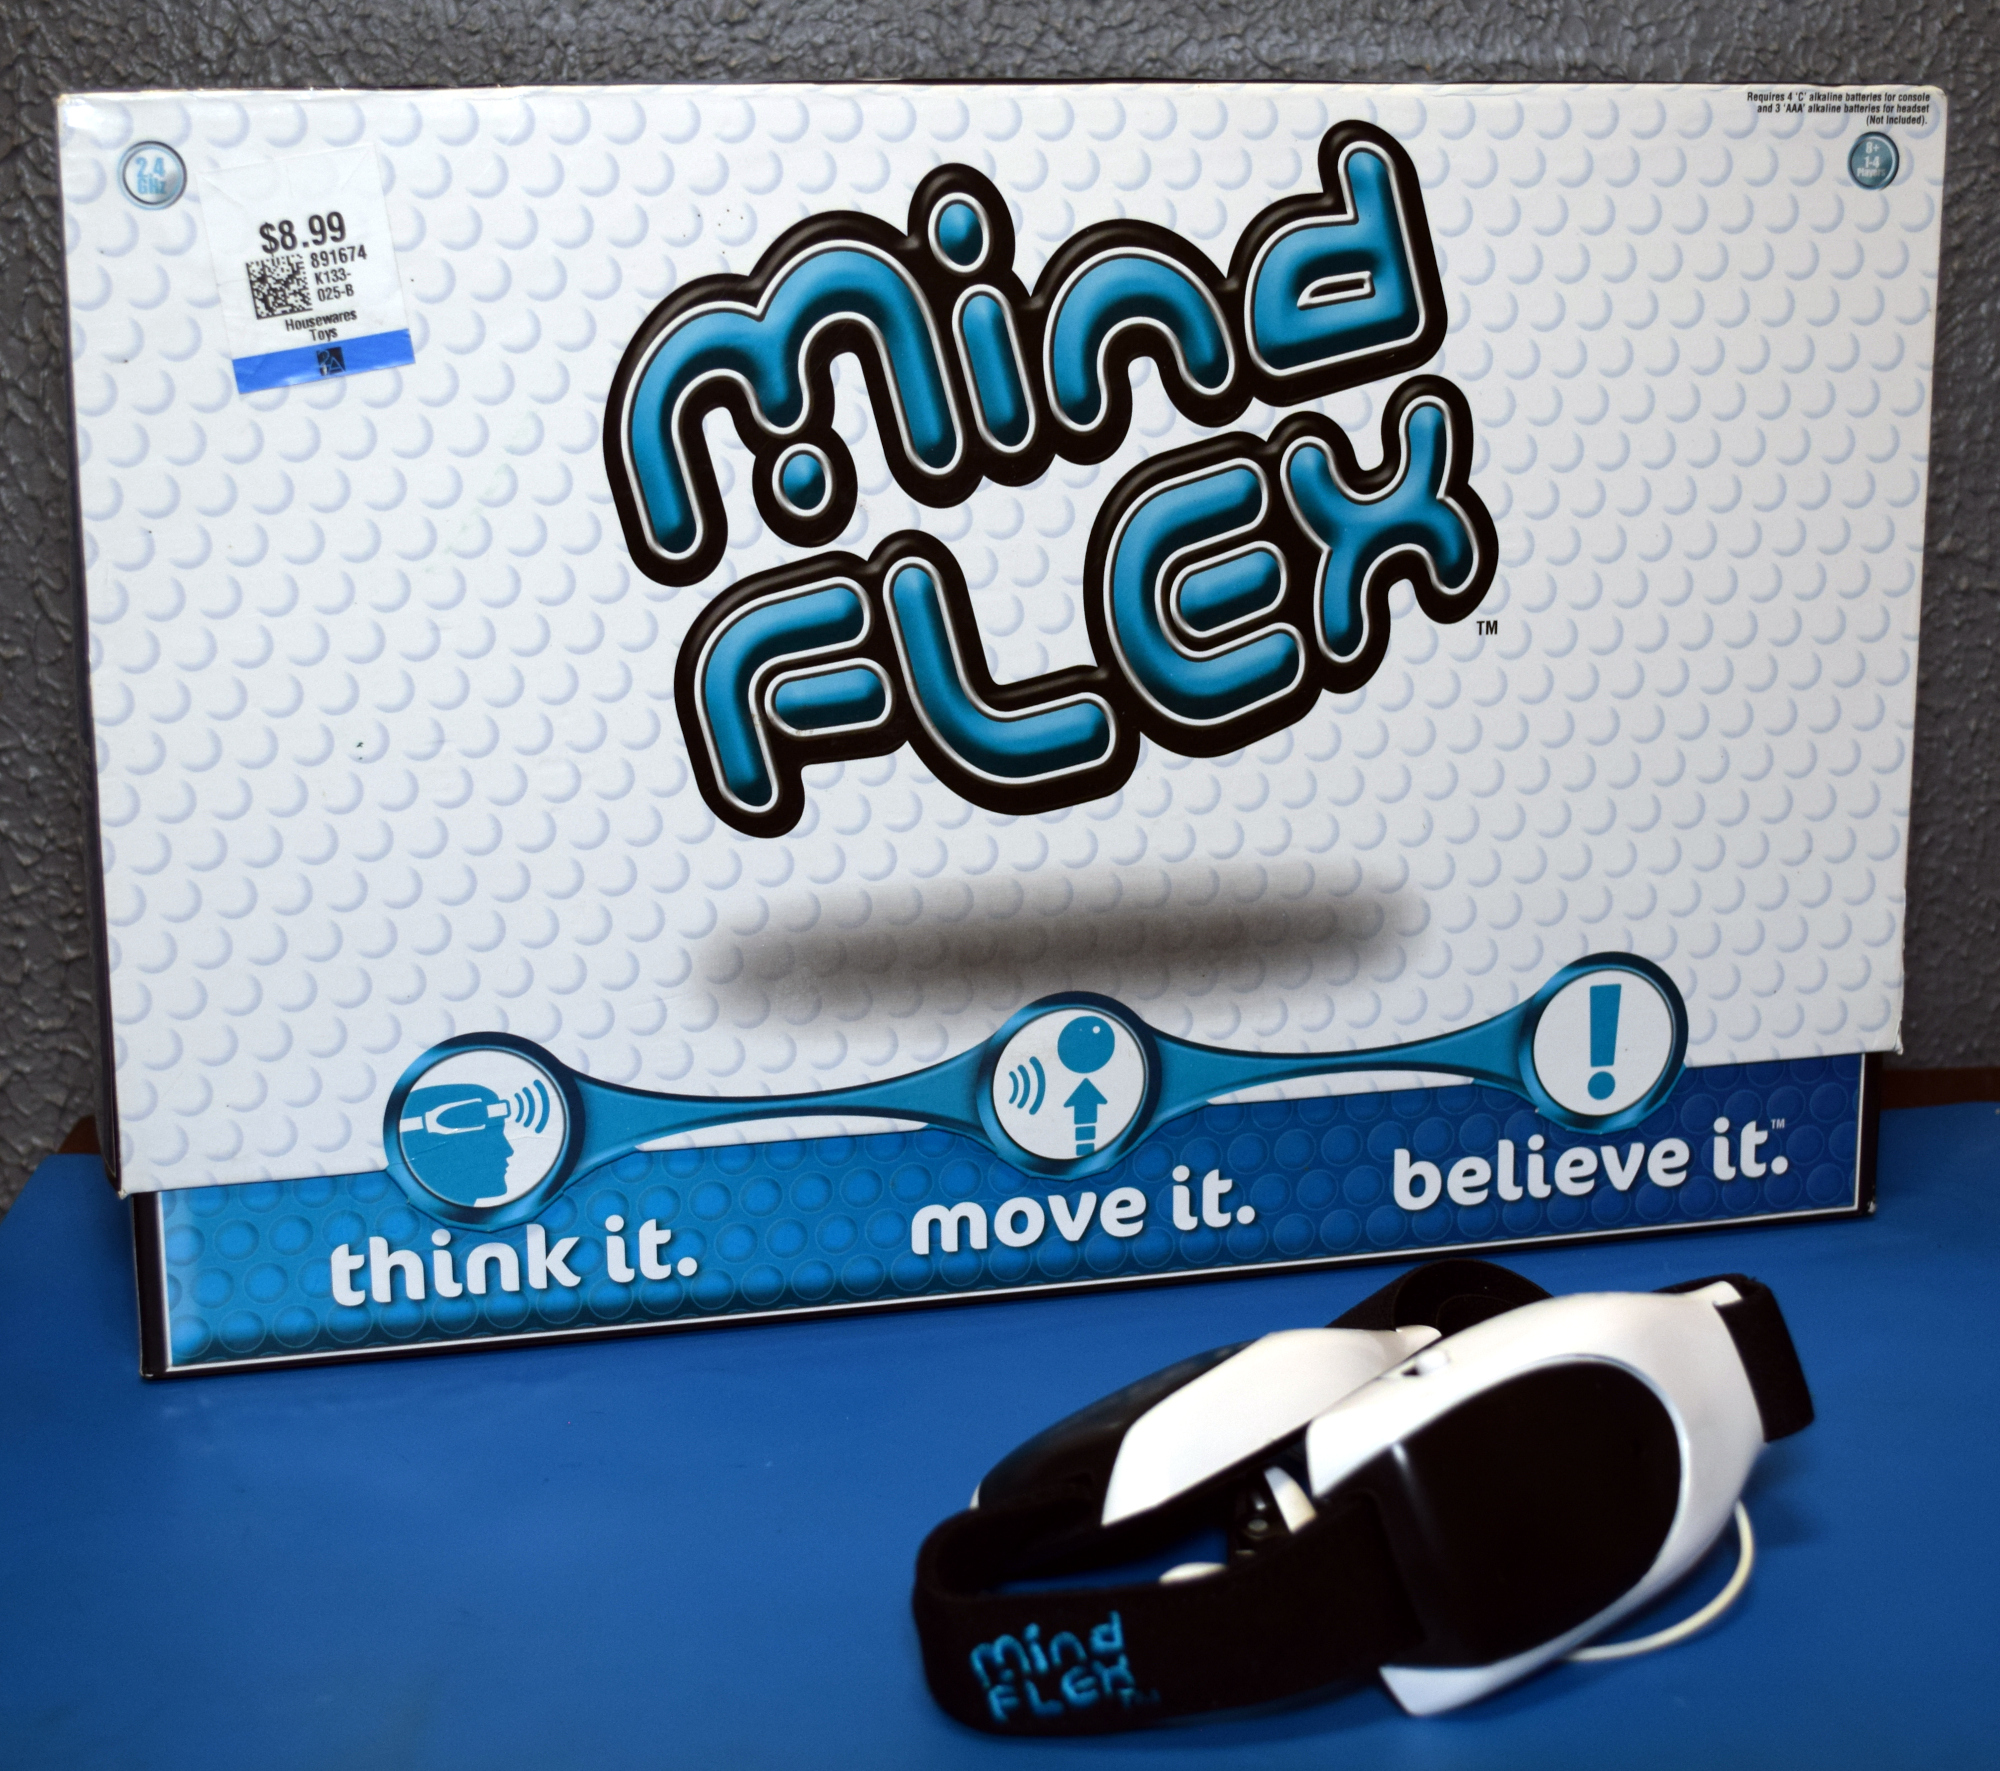
I had all but forgotten about them myself, until I recently came across a complete Mattel Mindflex at a thrift store for $8.99. It seemed a perfect opportunity to not only examine the nearly 20 year old toy, but to take a look at the origins of the product, and find out what ultimately became of Neurosky’s EEG technology. Was the concept simply ahead of its time? In an era when most people still had flip phones, perhaps consumers simply weren’t ready for this type of BCI. Or was the real problem that the technology simply didn’t work as advertised?
Continue reading “The Complicated Legacy Of Mind Controlled Toys”