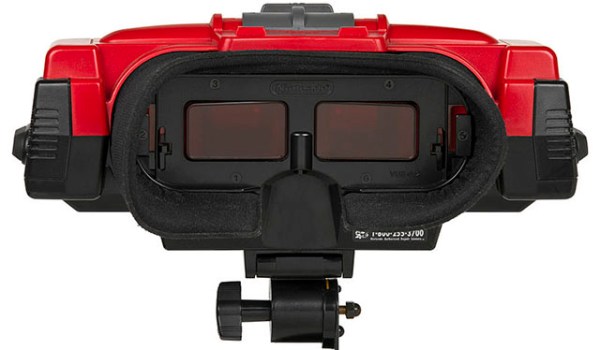
Nintendo’s VirtualBoy – the odd console-inside-a-pair-of-goggles and arguable ancestor of Nintendo’s 3DS – was a marvelous piece of technology for its time. In a small tabletop unit, you were able to play true 3D video games at an impressive 384 x 224 pixel resolution. Of course the VirtualBoy was a complete failure, but that doesn’t mean hardware tinkerers are leaving this wonderful system to video game collectors. [furrtek] has been playing around with his VirtualBoy and managed to add VGA out.
As a 3D system with two displays, any sort of video out was rightfully ignored by the VirtualBoy system designers. Still, [furrtek] wanted some sort of video out on his system, so he began poking around with a small FPGA board to generate some VGA signals.
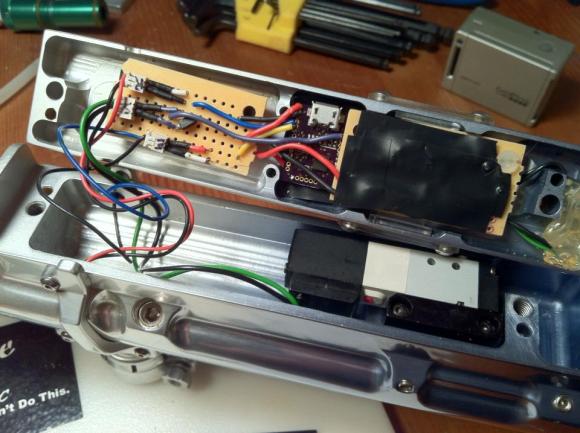
The two displays inside the VirtualBoy aren’t your normal LCD display – as seen in this iFixit teardown. they’re really two linear LED arrays that generate a single line of 244 pixels, with mirrors scanning the line in the in the Y axis. These LED arrays are controlled by the VirtualBoy CPU through a series of shift registers, and by carefully tapping the lines of each LED array, [furrtek] was able to copy all the image data into the RAM of an FPGA.
After stuffing an XESS XULA-200 FPGA board inside the case of his VirtualBoy, [furrtek] wired up a few resistors for a DAC and installed a VGA out port on the underside of his console. Everything worked the first time he powered it up, and he began playing his VirtualBoy on his big screen TV.
Because [furrtek] is only reading one of the VirtualBoy’s displays, all the 3D data – and the main feature of the VirtualBoy – is lost when it’s displayed on a TV. 3D TVs do exist, though, and we’d love to see an improved version of this that captures data from both of the VirtualBoy displays.
You can see [furrtek]’s video of his mod in action below.
")
")
")
")
")
")
")
")
")