Syncing Two Strands Of G35 Christmas Lights

Lights

For a few years now, the set of Christmas lights most wanted by hackers and makers the world over is the GE G35 color changing set. With 50 individual RGB LEDs controlled by a microcontroller, these light strings can display any pattern of lights with the help of something as simple as an Arduino. The stock light sequences are a little problematic, especially if you’re running more than one string.

[Todd] picked up two G35 strings, and even when they’re turned on at the same time the light sequences slowly go out of sync after a half hour or so. He came up with a great way to make sure these lights stay in sync that requires only a slight modification. To make two light strings stay in sync, it’s simply a matter of disconnecting the data line from one string’s controllers and bridging that connection with the other string.

It’s a very easy modification, but it won’t give you twice as many individually controllable LEDs – for that, you’ll have to use either multiple Arduinos or buy a longer RGB LED strip. Still, having two identical 7×7 LED panels is better than a single panel, so we’ll have to tip our hat to [Todd] for this one.
Cute Little Amplifier Has A Tube Pre

tube

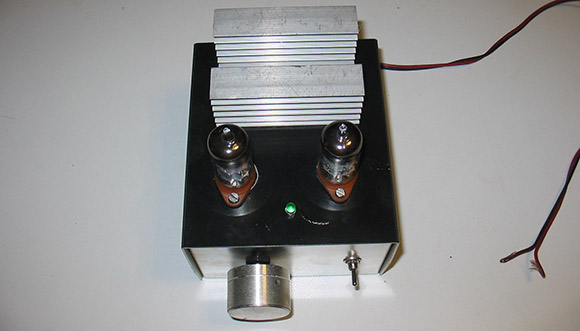
While you won’t catch us in an argument with an audiophile regarding the sound quality of tube vs. solid state amps, there is a general consensus that tube amplifiers sound much better than their transistorized brethren. Actually building an all-tube amplifier, though, is a bit harder than one built around common ICs – there are transformers to deal with and of course very high voltages. One solution to get the sound of tubes easily but still retaining the simplicity of integrated circuits is a hybrid amp, or a tube preamplifier combined with a solid state power section. They’re easy enough to build as [Danilo] shows us with his hybrid tube amp design (Italian, translation).

[Danilo]’s design uses two ECC86 for the left and right channels powered by a 12 Volt supply. Each channel is sent through a tube and then amplified by a TDA2005 20 Watt power amplifier. After plugging in a CD player, the result is a clear, warm sound that can put a whole lot of power through a speaker.

Self Balancing Unicycle Built From Old Scooter

[Glenn] had an old electric scooter/motorcycle in his garage that had long ago given up the ghost. Without a working battery and motor controller this scooter wasn’t beyond repair, but [Glenn] thought he could use it to build something much, much cooler. What he came up with is a self-balancing unicycle that borrows inspiration from a Segway and other self-balancing robots.

After cutting the drive chain off his scooter, [Glenn] began work on installing a new motor controller and battery. To make this unicycle balance itself, he would need a few gyroscopes and accelerometers provided via an Arduino and Sparkfun IMU shield.

After tuning his PID loop, [Glenn] hopped on his new ride and took it for a spin with the help of a pair of ski poles. It’s much easier to ride than a traditional unicycle and [Glenn] says he’s getting better at riding it.

MSP430 Bit Banged USB 1.1

msp430-usb-hardware

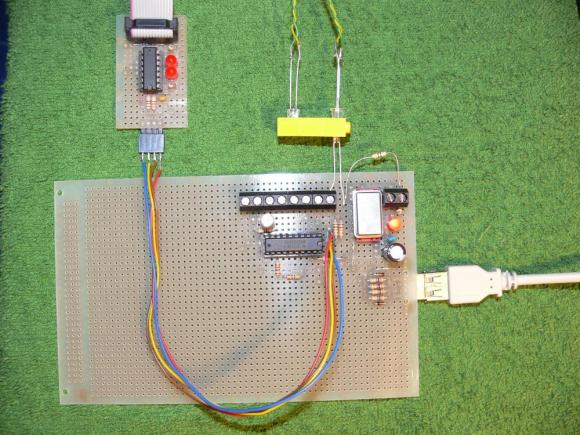
Here’s a rather exciting development for those who work with MSP430 microcontrollers. [M-atthias] worked out a way to implement USB 1.1 on a MSP430G2452. He’s bit banging the communications as this hardware normally doesn’t support the Universal Serial Bus. This is much like using the V-USB stack for AVR micros.

The test hardware seen above uses an 18Mhz crystal to get the timings just right. As this squeezes the most out of the chip it should come as no surprise that the firmware is written in assembly. This is still quite early on in development but the core features are mostly there, having been implemented and debugged over several versions already. Currently the base functionality can be loaded using under 2k of flash memory. You can download the Mecrisp package from [M-atthias’] sourceforge page. If you want to lend a hand testing or developing it would be greatly appreciated.

[via 43oh blog]

ODROID-U2 Is Latest Barebones Board Begging To Be Used

odroid-u2

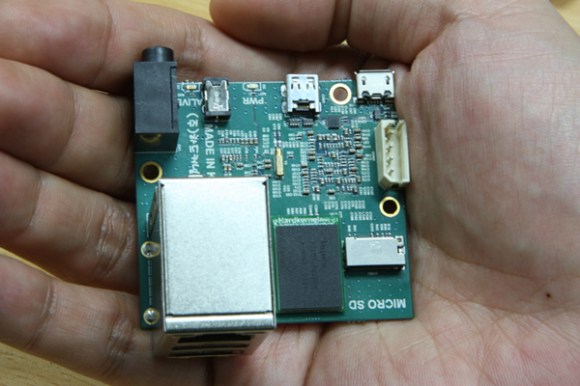
Oh hey, another barebones dev board. Well, that’s what we said to ourselves when we first saw this picture, but the way this is presented is like crack for geeks. It starts with this tiny board, which has a footprint smaller than a credit card. But once you start looking at the add-ons you’ll want to watch out or you’ll cover yourself in drool.

The name of the game here is speed. It’s running a quad-core Cortex-A9 chip with a Mali-400 graphics accelerator. There is no on-board storage, but the microSD slot is meant to be used for OS and storage. A faster option is to use a NAND add-on board offered in 8, 16, and 64 gig capacities ($25-$79). There is a micro type-D HDMI connector and the device is powered by a cellphone charger. It ships with a big heat sink that acts as a case for the board.

After the break you can see it booting Android and immediately loading into XBMC. The menu looks mighty snappy, making us think this is a great alternative to using Raspberry Pi as a media center. But you’ll pay for the faster speed and ability to run Android. The rig they’re showing off, plus the add-ons, comes out to about $132. There are also questions to be answered as to which video formats are supported through hardware decoding.

Continue reading “ODROID-U2 Is Latest Barebones Board Begging To Be Used”

Dyson Engineers’ Hacks Traverse Robot Obstacle Course

2012-dyson-challenge

These guys are all engineers who are employed by Dyson. They’re holding remote control creations made from Dyson parts. This time around the object of the challenge was to build a bot based on a the Dyson ball and race it through an obstacle course.

This sort of thing is right up our alley, but unlike the last time Dyson engineers shrugged off the daily grind to hack their own hardware, this doesn’t show off nearly enough of the festivities. Sure the pair of videos embedded after the break make a great trailer for the event, but we would love to have seen 90 seconds devoted to each of the entries. Alas, you do get to see most of the winning unit’s obstacle course run which includes a distance route, navigating through rough terrain, and negotiating a high path where falling off the edge is a real threat.

Maybe the engineers themselves will post details about their own builds like the contestants in Sparkfun’s autonomous vehicle contest do.

Continue reading “Dyson Engineers’ Hacks Traverse Robot Obstacle Course”

Gadgeteer Plant Monitor Wants It Wet And Photogenic

gadgeteer-plant-monitor

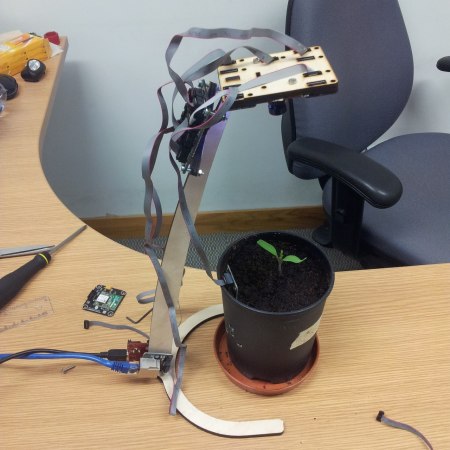
[Christian] is growing a tomato plant on his desk and wanted to capture some time-lapse images of its progress. To that end he built a rig that monitors moisture levels and snaps images at regular intervals.

The hardware he’s using is part of the Gadgeteer family. These run a .NET micro framework and are modular which makes for easy assembly. A laser-cut plywood stand helps to position the camera module for the best shots. Its takes a picture of the seedling once every ten minutes. There is a quartet of RGB LEDs surrounding the lens. They help illuminate the subject for each picture. But [Christian] also mentions that the red LEDs provide light the plant needs to grow (we raise an eyebrow at that claim, but in truth we have no idea if red LEDs make plants grow or not). There is also a moisture sensor which you can see inserted in the soil.

The images and moisture readings are all pushed to a server. There is an Ethernet board near the base of the rig. It uses POST to send the image, which is saved by a server-side script. The moisture data is sent via a GET command.