DIY Pick And Place Builds Boards, Is Awesome

In what can probably be attributed to the pains of placing a lot of SMD components, [gravelrash] built his own home-made pick and place machine.

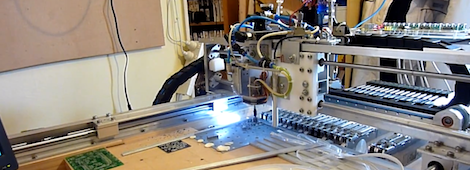
Instead of being frustrated with tweezers, stereo microscopes, and having an inordinate amount of concentration, [gravelrash] built a pick and place machine from a Chinese CNC router. The build doesn’t use automated feeders for its reels of parts. Instead,[gravelrash] picked up five manual feeders from eBay, allowing his pick and place to hold 25 different reels of components.

There is, of course, a vacuum pump for sucking up SMD parts and a two-axis gantry capable of moving components from reel to board. The software is Mach3, a program normally used with spinning cutters to mill away wood, metal and plastic. [gravelrash] replaced this motor with a few vacuum controlled needles to pick up, move, and drop components onto the board.

While the build may not be as fast as some other pick and place machines we’ve seen, it’s almost as fast as hand-placing components with the added bonus of not tearing your hair out over very tiny parts.

Tip ‘o the hat to [Alexander] for sending this one in.

Continue reading “DIY Pick And Place Builds Boards, Is Awesome” →

QR Clock Is Unreadable By Humans And Computers Alike

The clock is a perfect technology. For just a few dollars, you can buy a digital wristwatch and chronometer able to keep extremely accurate time for years without winding a spring or replacing a battery. Anything ‘improvement’ on the design of a clock only makes it harder to read, a feature exploited by the very 1337 binary clocks we see from time to time. [Ch00f] decided it was time to give way to the march of progress and build a completely unreadable clock. He came up with a QR code clock that is unreadable by humans and cellphones alike.

The hardware is built around nine 8×8 LED matrix panels resulting in a 24 x 24 pixel display, perfect for displaying a 21 pixel square QR code. The LED drivers are a standard multiplexed affair, but this project really shines in the firmware department.

The microcontroller [Ch00f] used – an ATMega328 – is far too small to store the 1440 QR codes for every minute of the day. No, this project would have to dynamically generate QR codes on the fly, not exactly an easy problem.

After looking over the official QR code standard, [Ch00f] wrote a rather large program that turns alphanumeric sequences into QR code. This runs on the microcontroller every minute, generating a new QR code for every minute of the day.

It’s nigh impossible for a human to read a QR code, but [Ch00f] figured he could make his project even less useful. By multiplexing the LEDs at a very low duty cycle [Ch00f] made it impossible for a camera to capture the entire QR code, even though the pattern of pixels is still visible to the human eye. A fabulously useless build that really steps up the game for unreadable clocks.

Video after the break.

Continue reading “QR Clock Is Unreadable By Humans And Computers Alike” →

Bora Board Teaches Binary Hardware

If you’re just starting out in your quest to build really cool electronic devices, you’ll find a ton of options ready for the beginner. The Arduino makes toggling pins dead simple, and the Raspi brings the wonders of blinking a LED from the command line down from the gods and into the hands of the common man. These are all software platforms, though, and if you want to learn digital logic with hardware the best option is still a drawer full of 7400-series logic chips.

[Colin O’Flynn] hopes to change this with a beginners board for digital logic hardware design. It’s called the BORA, or Binary explORer boArd, and brings digital logic to a convenient package that is far less frustrating than a breadboard full of logic chips.

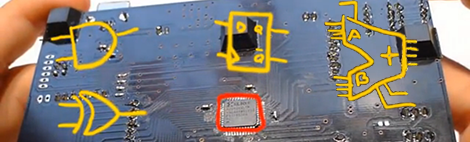
The BORA is based around a CPLD – a cousin of the FPGA-powered devices we see from time to time – that allows any student of digital logic to program the device and fill macrocells with NANDs, NORs, and ANDs.

The Xilinx device used in the BORA has about 1600 gates that can be programmed; more than enough to complete all the projects in the online lectures [Colin] has put together. You can check out the documentation for the BORA over on the official site, and the demo video after the break.

Continue reading “Bora Board Teaches Binary Hardware” →

Hackaday Retro Edition: The Macintosh SE/30

In 1988, Apple introduced the Macintosh IIx, an upgrade of the Mac II that included a Motorola 68030 CPU. The IIcx – a compact version of the IIx, also with a 68030 – was introduced in 1989. That same year, product designers at Apple created a more powerful version of the all-in-one Macintosh SE using the same CPU found in the IIx and IIcx. Unfortunately, the naming convention didn’t hold but the Macintosh SE/30 is still the greatest computer Apple will ever build.

Earlier this month, [Greg] sent in a submission for our retro edition successes. A huge mac fan, [Greg] connected his Powerbook Duo to an Ethernet adapter and loaded up our retro edition. [Greg] is back again, this time with an SE/30.

In the three pictures [Greg] sent us (in the gallery after the break), you can see his extremely clean SE/30 booting into System 7 and loading up our retro site. In the third picture, you can see [Greg] playing Bolo, one of the first network-enabled games ever made, and still a very fun waste of time today.

If you’re wondering what makes the SE/30 so great, consider this: the SE/30 is able to address up to 128 MB of RAM. Keep in mind this computer is from an era when one or two Megabytes of RAM would be more than enough to get just about any job done. The SE/30 also made a fabulous server. Even today it would be a capable home media server if it weren’t for its relatively slow networking capabilities and 2 Gigabyte file size (not volume size) limit.

[Greg] has a very cool machine on his hands here, and we’re pleased as punch his SE/30 could make its way over to our retro site.

Continue reading “Hackaday Retro Edition: The Macintosh SE/30” →

MakiBox Turns Plastic Pellets Into 3D Objects

The holy grail of desktop 3D printers – aside from manufacturing full color objects in any shape imaginable – is turning tiny plastic pellets into a plastic filament. Many projects have attempted this with moderate levels of success but turning pellets into filament still an open problem. MakiBot hopes to solve this problem by manufacturing plastic filament just in time to be squirted out a nozzle onto the print bed.

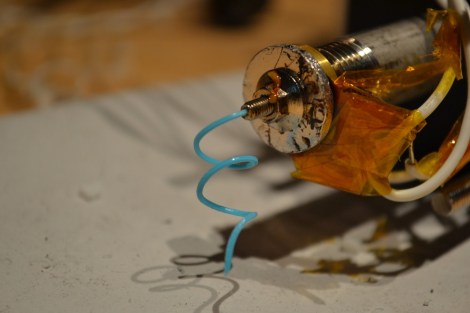
MakiBox is seeing a lot of potential with their pellet drive. Instead of sending huge amounts of pellets into an auger extruder, the team realized the best option would be to send pellets into the hot end one at a time. This makes for better thermal characteristics and produces a very consistent filament.

Turning plastic pellets into 3D objects is an enticing idea but producing a filament on the fly is an interesting concept. While the MakiBox team is making custom color filament right now, in the future it might be possible to mix colors for full-color prints.

Videos demonstrating the extruder after the break.

Continue reading “MakiBox Turns Plastic Pellets Into 3D Objects” →

RC Airplane Made From Political Signs

V1-Full

Whatever candidate (if any) you’re in favor of, we could bet that you’re probably tired of seeing advertisements and political signs everywhere. [Mark] wrote in with a hack that allows you to actually use these signs for something fun, making a RC airplane!

[Mark] gives a full bill of materials in his article, but the featured component is campaign sign. This isn’t LawyerADay, so we’re not sure of the legality of taking them. After election day at least, it’s doubtful anyone will care. Of course you’ll also need a motor, prop, and RC controls, as well as some dowels to attach the tail section to the main body, so don’t buy the “campaign promise” that this is a free airplane.

CAD diagrams are available of the cutouts, as well as how to cut the signs to form hinges without any other parts. This is quite clever, and a video of the plane in action on a table is available on the site. According to [Mark], no video was rolling on its test flight, but it did fly before some interference grounded the plane. Hopefully he’ll be able to get some footage of it in action soon!

Making A Phono Preamp For A First Electronics Project

Nearly everyone’s first electronic project is something that blinks a LED. There are a million ways to go about this ‘Hello World’ project of electronic design; 555 timers, microcontrollers, or maybe even discrete components if you’re really cool. When [miceuz] was asked by a friend to help with his first electronic project he eschewed the usual blinking LED project and taught him how to build something he actually needed: a phono preamp for an old turntable.

Back in the day when vinyl was king, albums needed to be mastered to play on a record player. The mastering process cuts some of the bass and increases the treble. When the record is played, this process needs to be reversed. It’s a preamp that does this job by attenuating the high frequency sounds and boosting the thumping bass.

[miceuz] found a nice DIY RIAA preamp  project and found a nice little op amp  somewhere in his parts bin. After laying out the circuit, [miceuz] etched a few boards and taught his friend how to solder SMD components.

Of course the project didn’t work the first time around, but after poking around with a meter and checking out the old turntable, the preamp came to life with the clang of chords from an old record. If you’d like to build your own, you can get the files from [miceuz]’s git.