Toorcamp: Milling PCBs With KiCad

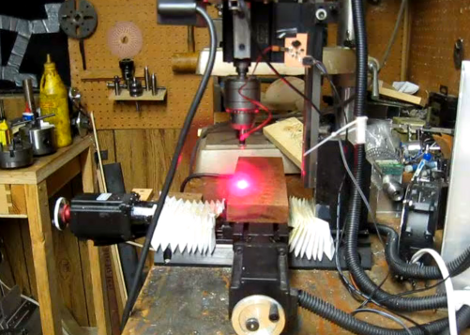
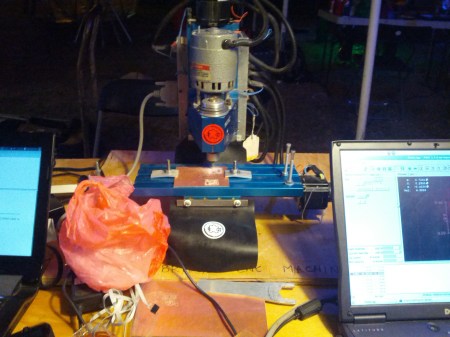
[Hao] from Noisebridge showed me their CNC mill being used to etch PCBs. Using copper clad board, this MAXNC 10 mill routes the PCB with decent accuracy. This makes for very rapid prototyping of single sided PCBs.

[Hao] designed the PCB using the open source KiCad EDA tool. This was used to draw the schematic, layout the PCB, and generate the Gerber files. Next, pcb2gcode was used to convert the Gerbers to G-code, which is a standard set of instructions for controlling CNC devices. Finally, LinuxCNC was used to send the G-code instructions to the mill. It’s a powerful application of a completely open source workflow.

The PCB being milled is for a pressure based touch sensor. It uses the Freescale MPL115A barometric pressure sensor encased in a rubber housing. This sensor is being incorporated into the Dora Opensource Robot Assistant project, which [Hao] and the Noisebridge folks are working on. We’re looking forward to hearing more about the Dora project in the future.

Toorcamp: Type A Machines

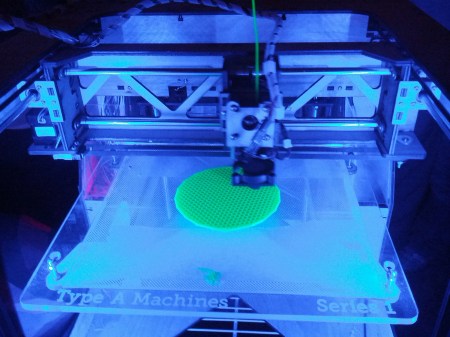
Type A Machines designs and builds 3D printers in San Francisco. [Miloh], one of the founders, brought two of their flagship Series 1 printers to Toorcamp. He printed out a variety of models including water tight cups and quadcopter arms.

The RepRap Arduino MEGA Pololu Shield (RAMPS) is used to drive the stepper motors for each axis, as well as the extruder. This is attached to an Arduino MEGA running the Marlin RepRap firmware. Type A Machines ships the printer with Polylactic Acid (PLA) filament, which is biodegradable.

On software side, you start with a 3D model in STL format. This can be exported from 3D software such as Google SketchUp or Autodesk 123D. You then need a slicer to generate G-code and machine control software to command the printer. [Miloh] used Slic3r and Repetier for his workflow, but he also pointed out a good summary of 3D printer workflows.

The Series 1 was launched at the Bay Area Maker Faire this past May. It has a print volume of 1200 mL, which is the largest print volume of any desktop printer around. The Series 1 brings another option into the low-cost 3D printer market.

Toorcamp: Hackerbot Labs’ Giant FAA Approved Laser

This is a big laser.

[3ric] from Hackerbot Labs gave me a run down of their BattleYurt laser installation at Toorcamp. It’s built with twenty-four 1 Watt lasers taken from a Casio DLP projector. The laser is housed on top of a yurt, which contains the controls and cooling system. It was built with the goal of measuring diffuse reflections of the atmosphere, but it also does the job of looking awesome when fired into the sky. Continue reading “Toorcamp: Hackerbot Labs’ Giant FAA Approved Laser”

R2D2 Drink Dispenser Will Happily Tinkle In Your Glass

As with Jabba the Hutt we’d like to have our own service droid to serve up a cold one. We’re in luck; it looks like you can make your very own beverage dispensing droid if you don’t mind a little awkward dispensation.

The body started as one of those big protein drink mix containers. After spraying it white and masking off the entire thing with blue painter’s tape, the shapes for the blue designs were cut out and painted. Half of a foam sphere from the hobby shop was used to form the dome.

Liquids are dispensed by the pump system from a Super Soaker motorized water gun. You can see it fill up a beaker with a mysterious blue liquid in the video after the break. It’s a long way from challenging the Bar2D2, but it’s also something a mere mortal can build

Continue reading “R2D2 Drink Dispenser Will Happily Tinkle In Your Glass”

Laser Diode Controller For A CNC Mill

[Smells of Bikes] wanted to add laser etching to the list of tricks his home CNC setup is capable of. He has a diode which will work for the task, but he needed a driver that could be interfaced with the CNC system. He ended up designing a driver board based around the LM3402 chip.

Now driving one of these laser diodes isn’t all that different from driving a Light Emitting Diode. He chose to use the LM3402 chip because he’s the TI engineer who designed the official evaluation board for the part. It’s meant for high-power LED applications, and the 700 mA he needs for the laser is within spec. Since he’s soldering by hand, and this part has a ground pad on the bottom, he shares his soldering technique in detail. Once the driver board is ready, he uses a ‘sed’ command to replace the g-code Z axis commands with digital on/off commands to switch the diode.

Check out the demo video after the break. He uses a diffuse beam since the cutting beam is bright enough to damage his camera.

Continue reading “Laser Diode Controller For A CNC Mill”

Arduino Voltage Measurement Tricks

We think it’s a great learning experience to tear back the veil of abstraction and learn a bit more about the hardware found on an Arduino board. This project is a great example. [Scott Daniels] takes a look at the other voltage measurement options available to AVR chips used by Arduino.

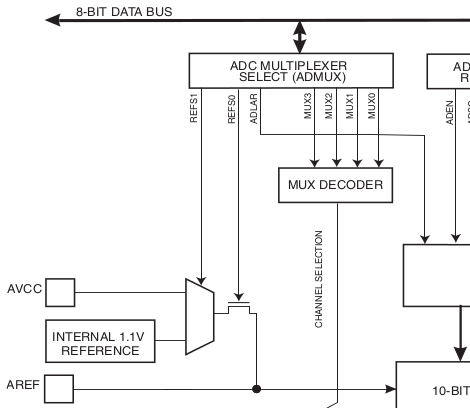
If you’ve used the analogRead() function then you’ve already measured a voltage using the Arduino. But do you know what is going on behind the scenes to make this happen? The Analog to Digital converter on the AVR chip is being used to measure an incoming voltage by comparing it to a known voltage reference. That reference is by default the supply voltage line for the chip. This should be 5V but will only be as accurate as the regulator supplying it. [Scott] looks at the other voltage references that may be used. An external reference can be used by adding hardware, but that’s not the focus of his article. Instead he looks at using the 1.1V internal reference. He’s written some short example code that let’s you measure the incoming line voltage based on that internal reference. This is a very handy trick that can let you detect when the chips is running from a battery and how much juice is left in the cell.

Mechanical Skeeball Built From Knex

We don’t really know what to say. This Skeeball cabinet is built entirely from Knex. It works exactly how you’d expect Skeeball to work. You plug in quarter and it dispenses balls and keeps score.

[Shadowman39] worked on the build for more than a year. Everything that went into it is a Knex part with the exception of a few rubber bands, and the paper numbers that are used on the scoreboard. There are six motors which drive the machine. Four of them are responsible for turning the scoreboard digits, the others handle ball return.

The link at the top starts off with a bunch of images of the various parts, but you’ll want to watch the video after the break for a closer look. It shows the coin hopper in greater detail. It’s built to only accept quarters and to reject all other coins.

Continue reading “Mechanical Skeeball Built From Knex”