[Bob] Shows Us How To Make DIY Calendars For Vintage Computer Geeks

nixie-tubes

[Bob Alexander] wrote in to share a hobby of his that we thought was pretty timely considering the new year is quickly approaching. For several years now he has put together a custom calendar for himself, including both dates he finds important along with sweet pictures of vintage computer equipment. Friends and family found his calendars so intriguing that they asked him to make some for them as well.

Each year his stack of calendar requests grew, and he found that no outlet – online or otherwise could produce exactly what he wanted. Instead of settling, he wrote a small application that lets him customize and print calendars to his heart’s content.

We think this is much cooler than buying one at your local bookstore, and we’re guessing that our readers likely agree. If you were creating your own custom calendar, what cool vintage computer hardware would you choose to display? What if you were designing a Hack-a-Day calendar? Let us know in the comments – we’re itching to find something interesting to look at while we count down to New Year’s Eve!

Relighting A Gauge Cluster

When a few lights in the dashboard of  [Garrett]’s truck burned out, he was looking at a hefty repair bill. The repair shop would have to replace the huge PCB to change a few soldered light bulbs, so he was looking at a $500 repair bill. Lighting up a LED is everyone’s first project, so [Garrett] decided to change out the bulbs with LEDs and save a few dollars.

The repair was very simple – after removing the dials and needles, [Garrett] found a huge PCB with a few burnt out bulbs on board. He took a multimeter to each bulb’s solder pad and replaced each one with an LED and resistor. The finished project looks like it came out of a factory and is a huge improvement over the ugly amber bulbs originally found in his truck.  [Garrett] also posted a nice Instructable of his build showing the nicely soldered lamp replacements.

Solar-powered CNC Woodburning

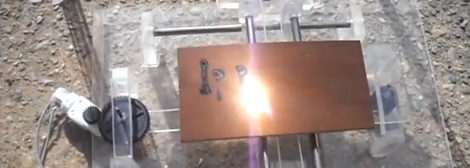
[Johnie] built himself a CNC woodburner powered by the sun. Like the solar 3D printer we saw last summer, [Johnie]’s build uses a giant Fresnel lens to focus sunlight onto a piece of wood. To get some control out of his build, a 2-axis bed was made from scrounged and junked parts.

The lens in [Johnie]’s build looks to be about a foot square – more than hot enough to burn a few holes in things from our experience. The bed (hopefully) gets around this problem by being built entirely out of clear acrylic. The idea behind the acrylic bed is that the focused light will pass through harmlessly, and not melt the entire thing.

Now that we think about it, we couldn’t come up with a better project to enter in the Buildlounge laser cutter contest. For everybody else working on their laser cutter projects, the deadline is January 1st. Better get those wrenches out and irons hot, because we’ve seen a few awesome projects for the Buildlounge build off already.

Augmented Reality Ex Nihilo

[David] sent in a nice project to demonstrate augmented reality with ARtoolkit and discuss the deep philosophical underpinnings of the meaning of nothingness. The good news is he was able to create a volume control button on a sheet of paper with a marker. The bad news is the philosophical treatment is a bit weak; [David] built something cool, so we’re able to let that slide for now.

This build was inspired by the Impromptu Sound Board made using a Kinect and a piece of paper. The idea behind the sound board is simple – draw some buttons on the paper, and use them to play short sound clips. [David] took this idea to make a small tutorial on augmented reality for Occam’s Razor.

The hardware is very simple – just a webcam, a piece of paper, and a marker. After [David] draws a large square on the paper, the code recognizes it as a volume control. Rotating the paper counterclockwise increases the volume, and clockwise turns the volume down. It’s a neat build to get into the foundations of augmented reality.

Check out the video demo of [David]’s build after the break.

Continue reading “Augmented Reality Ex Nihilo”

Repairing A Commercial-grade Pick And Place Machine

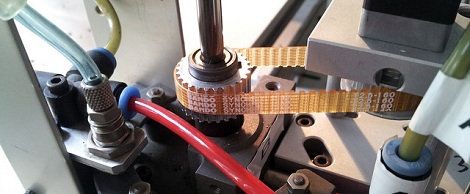
It looks like Null Space Labs has a new pick and place machine. This immense repair job began when [Charliex] and [Gleep] found a JukiPlacemat 360 pick and place machine. The idea of having their very own pick and place machine proved intoxicating, possibly too much so because the didn’t return the machine when they found out it wasn’t working.

After a ton of work that involved adding a camera, [Charliex] and the rest of the builders at Null Space Labs finally have their own pick and place machine that works. This was a complete rebuild from the ground up. So many things didn’t work on the machine, they might have been better off building one from scratch. Aside from the massive effort that went into turning the shell of a machine into a working unit, we really have to commend everyone who worked on it.

The team added a nice GUI to control the machine. The guys have already run a successful test and ovened a few boards, so everything works as it should have at purchase. It’ll be great for making next year’s LayerOne conference badges.

Phone-controlled Light Display Is Simple And Fun

android-phone-light-toy

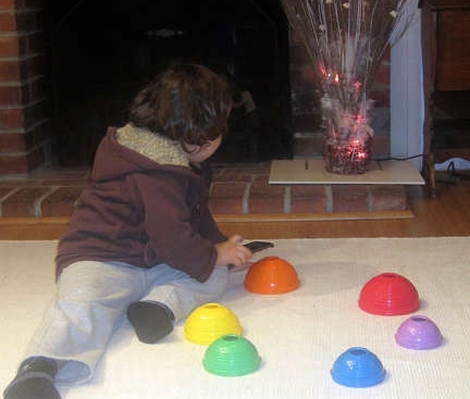
[Ytai Ben-Tsvi] wrote in to share a little holiday project that he and friend [Al Linke] put together, a dynamic light display that takes its cues from his Android-powered smartphone.

The display fits in a vase that sits in [Ytai’s] family room, and while it wasn’t exactly cheap to build, it sure looks nice. The vase is full of feathery decorative bits which help hide an addressable RGB LED strip. The lights are controlled by an IOIO board which the pair tucked away inside the vase as well.

The IOIO board was also fitted with a USB Bluetooth dongle, allowing it to communicate with just about any handset running a relatively recent flavor of the Android OS. When connected, the phone samples its surroundings with the onboard camera, commanding the vase to mix the colors seen by the phone into its twinkling display.

As you can see in the video below it works pretty well when used with solid, brightly colored objects. While just a fun toy in its current form, [Ytai] and [Al] have more than a few ideas on how to expand its usability.

Continue reading “Phone-controlled Light Display Is Simple And Fun”

Video Series Shows How To Build Your Own Solar-charged R/C Lawnmower

rc-solar-lawnmower

As winter is officially upon us, we’re pretty sure that the last thing most of you are thinking about is mowing your lawn. We would argue that it’s actually the ideal time to do so – that is, if you are interested in automating the process a bit.

[Robert Smith] has spent a lot of time thinking about his lawn, wanting a way to sit back and relax while doing his weekly trimming. He set off for the workshop to build an R/C electric lawnmower, and thoroughly documented the process in order to help you do the same.

On his web site, you will find a series of videos detailing every bit of the solar charged R/C lawnmower’s construction, taking you through the planning phases all the way to completion. [Robert] has provided just about anything you could possibly need including parts lists, schematics, code, and more.

If the short introductory video below has you interested, be sure to swing by his site for everything you need to build one of your own.

Continue reading “Video Series Shows How To Build Your Own Solar-charged R/C Lawnmower”