Building a modern computer is something plenty of us have done, and with various tools available to ensure that essentially the only thing required of the end user is to select parts and have them delivered via one’s favorite (or least expensive) online retailer. Not so with retro hardware, though. While some parts can be found used on reselling sites like eBay, often the only other option is to rebuild parts from scratch. This is sometimes the best option too, as things like ribbon cables age poorly and invisible problems with them can cause knock-on effects that feel like wild goose chases when troubleshooting. Here’s how to build your own ribbon cables for your retro machines.
[Mike] is leading us on this build because he’s been working on an old tower desktop he’s calling Rosetta which he wants to be able to use to host five different floppy disk types and convert files from one type to another. Of course the old hardware and software being used won’t support five floppy disk drives at the same time so he has a few switches involved as well. To get everything buttoned up neatly in the case he’s building his own ribbon cables to save space, especially since with his custom cables he won’t have the extraneous extra connectors that these cables are famous for.
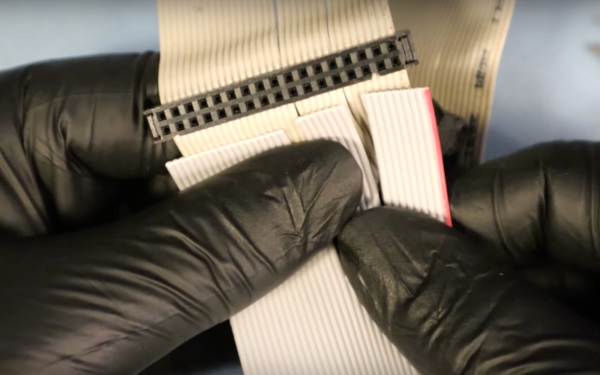
Even though, as [Mike] notes, you can’t really buy these cables directly anymore thanks to the technology’s obsolescence, you can still find the tools and parts you’d need to create them from scratch including the ribbon, connectors, and crimping tools. Even the strain relief for these wide, fragile connectors is available and possible to build into these projects. It ends up cleaning up the build quite nicely, and he won’t be chasing down any gremlins caused by decades-old degraded multi-conductor cables. And, even though [Mike] demonstrated the floppy disk drive cables in this build, ribbon cable can be used for all kinds of things including IDE drive connectors and even GPIO cables for modern electronics projects.
Continue reading “Crafting Ribbon Cables For Retro Hardware”