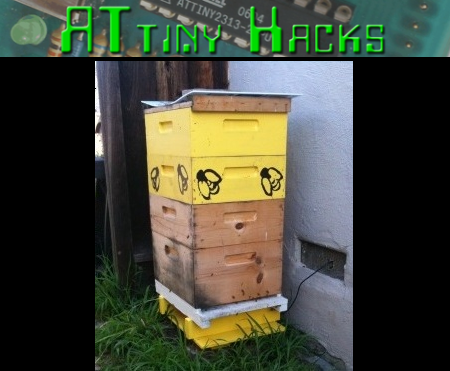
[MakingThingsWork] wanted an accurate way to keep track of the weight of his beehive, so he decided to build himself a data logging electronic scale. First he ripped the strain gauges from an old electronic scale which he then fitted to his home made beehive base. He then went about designing and building the control board which is based about the Attiny 85 (if you hadn’t guessed by the banner). An instrumentation amplifier was used to amplify the signal from the strain gauge, which is then read by the ADC on the Attiny. It looks like he had some trouble getting consistent results from the scale, so to eliminate the error caused by temperature variations he set up a fixed voltage divider for reference. With this setup the scale can produce results at +/- 0.5lb accuracy, sounds just fine for a system that cost less than $50. The V-usb project software has been used to connect the scale to his PC which he uses to collect and graph the data. All in all a very neat project and by the looks of it, some very productive bees.
8 Breadboard Hacks To Make Life Easier

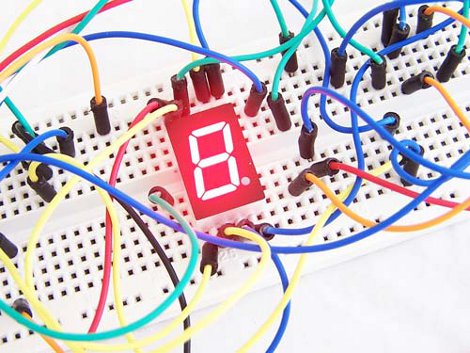
If you like messing around with electronics, one of the best tools you can have on hand is a solderless breaboard. These handy little chunks of plastic just let you “plug n play” so you can quickly develop a circuit before committing it to solder and fiberglass. Handy as they are, they do have their downsides such as: stuff not fitting, split up power rails, running out of jumpers or just taming what can quickly become a birds nest of a mess.
Luckily the folks over at [Proto Stack] have published a handy article giving us 8 Breadboard Hacks. While anyone that has used breadboads for any length of time will have probably figured most of these out, its still good knowledge for any newcomers to the sometimes aggravating world of plastic and jumpers.
Also we know there are more hacks you can do to make your lives easier and would love to hear them in the comments.
Things To Do With Your Laptop Batteries When They’re Dead
[Roy] over at GeekDad had a dead laptop battery on his hands, and decided he would disassemble it to see what useful things he could do with the cells inside. He mentions in his article that even though your laptop might be convinced that its battery is toast, more often than not just one or two cells are damaged. This may not be news to all of our readers, but is worth pointing out to those who might not be aware.
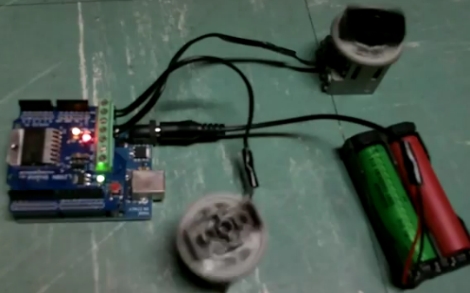
With the bad cells separated from the good, [Roy] thought up a couple of different uses for his newly acquired batteries. His initial idea was to power an LED flashlight that was made to run on the 18650 cells he recovered from his laptop – not a stretch of the imagination, but definitely useful. The second use he came up with was to pair two of the cells together in order to simultaneously power an Arduino and some small Lego motors.
[Roy] lays out all of the standard caveats you would expect regarding the care and feeding of the lithium cells, and even suggests rebuilding the laptop battery as an option for the more skilled members of his audience.
Now we understand that dismantling and re-using old laptop cells is not necessarily groundbreaking, but it’s definitely something that’s worth a bit of discussion. [Roy] admits that his two ideas fall far short of the “18650 Things” his article title suggests, so how about adding a few of your own?
If you have stripped down some laptop batteries to salvage the cells, let us know what you did with them in the comments – we would be interested in hearing about it.
Space Camera Streams Data During Flight

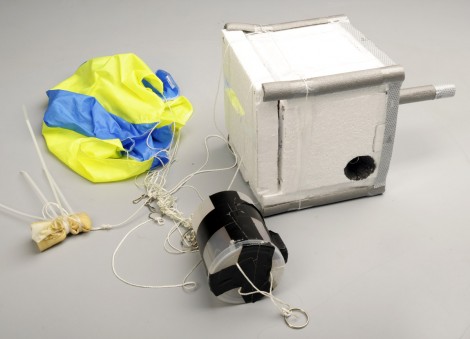
Take the risk of not recovering your hardware out of a near-space camera launch by streaming the data during flight. [Tim Zaman] is part of a team that developed the rig seen above. It sent 119 image back during the recent balloon launch. This included transmissions from as high as 36 kilometers.
The main hardware included a BeagleBoard with connected Webcam housed in a Styrofoam cooler for thermal protection. Pair that with a GPS module for location tracking, and a GPRS module for data transmission and you’re in business.
But that’s not all that went up. The team built a backup hardware module in case the primary failed. This one also had a GPS and GPRS radio, but was driven by an Arduino.
The radio connection made it easy to recover the hardware. GPS data led the team directly to the landing site. The package came to rest on the roof of a building, but we guess that’s more convenient than getting snagged at the top of a huge tree.
Don’t miss the hardware detail video that we’ve embedded after the break.
Motorized Blinds Put Control At Your Fingertips

While [Bremster] likes the view from his office window, he often needs to get up and adjust the blinds several times throughout the day in order to keep the glare from killing his eyes. Like any other enterprising hacker, he decided that constantly adjusting them was too repetitive, and that he could automate the process with electronics.
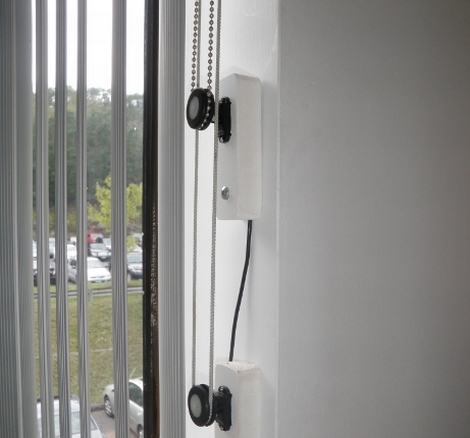
He thought that RC car servos would be a great choice to control the blinds, since they are cheap and the geared drive system offers a lot of torque at low speeds. After modifying the servos to enable continuous rotation, he set off to the hardware store in search of a way to mount them to the blinds’ looped cords.
After mounting some nylon spacers with rubber grommets on the servo arms, he installed them into a set of brackets he built and gave the blinds a spin. Now, he can easily control his blinds from the comfort of his desk with the simple flick of a switch – that’s the kind of laziness ingenuity we can respect!
Continue reading to see a quick video of his motorized blinds in action.
Continue reading “Motorized Blinds Put Control At Your Fingertips”
Easily Movable RFID Door Lock Is Great For Dorm Rooms
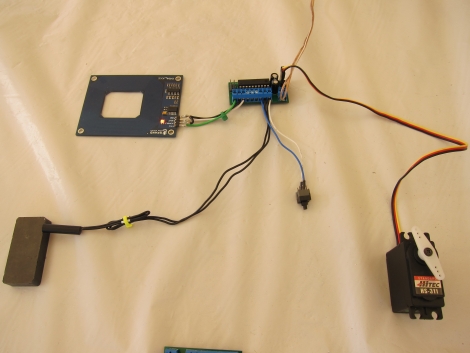
One of the first things that [Eric] hacked together when he got to college was an RFID door locking system. He found that he was often in a rush to get in and out of his dorm room, and that using a simple wireless key was a great way to streamline his days.
Over the years, he has refined his design, and while his original prototype was functional, it was a bit rough around the edges. In the video posted on his site, he thoroughly explains how his system was built, and shows off the revisions he has made over time. One key consideration when building this system was the fact that the installation had to be non-permanent. Since schools typically frown on physically altering your rooms, he found a non-intrusive means to mount his system in the way of zip ties and foam board.
His RFID door lock looks to work quite nicely, and we especially like the inclusion of the reed switch to ensure that the system knows if the door has been opened or not. If you have about half an hour to spare and are interested in building an RFID entry system of your own, be sure to check out [Eric’s] video below for all the details.
Continue reading “Easily Movable RFID Door Lock Is Great For Dorm Rooms”
Arduino Releases New Products; Help Them Develop ARM-based Arduino

The Arduino folks took advantage of Maker Faire New York to announce their new line of products. There’s several interesting new additions to their product line.
They’ve got a WiFi shield in the works that utilizes a module from H&D Wireless in conjunction with an AVR32 processor to take the workload off of the ATmega chip on the Arduino board. It even has room for you to run your own code on the shield’s processor.
Notable (but of less interest to us) is the 1.0 release of the IDE and the development of a new low-cost board. That hardware is intended to make USB device development easier for those already familiar with the Arduino platform.
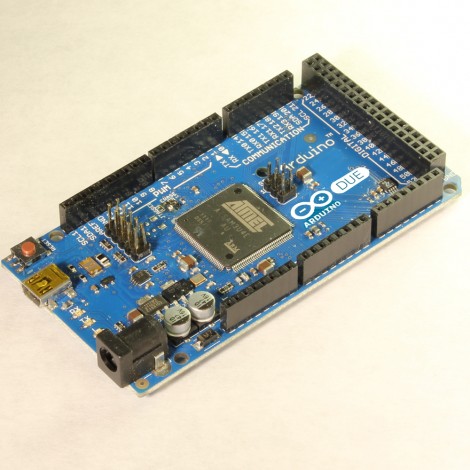
But the big news that caught our eye is the announcement of an ARM Cortex-M3 Arduino called the Due (we already wish that had been named something different just for search term contrast to the Duemilanova). The hardware hasn’t been finalized yet, although you can see a prototype in the picture above. They want community input on the final touches, so get in there and give them a hand!
[Thanks Insapio and Tom]