Dev Board From An AVR Programmer

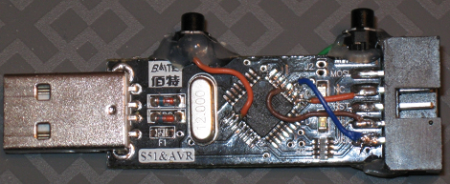
[jethomson] sent in a build he’s been working on that turns an inexpensive AVR programmer into a development board. The build is based on the very affordable USBasp programmer that’s based on an ATmega8. With hundreds of these boards available from China for less than a Hamilton, we’re wondering how soon it will be before we see these boards end up in other projects.

After fiddling with the AVR fuse settings, [jethomson] managed to burn some code to the microcontroller. After that, all that was required to upload software to the programmer is a bit of solder, a push button, and an external programmer. [jethomson] also managed to make this little AVR programmer compatible with the Arduino environment with a small addition to the boards.txt file.

[jethomson] included a few bits of software as an example – he ported the haunted USB cable and adapted the USB business card to print out, “All work and no play makes Jack a dull boy.” Nice work, and we can’t wait to see it in future projects.


High Voltage Hacks: A 1000 Watt Tube Amp

Normally when we hear of a Champ guitar amp, we think of a sweet-sounding rig that puts out 6 Watts through an 8-inch speaker. [John Chambers] of Champ Electronics wanted to build a true champion for the field of battle and came up with The Champ 1000 Watt Tube Amp, an amplifier that probably puts out enough heat to keep an igloo warm.

The amp is based on 807 valves. With some clever engineering [John] managed to coax 100 watts out of a pair of 807s, so the entire amp “only” requires 20 power tubes. The build log shows some pretty impressive examples of electrical prowess. We can’t recall the last time we featured a build with point-to-point wiring on tagboard, and [John]’s work is some of the best we’ve ever seen.

[John] has been working on this amp off and on for a few years now, but he should be wrapping up the build sometime soon. We haven’t seen this amp in action, but we imagine it would look something like this 36×10 monstrosity. Send us a message or post a comment if you can find a video and we’ll put it up.

Raspberry Pi Might Not Be Vaporware

When we first covered the Raspberry Pi, we secretly wondered if the project might become vaporware. It looks like the tiny, full-fledged computer might actually be produced with the announcement of alpha boards in the Raspberry Pi HQ.

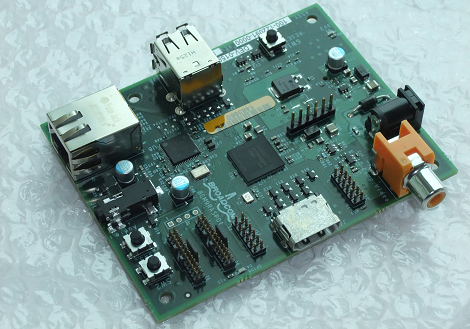
In the announcement of the Raspberry Pi last May, the board was about the size of a USB thumb drive and would cost $25. It looks like the board will be a little larger in the final revision – about the size of a business card – and production of the alpha boards were a bit over cost. That being said, these boards seem a lot more capable than what we’ve seen before. The Raspberry Pi now has 10/100 ethernet, and analog audio and video while keeping the HDMI, USB, and SD card support we saw in the original.

The Raspberry Pi team already has Debian running on these boards, so right now we’re wondering when gumstix boards will come down in price. Of course, this project is intended for use in education, but we can’t wait to see what can be done with this hardware. If you already know what you would do with this, tell us in the comments.

Large 7 Segment Display Made From Glue

We here at Hack A Day love LED’s, and all things LED related, but one of the biggest problems with LED’s are the small size. We want bigger and brighter, matrices the size of our TV, seven segments as big as a wall and a single white led the size of a baseball, and brighter than the sun!

I was recently commissioned to make a device which uses a pretty large number display, and I went out shopping. The seven segment we liked best was still quite pricey, and would not fit our enclosure correctly anyway. We ended up going a different route, but it really got me thinking… What if you wanted to make something with a fairly large display? And how could one go about doing it cheaply at home?

I first thought about acrylic rods, but no one near me had any of small diameter, or at a decent price. Never mind that I don’t have that many tools on hand, and I could just see me trying to drill out the end of a thin plastic rod using a electric hand drill, and my knees as a clamp. Looking around the HQ I found my stash of glue-sticks. I thought would make an interesting display and it is easy to work with.

Before I knew it I had a working (serial and expandable) 9 inch tall 6 inch wide 7 segment display. I will be the fist to admit, its not spectacular in quality, or brightness, though the display itself did only cost four dollars in material. A quick and easy project, especially if you need a quick scoreboard or large clock.

Join us after the break to see how the display and the controller circuit are made.

Continue reading “Large 7 Segment Display Made From Glue”

Paddle Controller For GPU Overclocking

[Fred] likes to squeeze every cycle possible out of his graphics card. But sometimes pushing the clock speed too high causes corruption. He figured out a way to turn a knob to adjust the clock speed while your applications are still running.

The actuator seen above is a Griffin Powermate 3.0. It’s a USB peripheral which is meant to be used for anything you can imagine. [Fred] uses an AutoHotKey script that he wrote to capture the input from the spinner, process that information, then adjust GPU clock speed in the background. Since the clock on his ATi Radeon 5800 can be adjusted using the AMD GPU clock tool, it’s an easy choice for this application. Now better graphics are at the tips of his fingers. See for yourself in the video after the break.

Of course if you don’t want to shell out for the fancy hardware you could always build your own paddle controller.

Continue reading “Paddle Controller For GPU Overclocking”

shadeydaves_lawnbot

How Not To Build A Robotic Lawnmower

[shadeydave] wanted to build his own Lawnbot, but he had no idea where to start. He purchased some DIY plans online which looked like they would get the job done, but then he strayed from the path in a big way and spent gobs of money in the process.

In his Instructable writeup, he details each misstep he made, explaining why his choices were bad as well as how much each mistake cost him. It sounds like pretty much everything that could go wrong did go wrong, from spending money on unnecessary microcontrollers to choosing the wrong wheels. Our favorite part is where he mentions that he couldn’t figure out how to create a “kill switch” for the Lawnbot in the event that his transmitter loses contact with the speedy whirling death machine.

[shadeydave] is well aware of how poorly his build went, and primarily wrote it up as a cautionary tale to others out there who might decide to take on a similar project. He says that the Lawnbot works for the most part, but with his newfound wisdom he will be revising the bot, having learned from his mistakes.

We actually like to see this kind of writeup as they can be quite beneficial to someone trying to put together a similar project. So if you have some major flubs under your belt, don’t be shy about digging them out and letting us know. As Thomas Edison said, “I have not failed. I have just found 10,000 ways that won’t work.”

Continue reading to see a quick video tour of [shadeydave’s] mostly working Lawnbot.

Continue reading “How Not To Build A Robotic Lawnmower”

Evalbot OS Set Free

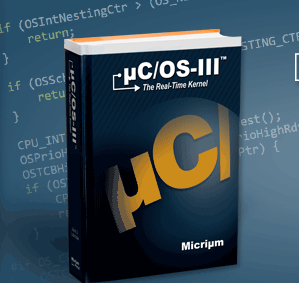
[Theo] tipped us off about something that every TI Evalbot owner may be interested in, the The manual and source code for the uC/OS-III kernel is now available for download. UC/OS-III is what came with the evalbot, and it is a realtime operating system for that and many other chips. The problem with it for most hobby level people is that just the manual was 100$, and unless you already knew something about the system it did not sound very attractive.

But now micrium, the author of US/OS-III, has released the source code free to use in non commercial applications, and manuals for every chip supported it may drum up some more interest in this neat little RTOS. Though it does require a subscriber login.

Excerpt:

Dear Subscriber,

The ideal scenario for developers wishing to evaluate embedded software is to be granted easy access to the software’s full source code.  In the case of Micriµm’s celebrated real-time kernel, µC/OS-III, this ideal has become reality.  Last week, Micriµm announced a new policy for µC/OS-III: the kernel is now “source available.” µC/OS-III’s incomparably clean source code, as well as PDFs of the popular books describing the kernel, can be downloaded from Micriµm’s Web site at no cost, giving developers a refreshingly fast and simple means of beginning an evaluation