Ever wanted to sniff USB device communications? The usual path was buying an expensive metal box with USB connectors, using logic analyzers, or wiring devboards together and hacking some software to make them forward USB data.
Now, thanks to [ataradov]’s work, you can simply use a Pi Pico – you only need to tap the D+ and D- pins, wire them to RP2040’s GPIOs, and you can sniff communication between your computer and any low-speed (1.5 Mbps) or full-speed (12 Mbps) devices. On the RP2040 side, plug the Pico into your computer, open the virtual serial port created, and witness the USB packets streaming in – for the price of a Pico, you get an elegant USB sniffer, only a little soldering required.
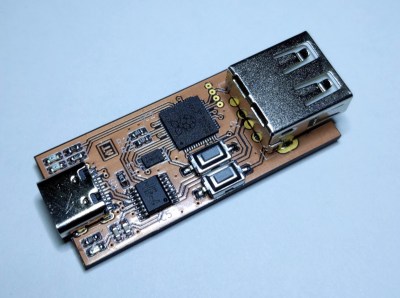 [ataradov] also offers us a complete board design with a RP2040 and a USB hub on it, equipped with USB sockets that completely free us from the soldering requirement; it’s an open-source KiCad design, so you can simply order some sniffers made from your favourite fab! This project is a great learning tool, it’s as cheap and easy to make as humanly possible, and it has big potential for things like reverse-engineering old and new systems alike. Just couple this hack with another Pico doing USB device or host duty, maybe get up to date with USB reverse-engineering fundamentals, and you could make a Facedancer-like tool with ease.
Need to reach 480 Mbit/s? [ataradov] has a wonderful board for you as well, that we have covered last year – it’s well worth it if a device of yours can only do the highest speed USB2 can offer, and, it offers WireShark support. Want WireShark support and to use a Pico? Here’s a GitHub project by another hacker, [tana]. By now, merely having a Pi Pico gives you so many tools, it’s not even funny.
We thank [Julianna] for sharing this with us!