Checking Belt Tension Gets Easier For (Some) Prusa 3D Printers

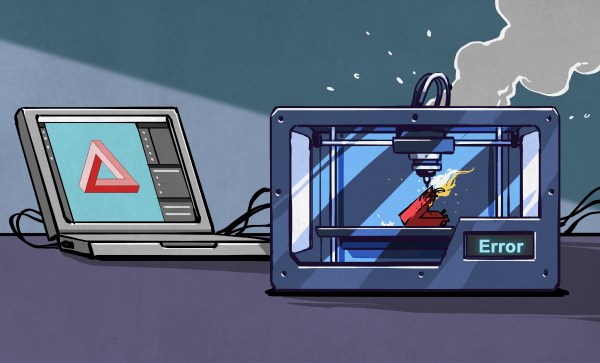
Belts on a 3D printer should be tight enough, but not too tight. That can be an iffy thing to get right for someone who lacks familiarity with CNC platforms. Prusa Research aims to make it a bit easier with a web app that can measure tension via your mobile phone’s microphone and diagnose belt tightness, at least for their MK4 and XL printers.

Using different tools to analyze belt tightness (including belt acoustics) have been tried in the past with mixed results, but this is a pretty focused approach that aims to give exact guidance for specific printer models. It’s pretty useful to provide someone with a reliable go/no-go number, after all.

What happens to a printer if a belt’s tension is not right? Well, there’s actually a pretty forgiving range within which the printer will mostly work fine, but not as well as it could be. Loose belts can have novices chasing other problems, and overly-tightened belts definitely put extra strain on parts. It’s one of those things that’s worth a little extra work to get right.

3D printable tension meter is a different option for Prusa MK3 and Mini printers, if one has some Prusament PETG to print it in.

Everything about belt tension for Prusa printers is covered in their documentation, but did you know there’s also neat 3D printable tension meter for Prusa MK3 and Mini printers? It’s meant to be printed in Prusament PETG (printing in other materials may have different results) but it’s a pretty neat idea for a tool.

If you have a Prusa MK4 or XL and want to try their new method, go here and allow access to your device’s microphone. Then select a printer model and an axis to test. Gently strum the upper part of the belt (avoid touching the bottom belt in the process) and watch live results telling you whether the belt is too tight, too loose, or just right. Prusa have a video demonstrating the process, also embedded below.

Continue reading “Checking Belt Tension Gets Easier For (Some) Prusa 3D Printers”

It’s A Sander! No, It’s A Toothbrush! Relax, Relax, It’s Both

We always enjoy a project that transforms some common object into something useful for us. [Modelkitsdeluxe] fits the bill by modifying a power toothbrush into a miniature sander. If you want to practice your Spanish, you can watch the video below. Or you can try the automatically translated captions.

As you can guess from the user name, he is mainly interested in working with small models, but it struck us that this might also be useful for general 3D printing. Honestly, once you have the idea, there isn’t much to it. You mutilate a brush head that fits the toothbrush to accept a small sanding disk.

There are probably a dozen ways to attach your sandpaper or emery cloth to the head. [Modelkitdeluxe] used double-sided tape and Velcro. While we applaud the upcycling, we’ll probably stick with a hobby tool. Our toothbrush makes an annoying buzz every 30 seconds or so to remind you to move to another part of your mouth. That doesn’t seem like a great feature when doing precision sanding. On the other hand, you could probably yank the controller out of the toothbrush and use it for the motor, drive, and batteries to avoid that.

If you want to tackle that, here’s something to get you started. If sanding doesn’t turn your crank, maybe you can try turning your deadbolt.

Continue reading “It’s A Sander! No, It’s A Toothbrush! Relax, Relax, It’s Both”

Take A PEEK At This 3D Printer

Normally, when you think of PEEK in 3D printing, you think of a part made of PEEK, suitable for lower-temperature plastics. [ND-3D] has a different idea: printing with PEEK. You can get the details over on Hackaday.io, and there are a few YouTube videos below. Using a special controller and a halogen lamp, you can modify your own printer to use this exotic material often found in printer hot ends.

Logically, if PEEK is used near the hot end of regular printers, it must need a higher temperature to print. PEEK has a glass transition temperature of about 143 °C and melts at 343 °C. Compare this to PLA, which melts between 150 °C and 180 °C and has a glass transition temperature of only 60 °C.

Continue reading “Take A PEEK At This 3D Printer”

3D Printing With Clay, Thanks To Custom Extruder

When it comes to 3D printing clay, there are a lot of challenges to be met. An extruder capable of pushing clay is critical, and [davidsfeir] has an updated version suitable for an Ender 3 printer. This extruder is based on earlier designs aimed at delta printers, but making one compatible with an Ender 3 helps keep things accessible.

Lightly pressurized clay comes in via the clear tube. Air escapes out the top (motor side) while an auger homogenizes the clay and pushes it out the nozzle.

What’s special about a paste extruder that can push clay? For one thing, clay can’t be stored on a spool, so it gets fed into the extruder via a hose with the help of air pressure. From there, the clay is actually extruded with the help of an auger that takes care of pushing the clay down through the nozzle. The extruder also needs a way to deal with inevitable air bubbles, which it does by allowing air to escape out the narrow space at the top of the assembly while clay gets fed downward.

[davidsfeir] was greatly inspired by the work of clay-printing pioneers [Piotr Waśniowski] and his de-airing clay extruder, and [Jonathan Keep], who has documented 3D printing with clay comprehensively in a freely-available PDF. You can check out more of [david]’s designs on his Instagram page.

There are so many different aspects to printing with clay or clay-like materials that almost every part is ripe for innovation. For example, we’ve seen wild patterns result from sticking a thumping subwoofer under a print bed.

Resin Printer Temperature Mods And Continuous IPA Filtration

Two essential parts to producing successful resin 3D prints: keeping resin at its optimal temperature and lots and lots of IPA to clean the printed parts with after printing. Unfortunately, most consumer MSLA printers do not come with a resin tray heater, and tossing out IPA after every cleaning session because of some resin contamination is both wasteful and somewhat expensive. These are two things that can be fixed in a number of ways, with [Nick Wilson] going for the ‘crank it to 11’ option, using a high-tech, fully integrated solution for both problems.

The vat with IPA is kept clean through the use of a diaphragm pump that circulates the alcohol through two filter stages, one for larger — up to 5 micrometer — particulates and one for smaller 0.5-micrometer junk. A 405 nm LED lighting section before the filters is intended to cure any resin in the IPA, theoretically leaving the IPA squeaky clean by the time it’s returned to the vat.

For the resin tray heater, a more straightforward 12V 150 Watt silicone heater strip is stuck to the outside edge of the metal resin tray, along with a temperature-controlled relay that toggles the heater strip on and off until the resin reaches the desired temperature. None of these are necessarily expensive solutions, but they can be incredibly useful if you do a fair amount of resin printing.

Continue reading “Resin Printer Temperature Mods And Continuous IPA Filtration”

3D-Printed Woven Coasters Save Tabletops In Style

When regular people think of 3D printing, they likely imagine semi-newfangled objects like twisty vases and useless trinkets. But there is so much more to 3D printing, as [andrei.erdei]’s printed, woven coasters demonstrate.

The design is based on the stake and strand basket weaving technique, which uses rigid strips called stakes in one direction and thinner strips called strands in the other. Since the flexibility of PLA is questionable, [andrei] printed the stakes already bent in a square wave pattern that accommodates the strands fairly easily. To tie the coasters together and make them look more polished and commercial, [andrei] designed a holder as well.

The awesome thing about this technique is that you can do so much with it, like varying the stakes’ widths or making them diagonal instead of square. [andrei] designed these in Tinkercad using Codeblocks; of course, they are open source. Be sure to check out the assembly video after the break.

Continue reading “3D-Printed Woven Coasters Save Tabletops In Style”

Four images in as many panes. Top left is a fuchsia bottle with a QR code that only shows up on the smartphone screen held above it. Top right image is A person holding a smartphone over a red wristband. The phone displays a QR code on its screen that it sees but is invisible in the visible wavelengths. Bottom left is a closeup of the red wristband in visible light and the bottom right image is the wristband in IR showing the three QR codes embedded in the object.

Fluorescent Filament Makes Object Identification Easier

QR codes are a handy way to embed information, but they aren’t exactly pretty. New work from MIT’s Computer Science and Artificial Intelligence Laboratory (CSAIL) have a new way to produce high contrast QR codes that are invisible. [PDF]

If this sounds familiar, you may remember CSAILs previous project embedding QR codes into 3D prints via IR-transparent filament. This followup to that research increases the detection of the objects by using an IR-fluorescent filament. Another benefit of this new approach is that while the InfraredTags could be any color you wanted as long as it was black, BrightMarkers can be embedded in objects of any color since the important IR component is embedded in traditional filament instead of the other way around.

One of the more interesting applications is privacy-preserving object detection since the computer vision system only “sees” the fluorescent objects. The example given is marking a box of valuables in a home to be detected by interior cameras without recording the movements of the home’s occupants, but the possibilities certainly don’t end there, especially given the other stated application of tactile interfaces for VR or AR systems.

We’re interested to see if the researchers can figure out how to tune the filament to fluoresce in more colors to increase the information density of the codes. Now, go forth and 3D print a snake with snake in a QR code inside!

Continue reading “Fluorescent Filament Makes Object Identification Easier”