Hefty 3D Printed Quadcopter Meets Nasty End

You can readily buy all kinds of quadcopters off the shelf these days, but sometimes it’s more fun to build your own. [Michael Rechtin] did just that, with a hefty design of his own creation.

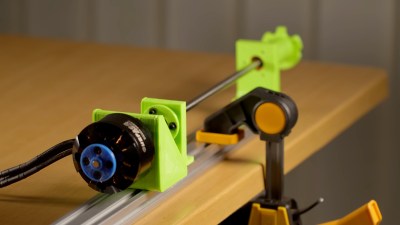
The build is an exploration of all kinds of interesting techniques. The frame itself uses generative design techniques to reduce weight while maintaining strength, while the motors themselves make heavy use of 3D-printed components. The design is modular and much of it slots together, too, and it uses a homebrewed flight controller running dRehmflight. It draws 2.5 kW from its lithium polymer batteries and weighs over 5 kg.

The DIY ethos led to some hurdles, but taught [Michael] plenty along the way. Tuning the PID control loop posed some challenges, as did one of the hand-wound motors being 5% down on thrust.  Eventually, though, the quad flew well enough to crash into a rectangular gate, before hitting the ground. Any quad pilot will tell you that these things happen. Drilling into the quad with a battery still inside then led to a fire, which did plenty of further damage.

[Michael’s] quad doesn’t appear to be specifically optimized to any one task, and it’s easy to see many ways in which it could be lightened or otherwise upgraded. However, as a freeform engineering thinking exercise, it’s interesting to watch as he tackles various problems and iteratively improves the design. Video after the break.

Continue reading “Hefty 3D Printed Quadcopter Meets Nasty End”

IKEA’s Billy Bookshelf Is A Useful 3D Printing Enclosure

The results from your 3D printer may be improved if you use a dedicated enclosure for the job. This is particularly helpful for printing certain materials which are more sensitive to cold drafts or other thermal disruptions to the working area.  If you want an elegant solution to the problem, consider getting yourself an IKEA Billy bookshelf, says [wavlew].

The Billy makes a remarkably elegant 3D printing workstation, overall. It’s got a nifty slide-out drawer that makes a perfect mounting point for a 3D printer. It lets you slide out the printer for maintenance, using the controls, or extracting finished prints. It also naturally features plenty of storage for your filament, tools, and other accoutrements. When it comes to the business of actually printing though, you just slide the printer inside and shut the door. Its thermal and noise isolating performance can also be further improved by adding a silicone door seal.

We love this idea. Too often, 3D printers are left chugging away on messy desks, where they’re subject to blasts from AC vents and other disruptions. Having everything tidily tucked away in a cupboard neatens things significantly, and could also prove helpful if you pursue fume extraction, too.

If you’ve identified any other nifty maker applications for IKEA furniture, be sure to let us know!

Checking Belt Tension Gets Easier For (Some) Prusa 3D Printers

Belts on a 3D printer should be tight enough, but not too tight. That can be an iffy thing to get right for someone who lacks familiarity with CNC platforms. Prusa Research aims to make it a bit easier with a web app that can measure tension via your mobile phone’s microphone and diagnose belt tightness, at least for their MK4 and XL printers.

Using different tools to analyze belt tightness (including belt acoustics) have been tried in the past with mixed results, but this is a pretty focused approach that aims to give exact guidance for specific printer models. It’s pretty useful to provide someone with a reliable go/no-go number, after all.

What happens to a printer if a belt’s tension is not right? Well, there’s actually a pretty forgiving range within which the printer will mostly work fine, but not as well as it could be. Loose belts can have novices chasing other problems, and overly-tightened belts definitely put extra strain on parts. It’s one of those things that’s worth a little extra work to get right.

3D printable tension meter is a different option for Prusa MK3 and Mini printers, if one has some Prusament PETG to print it in.

Everything about belt tension for Prusa printers is covered in their documentation, but did you know there’s also neat 3D printable tension meter for Prusa MK3 and Mini printers? It’s meant to be printed in Prusament PETG (printing in other materials may have different results) but it’s a pretty neat idea for a tool.

If you have a Prusa MK4 or XL and want to try their new method, go here and allow access to your device’s microphone. Then select a printer model and an axis to test. Gently strum the upper part of the belt (avoid touching the bottom belt in the process) and watch live results telling you whether the belt is too tight, too loose, or just right. Prusa have a video demonstrating the process, also embedded below.

Continue reading “Checking Belt Tension Gets Easier For (Some) Prusa 3D Printers”

It’s A Sander! No, It’s A Toothbrush! Relax, Relax, It’s Both

We always enjoy a project that transforms some common object into something useful for us. [Modelkitsdeluxe] fits the bill by modifying a power toothbrush into a miniature sander. If you want to practice your Spanish, you can watch the video below. Or you can try the automatically translated captions.

As you can guess from the user name, he is mainly interested in working with small models, but it struck us that this might also be useful for general 3D printing. Honestly, once you have the idea, there isn’t much to it. You mutilate a brush head that fits the toothbrush to accept a small sanding disk.

There are probably a dozen ways to attach your sandpaper or emery cloth to the head. [Modelkitdeluxe] used double-sided tape and Velcro. While we applaud the upcycling, we’ll probably stick with a hobby tool. Our toothbrush makes an annoying buzz every 30 seconds or so to remind you to move to another part of your mouth. That doesn’t seem like a great feature when doing precision sanding. On the other hand, you could probably yank the controller out of the toothbrush and use it for the motor, drive, and batteries to avoid that.

If you want to tackle that, here’s something to get you started. If sanding doesn’t turn your crank, maybe you can try turning your deadbolt.

Continue reading “It’s A Sander! No, It’s A Toothbrush! Relax, Relax, It’s Both”

Take A PEEK At This 3D Printer

Normally, when you think of PEEK in 3D printing, you think of a part made of PEEK, suitable for lower-temperature plastics. [ND-3D] has a different idea: printing with PEEK. You can get the details over on Hackaday.io, and there are a few YouTube videos below. Using a special controller and a halogen lamp, you can modify your own printer to use this exotic material often found in printer hot ends.

Logically, if PEEK is used near the hot end of regular printers, it must need a higher temperature to print. PEEK has a glass transition temperature of about 143 °C and melts at 343 °C. Compare this to PLA, which melts between 150 °C and 180 °C and has a glass transition temperature of only 60 °C.

Continue reading “Take A PEEK At This 3D Printer”

3D Printing With Clay, Thanks To Custom Extruder

When it comes to 3D printing clay, there are a lot of challenges to be met. An extruder capable of pushing clay is critical, and [davidsfeir] has an updated version suitable for an Ender 3 printer. This extruder is based on earlier designs aimed at delta printers, but making one compatible with an Ender 3 helps keep things accessible.

Lightly pressurized clay comes in via the clear tube. Air escapes out the top (motor side) while an auger homogenizes the clay and pushes it out the nozzle.

What’s special about a paste extruder that can push clay? For one thing, clay can’t be stored on a spool, so it gets fed into the extruder via a hose with the help of air pressure. From there, the clay is actually extruded with the help of an auger that takes care of pushing the clay down through the nozzle. The extruder also needs a way to deal with inevitable air bubbles, which it does by allowing air to escape out the narrow space at the top of the assembly while clay gets fed downward.

[davidsfeir] was greatly inspired by the work of clay-printing pioneers [Piotr Waśniowski] and his de-airing clay extruder, and [Jonathan Keep], who has documented 3D printing with clay comprehensively in a freely-available PDF. You can check out more of [david]’s designs on his Instagram page.

There are so many different aspects to printing with clay or clay-like materials that almost every part is ripe for innovation. For example, we’ve seen wild patterns result from sticking a thumping subwoofer under a print bed.

Resin Printer Temperature Mods And Continuous IPA Filtration

Two essential parts to producing successful resin 3D prints: keeping resin at its optimal temperature and lots and lots of IPA to clean the printed parts with after printing. Unfortunately, most consumer MSLA printers do not come with a resin tray heater, and tossing out IPA after every cleaning session because of some resin contamination is both wasteful and somewhat expensive. These are two things that can be fixed in a number of ways, with [Nick Wilson] going for the ‘crank it to 11’ option, using a high-tech, fully integrated solution for both problems.

The vat with IPA is kept clean through the use of a diaphragm pump that circulates the alcohol through two filter stages, one for larger — up to 5 micrometer — particulates and one for smaller 0.5-micrometer junk. A 405 nm LED lighting section before the filters is intended to cure any resin in the IPA, theoretically leaving the IPA squeaky clean by the time it’s returned to the vat.

For the resin tray heater, a more straightforward 12V 150 Watt silicone heater strip is stuck to the outside edge of the metal resin tray, along with a temperature-controlled relay that toggles the heater strip on and off until the resin reaches the desired temperature. None of these are necessarily expensive solutions, but they can be incredibly useful if you do a fair amount of resin printing.

Continue reading “Resin Printer Temperature Mods And Continuous IPA Filtration”