3D Printering: Treating Filament Like Paint Opens Wild Possibilities

New angles and concepts in 3D printing are always welcome, and we haven’t seen anything quite like [Horn & Rhode]’s 3D prints that do not look anything like 3D prints, accomplished with an experimental tool called HueForge. The concept behind it is simple (though not easy), and the results can be striking when applied correctly.

3D prints that really don’t look 3D-printed.

The idea is this: colored, melted filament is, in a sense, not that different from colored paint. Both come in various colors, are applied in thin layers, and blend into new colors when they do so. When applied correctly, striking imagery can emerge. An example is shown here, but there are several more both on the HueForge project page as well as models on Printables.

Instead of the 3D printer producing a 3D object, the printer creates a (mostly) flat image similar in structure to a lithophane. But unlike a lithophane, these blend colors in clever and effective ways by printing extremely thin layers in highly precise ways.

Doing this effectively requires a software tool to plan the color changes and predict how the outcome will look. It all relies on the fact that even solid-color filaments are not actually completely opaque — not when printed at a layer height of 0.08 mm, anyway — and colors will, as a result, blend into one another when layered. That’s how a model like the one shown here can get away with only a few filament changes.

Of course, this process is far from being completely automated. Good results require a solid amount of manual effort, and the transmissivity of one’s particular filament choices plays a tremendous role in how colors will actually blend. That’s where the FilaScope comes in: a tool to more or less objectively measure how well (or how poorly) a given filament transmits light. The results plug into the HueForge software to better simulate results and plan filament changes.

When done well, it’s possible to create things that look nothing at all like what we have come to expect 3D-printed things to look. The cameo proof-of-concept model is available here if you’d like to try it for yourself, and there’s also an Aztec-style carving that gives a convincing illusion of depth.

[Horn & Rhode] point out that this concept is still searching for a right-sounding name. Front-lit lithophane? Reverse lithophane? Filament painting? Color-blended bas-relief? If you have a better idea, we urge you not to keep it to yourself because [Horn & Rhode] absolutely want to hear from you.

Reliable 3D Printing With Ceramic Slurry

3D printing is at its most accessible (and most affordable) when printing in various plastics or resin. Printers of this sort are available for less than the cost of plenty of common power tools. Printing in materials other than plastic, though, can be a bit more involved. There are printers now for various metals and even concrete, but these can be orders of magnitude more expensive than their plastic cousins. And then there are materials which haven’t really materialized into a viable 3D printing system. Ceramic is one of those, and while there are some printers that can print in ceramic, this latest printer makes some excellent strides in the technology.

Existing technology for printing in ceramic uses a type of ceramic slurry as the print medium, and then curing it with ultraviolet light to solidify the material. The problem with ultraviolet light is that it doesn’t penetrate particularly far into the slurry, only meaningfully curing the outside portions. This can lead to problems, especially around support structures, with the viability of the prints. The key improvement that the team at Jiangnan University made was using near-infrared light to cure the prints instead, allowing the energy to penetrate much further into the material for better curing. This also greatly reduces or eliminates the need for supports in the print.

The paper about the method is available in full at Nature, documenting all of the details surrounding this new system. It may be a while until this method is available to a wider audience, though. If you can get by with a print material that’s a little less exotic, it’s not too hard to get a metal 3D printer, as long as you are familiar with a bit of electrochemistry.

Hinged Parts For The 8th Grade Set

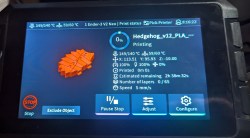
I recently agreed to run a 3D printing camp for 8th graders. If you’ve never shared your knowledge with kids, you should. It is a great experience. However, it isn’t without its challenges. One thing I’ve learned: don’t show the kids things that you don’t want them to try to print.

I learned this, of course, the hard way. I have several “flexy”3D prints. You know the kind. Flexy dinosaurs, cats, hedgehogs, and the like. They all have several segments and a little hinge so the segments wobble. The problem is the kids wanted to print their own creations with flexy hinges.

I’ve built a few print-in-place hinges, but not using Tinkercad, the software of choice for the camp. While I was sure it was possible, it seemed daunting to get the class to learn how to do it. Luckily, there’s an easy way to add hinges like this to a Tinkercad design. There was only one problem.

Continue reading “Hinged Parts For The 8th Grade Set”

These 3D Printed Biocatalytic Fibers Scrub Carbon Dioxide

On today’s episode of “What If?” — what if the Apollo 13 astronauts had a 3D printer? Well, for one thing, they may have been able to avoid all the futzing with duct tape and procedure list covers to jury rig the lithium hydroxide filters, at least if they’d known about these 3D printed enzymatic CO2 filters. And time travel…they probably would have needed that too.

A bit of a stretch, yes, but environmental CO2 scrubbing is at least one use case for what [Jialong Shen] et al from the Textile Engineering Department at North Carolina State University have developed here. The star of the show isn’t so much the 3D printing — although squirting out a bio-compatible aerogel and cross-linking it with UV light on the fly is pretty cool. Rather, the key to developing a CO2-scrubbing textile is carbonic anhydrase, or CA, a ubiquitous enzyme that’s central to maintaining acid-base homeostasis. CA is a neat little enzyme that coordinates a zinc ion in its active site and efficiently catalyzes the addition of water to carbon dioxide to produce bicarbonate and hydrogen ions. A single CA molecule can catalyze the conversion of up to a million CO2 molecules per second, making it very attractive as a CO2 filter.

In the current work, an aerogel of poly(ethylene glycol) diacrylate/poly(ethylene oxide) (PEG-DA/EO) was used to entrap CA molecules, holding them in place in a polymer matrix to protect them from denaturation while still allowing access to gaseous CO2. The un-linked polymers were mixed with photoinitiators and a solution of carbonic anhydrase and extruded through a fine nozzle with a syringe pump. The resulting thread was blasted with 280–450 nm UV light, curing the thread instantly. The thread is either wound up as a mono-filament for later weaving or printed directly into a 2D grid.

The filament proved to be quite good at CO2 capture, managing to scavenge 24% of the gas from a mixture passed over it. What’s more, the entrapped enzyme appears to be quite stable, surviving washes with various solvents and physical disruptions like twisting and bending. It’s an exciting development in catalytic textiles, and besides its obvious environmental uses, something like this could make cheap, industrial-scale bioreactors easier to build and run.

Photo credits: [Sen Zhang] and [Jialong Shen], NC State; [Rachel Boyd], Spectrum News 1

[via Phys.org]

Art of 3D printer in the middle of printing a Hackaday Jolly Wrencher logo

Microsculptures 3D Printed With Advanced Macromolecular “Inks”

When we think about 3D printing, our mind often jumps to hot nozzles squirting out molten plastic. Other popular techniques include flashing bright light into resin, or using lasers to fuse together metal powders. All these techniques are great at producing parts with complicated geometries at desktop scales.

However, it’s also possible to 3D print at altogether microscopic scales. Researchers in Germany have now developed advanced macromolecular “inks” that can be used to create microscopic 3D sculptures with finer control than ever before.

Continue reading “Microsculptures 3D Printed With Advanced Macromolecular “Inks””

3D Printing Safety (According To The UL)

If you want to start a heated discussion in 3D printing circles, ask people about the requirements to print safely. Is ABS safe to print without ventilation? Can you drink out of a PLA cup? How nasty is that photo resin if you spill it on yourself? If you are at home, it’s more or less up to you. But if you are building a shared hackerspace, a corporate workstation, or a classroom, these questions might come up, and now, the UL has your answer. The UL200B document is aimed at 3D printers in “institutions of higher education,” but we imagine what’s good for the university is good for us, too.

The 45-page document isn’t an easy read. It does cover both “material extrusion” and “vat photopolymerization” technology. In fact, they identify seven “most common” processes ranging from powder bed fusion, energy deposition, and more.  The work results from a UL task force with participants from Harvard, Princeton, and Carnegie-Mellon. We were surprised there didn’t seem to be any industry representation, but maybe that was on purpose.

With extrusion printing — what we’d call FDM — the focus seems to be on ultra-fine particles and volatile organic compounds (VOCs). However, the level of VOCs rose up to six times with resin printers when compared to FDM. Filters helped with ABS, nylon, and ASA, and polycarbonate/ABS. The paper does acknowledge that PLA is probably safer, although it is quick to point out that PLA with additives may not be as safe as plain PLA. If you want a quick summary, check out Table 2, starting on page 23.

The rest of the document is about creating a safety plan for all the printers that might be on a college campus — that might not be as interesting. However, you’ll want to skip forward to the appendix section. It has some data about relevant industrial standards and other data.

This is a great step in analyzing the risks of 3D printing. Of course, laser printers and copiers also spew micro-particles, and we seem to have survived those for a number of decades. Still, more data is good — you should be informed to make decisions about your health and safety. We didn’t see much in the document that covered food safety, something we’ve talked about before. If you want to monitor your VOC exposure, we got you.

3D Printing Bores Without Support

If you’ve done even a small amount of 3D printing, you probably ran into the challenge of printing a small hole on top of a larger hole. The conventional solution is just to add support, but in the video after the break, [Angus] of Maker’s Muse demonstrates an alternative solution you can implement in CAD, without having to do manual post-processing.

This is a common problem when you have a countersink feature for a bolt head or captured nut on the bottom of the part. [Angus] first demonstrates some other techniques, including printing the bore over empty space, adding a sacrificial bridge, and making the overhang 45°. Each of these work but have some trade-offs. The proposed solution is what [Angus] calls sequential overhangs. It involves bridging the sides of the open space in steps to create supporting edges onto which the bore perimeter can print. It starts with 2 or 3 bridging layers to create a rectangle the same width as the bore, and then a second set of bridges at 90° to turn the opening into a square. For smaller holes this should create enough of a support to start the bore perimeter, but for larger holes three sets of bridges at 60° offsets might be needed.

[Angus] does not claim to have invented the technique but states he borrowed the idea from parts printed by Prusa Research for their popular line of 3D printers. One of the comments on the [Maker’s Muse] video referenced a 2014 blog post by [nophead] showing the same approach. Regardless of the idea’s lineage, it’s a great addition to anyone’s 3D printing design toolbox.
Continue reading “3D Printing Bores Without Support”