Automated Turntable For 3D Scanning

Those just starting out in 3D printing often believe that their next major purchase after the printer will be a 3D scanner. If you’re going to get something that can print a three dimensional model, why not get something that can create said models from real-world objects? But the reality is that only a small percentage ever follow through with buying the scanner; primarily because they are notoriously expensive, but also because the scanned models often require a lot of cleanup work to be usable anyway.

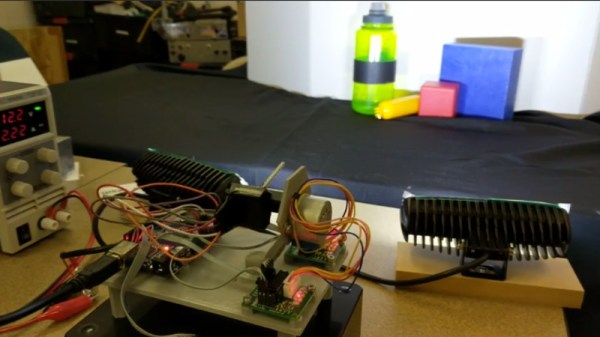
While this project by [Travis Antoniello] won’t make it any easier to utilize scanned 3D models, it definitely makes them cheaper to acquire. So at least that’s half the battle. Consisting primarily of a stepper motor, an Arduino, and a EasyDriver controller, this is a project you might be able to assemble from the parts bin. Assuming you’ve got a pretty decent camera in there, anyway…

The general idea is to place a platform on the stepper motor, and have the Arduino rotate it 10 degrees at a time in front of a camera on a tripod. The camera is triggered by an IR LED on one of the Arduino’s digital pins, so that it takes a picture each time the platform rotates. There are configurable values to give the object time to settle down after rotation, and a delay to give the camera time to take the picture and get ready for the next one.

Once all the pictures have been taken, they are loaded into special software to perform what’s known as photogrammetry. By compiling all of the images together, the software is able to generate a fairly accurate 3D image. It might not have the resolution to make a 1:1 copy of a broken part, but it can help shave some modeling time when working with complex objects.

We’ve previously covered the use of photogrammetry to design 3D printed accessories, as well as a slightly different take on an automated turntable a few years ago. The process is still not too common, but the barriers to giving it a try on your own are at least getting lower.

Continue reading “Automated Turntable For 3D Scanning”

An LED You Can Blow Out, With No Added Sensor

We’d seen it done with buttons, switches, gestures, capacitive touch, and IR remote, but never like this. [electron_plumber] made an LED that can be blown out like a candle, and amazingly it requires no added sensors. The project uses an Arduino to demonstrate turning a tiny LED on and off in response to being blown on, and the only components are the LED and a resistor.

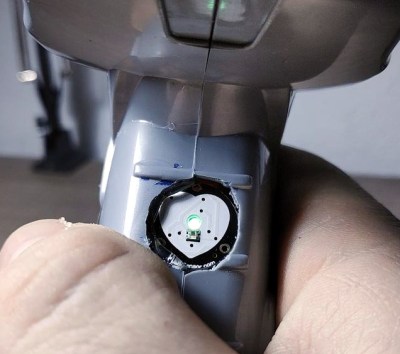
[electron_plumber] used an 0402 LED and thin wires to maximize the temperature responses.
How is this done? [electron_plumber] uses an interesting property of diodes (which are the “D” in LED) to use the LED itself as a temperature sensor. A diode’s voltage drop depends on two things: the current that is being driven through the diode, and the temperature. If the current is held constant, then the forward voltage drop changes reliably in response to temperature. Turning the LED on warms it up and blowing on it cools it off, causing measurable changes in the voltage drop across the device. The change isn’t much — only a handful of millivolts — but the effect is consistent and can be measured. This is a principle [Elliot Williams] recently covered in depth: using diodes as temperature sensors.

It’s a clever demo with a two important details to make it work. The first is the LED itself; [electron_plumber] uses a tiny 0402 LED that is mounted on two wires in order to maximize the temperature change caused by blowing on it. The second is the method for detecting changes of only a few millivolts more reliably. By oversampling the Arduino’s ADC, an effectively higher resolution is obtained without adding any hardware or altering the voltage reference. Instead of reading the ADC once, the code reads the ADC 256 times and sums the readings. By working with the larger number, cumulative changes that would not register reliably on a single read can be captured and acted upon. More details are available from [electron_plumber]’s GitHub repository for LEDs as Sensors.

Embedded below is a video that is as wonderful as it is brief. It demonstrates the project in action, takes a “show, don’t tell” approach, and is no longer than it needs to be.

Continue reading “An LED You Can Blow Out, With No Added Sensor”

PCB Junk Drawer Turned Into Blinky Mosaic

We’ve all got a box full of old PCBs, just waiting to be stripped of anything useful. [Dennis1a4] decided to do something with his, turning it into an attractive mosaic that he hung on the wall of his new workshop. But this isn’t just a pile of old PCBs: [Dennis1a4] decided to use the LEDs that were on many of the old boards, creating a blinky junk build. That’s kind of neat in itself, but he then decided to go further, building in an IR receiver so he could control the blinkiness, and a PIR sensor that detected when someone was near the mosaic.

This whole setup is controlled by an ATMega328p  that is driving a couple of PCF8575 port expanders that drive the LEDs. These blink in Morse code patterns. [Dennis1a4] also used an array of DIP switches on one of the boards to randomize the patterns, and wired in a pizeo buzzer on another board to make appropriate bleepy noises.

Continue reading “PCB Junk Drawer Turned Into Blinky Mosaic”

Welcome To The Internet Of Swords

As has been made abundantly clear by the advertising department of essentially every consumer electronics manufacturer on the planet: everything is improved by the addition of sensors and a smartphone companion app. Doesn’t matter if it’s your thermostat or your toilet, you absolutely must know at all times that it’s operating at peak efficiency. But why stop at household gadgets? What better to induct into the Internet of Things than 600 year old samurai weaponry?

Introducing the eKatana by [Carlos Justiniano]: by adding a microcontroller and accelerometer to the handle of a practice sword, it provides data on the motion of the blade as it’s swung. When accuracy and precision counts in competitive Katana exhibitions, a sword that can give you real time feedback on your performance could be a valuable training aid.

The eKatana is powered by an Adafruit Feather 32u4 Bluefruit LE and LSM9DS0 accelerometer module along with a tiny 110 mAh LiPo battery. Bundled together, it makes for a small and unobtrusive package at the base of the sword’s handle. [Carlos] mentions a 3D printed enclosure of some type would be a logical future improvement, though a practice sword that has a hollow handle to hold the electronics is probably the most ideal solution.

A real-time output of sword rotation, pitch, and heading is sent out by the Adafruit Feather over BLE for analysis by a companion smartphone application. For now he just has a running output of the raw data, but [Carlos] envisions a fully realized application that could provide the user with motions to perform and give feedback on their form.

Incidentally this isn’t the first motion-detecting sword we’ve ever covered, but we think this particular incarnation of the concept might have more practical applications.

A Remotely Controlled Kindle Page Turner

One of the biggest advantages of e-readers such as the Kindle is the fact that it doesn’t weigh as much as a traditional hardcover book, much less the thousands of books it can hold in digital form. Which is especially nice if you drop the thing on your face while reading in bed. But as light and easy to use as the Kindle is, you still need to hold it in your hands and interact with it like some kind of a baby’s toy.

Looking for a way to operate the Kindle without having to go through the exhaustive effort of raising their hand, [Alex Mikes] designed and built a clip-on device that makes using Amazon’s e-reader even easier. At the press of a button, the device knocks on the edge of the screen which advances the book to the next page. Going back a page will still require you to extend your meaty digit, but that’s your own fault for standing in the way of progress.

The 3D printed case holds an Arduino and RF receiver, as well as a small servo to power the karate-chop action. There’s no battery inside, meaning the device needs to stay plugged in via a micro USB connection on the back of the case. But let’s be honest: if you’re the kind of person who has a remote-controlled Kindle, you probably aren’t leaving the house anytime soon.

To fool the Kindle into thinking a human finger is tapping the screen, the page turner’s arm has a stylus tip on the end. A channel is designed into the 3D printed arm for a wire to run from the tip to the Arduino’s ground, which triggers the capacitive screen to register a touch.

All joking aside, the idea holds promise as an assistive technology for individuals who are unable to lift an e-reader or operate its touch screen controls. With the Kindle held up in a mount, and this device clipped onto the side, anyone who can push a button (or trigger the device in whatever method they are physically capable) can read a book on their own. A simple pleasure that can come as a huge comfort to a person who may usually be dependent on others.

In the past we’ve seen physical buttons printed for touch screens, and an Arduino used to control a touch screen device. But this particular combination of physical and electrical interaction is certainly a unique way to tackle the problem without modifying the target device.

Thomas The Terrifying Karaoke Robot

The junk bin can be a great source of inspiration, unless you’re too familiar with the contents to be imaginative with them. But thrift stores are another matter, like giant junk bins that are constantly replenished by underappreciated elves. You never know what kinds of goodies they will pile on the shelves, so it’s easy to become a fixture and visit them once or thrice a week.

[Hunter Irving] haunts a few choice thrift stores in his neighborhood, and a few months ago he found a knockoff Thomas the Tank Engine with an articulated face. It uses a simple mechanism to produce an impressive amount of movement, especially for a cheap knockoff toy. Both of its eyes slide sideways and its mouth opens, resulting in a very animated (and terrifying) range of expressions. Sensing an opportunity to turn his animatronic robot dreams into karaoke-singing nightmare fuel for the rest of us, he forked over a few bucks and took it home.

As luck would have it, a 9g micro servo fit perfectly in the back of the frightening little face. [Hunter] designed an axle to transfer motion to the face mechanism, but it broke almost immediately. We applaud his Plan B, though, which consists of a mounting block for the servo, and a cable tie armature connected with screws. Once that was sorted, [Hunter] designed a bulbous body for it in Blender.

This terrifying train-faced toy uses an Arduino Leonardo to read MIDI note-on and -off messages, and opens his mouth when appropriate to sing hit favorites in a smooth, speech-synthesized contralto. Pour yourself a strong beverage and enjoy the build/demo video after the break.

Interested in making your own? [Hunter] has all the files up on his Patreon page. For just $1, you can access the code, synth files, and STL files. While you’re there, you can also get the scoop on his Nintendo LABO waveform cards.

Continue reading “Thomas The Terrifying Karaoke Robot”

Updating A 1999 Saab With An Arduino

Unless your car is fresh off the lot, you’ve probably had the experience of riding in a newer car and seeing some feature or function that triggered a little pang of jealousy. It probably wasn’t enough for you to run out and sign yourself up for a new car loan (which is what the manufacturer was hoping for), but it was definitely something you wished your older model vehicle had. But why get jealous when you can get even?

[Saabman] wished his 1999 Saab 9-5 had the feature where a quick tap of the turn signal lever would trigger three blinks of the indicator. Realizing this was an electronic issue, he came up with a way to retrofit this function into his Saab by adding an Arduino Pro Micro to the vehicle’s DICE module.

The DICE (which stands for Dashboard Integrated Central Electronics) module controls many of the accessories in the vehicle, such as the lighting and wipers. In the case of the blinkers, it reads the state of the signal lever switches and turns the blinkers on and off as necessary. After poking around the DICE board, [Saabman] found that the 74HC151 multiplexer chip he was after: the state of the blinker switches could be read from pins 1 and 2, and he’d even be able to pull 5 V for the Arduino off of pin 16.

After prototyping the circuit on a breadboard, [Saabman] attached the Pro Micro to the top of the 74HC151 with some double sided tape and got to work on refining the software side of the project. The Arduino reads the state of the turn signal switches, and if they flick on momentarily it changes the pin from an input to an output and brings it high for three seconds. This makes the DICE module believe the driver is holding the turn lever, and will keep the blinkers going. A very elegant and unobtrusive way of solving the problem.

Hackers aren’t complete strangers to the garage; from printing hard to find parts to grafting in their favorite features from other car manufacturers, this slick Saab modification is in good company.

Continue reading “Updating A 1999 Saab With An Arduino”