Fixing A Crazy Expensive Spectrum Analyser, With Solder

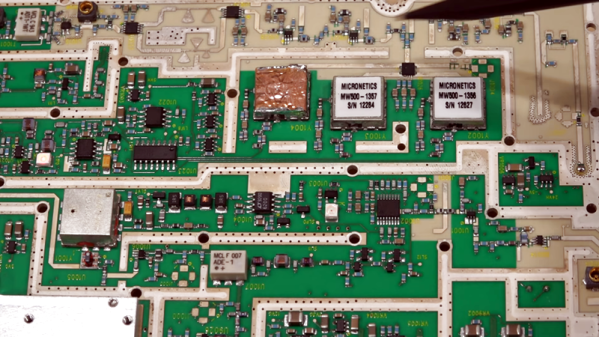
It used to be a spectrum analyzer was an exotic piece of gear. However, these days it is pretty common for a scope to have some ability to do the job — that is, plot amplitude versus frequency. However, a dedicated commercial product will usually have a lot more bandwidth and other features. [Signal Path] picked up an Anrtitsu 7.1 GHz portable spectrum analyzer. An expensive bit of kit — anywhere from around $4,000 to $8,000 on eBay — if it is working, but this one was not. It needed power, but it was also missing the internal flash card that the device uses to boot.

Being portable, there’s a lot of digital and RF electronics crammed into a very small space. The initial tear down didn’t look very interesting because it was mostly an RF shield. However, many tiny screws later, you can finally see the actual electronics.

Continue reading “Fixing A Crazy Expensive Spectrum Analyser, With Solder”

Pringles Can Turned Vaporwave Lamp

We play host to a lot of incredibly complex projects here at Hackaday; take a look at some of the entries in the Hackaday Prize for some real world-class engineering. But the hacks you can knock out in an afternoon are often just as compelling as the flagship projects. After all, not everyone is looking to devote years of their lives into building some complex machine.

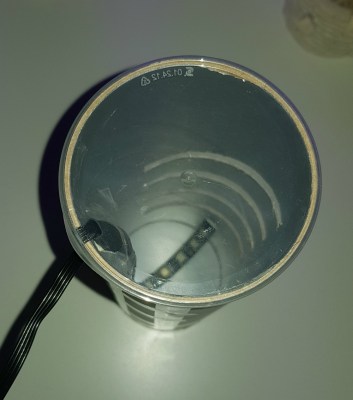
Case in point, this very slick lamp built by [mytzusky]. Made of nothing more exotic than an old Pringles can and an RGB LED strip, this is something that can potentially be built with what you have laying around right now. All you need to provide is a bit of geometry, a steady hand, and a love for anything that looks like it could pass as a prop in a TRON fan film.

The first step is getting the Pringles can: either find one in the trash or treat yourself to a stack of weird hard potato chip sorta things. Once you’ve got the can, you need to cut out your design. You could print out the template provided by [mytzusky] if you want, but you could put your own spin on it instead. Just remember that the design needs to make sense when you wrap it around the can.

With the lines cut out of the can, the whole thing gets wrapped with a few sheets of standard white paper. This will not only cover the original label but diffuse the light coming from the cuts you’ve just made. [Mytzusky] doesn’t mention it, but some kind of sealer applied to the paper might be a good idea if you’re looking to keep this thing around for the long haul.

Finally, an RGB LED strip goes inside the can. Make sure to flip the can upside down for this part, with the solid end on the top and the clear lid on the bottom. Not only does this let you run the wire out of the bottom, but provides a very cool ring of diffuse light at the bottom of the lamp.

This is another excellent example of an “upcycled” project which uses literal trash as a building material. It might take a little outside the box thinking, but the results can be very impressive.

A 3D-Printed Egg-Shaped Speaker Cabinet

There are few limits to the extent audiophiles will go in their quest for the perfect sound. This applies in particular to the loudspeaker, and with that aim [Heine Nielsen] has created an eye-catching set of 3D-printed egg-shaped enclosures.

The theory of a loudspeaker enclosure is that it should simulate an infinite space behind an infinite plane in which the speaker driver is mounted, and the reasoning behind spherical or egg-shaped enclosures goes that they better achieve that aim through presenting a uniform inner surface without the corners of a more conventional rectangular enclosure. [Heine]’s enclosures 3D-printed ported enclosures achieve this more easily than traditional methods of building this shape.

A loudspeaker enclosure is more than just a box though, whatever material it is made from must adequately dampen any resonances and absorb as much energy as possible. Conventional speakers try to achieve this by using high-mass and particulate materials, but 3D-printing does not lend itself to this. Instead, he created a significant air gap between two layers which he hopes will create the same effect.

This is an interesting design and approach to speaker cabinet construction, but we think from an audio perspective its one that will be well served by more development. What would be the effect of filling that air gap with something of higher mass, for example, and should the parameters of the egg shape and the port be derived for a particular driver by calculation from its Thiele-Small parameters. We look forward to more on this theme.

These aren’t the first 3D-printed enclosures we’ve seen, but if you’re after something truly unusual how about an electrostatic?

Did We Just Get Buzzed By Alien Space Junk?

Perhaps you heard about Oumuamua (don’t ask us how to pronounce that). The cigar-shaped object is the first item found by astronomers that is known to have come from outside the solar system and is continuing to pass through, not being captured by the sun’s gravitational field. A recent paper from [Shmuel Bialy] and [Abraham Loeb] from Harvard suggests that the thing could be a discarded light sail from an alien spacecraft.

Of course, it is fun to speculate that anything in space we don’t understand could be alien. However, the paper is doing more than just speculating. The rotation rate of the object suggests it is fairly flat (pancake-like, was the exact phrase used). In addition, it appears to experience “non-gravitational” acceleration — that is, it is accelerating due to some force other than gravity.

Others have suggested that the acceleration is due to material boiling off as the sun warms it. However, there’s no indication of that happening and activity like that ought to also change the spin rate which does not appear to be happening. Solar wind pressure could explain the changes, though. You might think that proves nothing since the solar wind pushes on everything. However, it is just like the wind in the atmosphere — sure it pushes on your car, your house, and a sailboat, but only the sailboat moves appreciably from it.

Continue reading “Did We Just Get Buzzed By Alien Space Junk?”

Rewound And Rewired BLDC Makes A Half-Decent Generator

What’s the best way to turn a high-powered brushless DC motor optimized for hobby use into a decent low-RPM generator? Do you take a purely mechanical approach and slap a gearbox on the shaft? Or do you tackle the problem electrically?

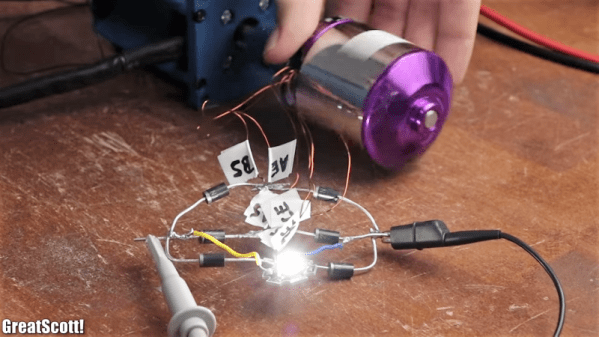
The latter approach is what [GreatScott!] settled on with his BLDC rewinding and rewiring project. Having previously explored which motors have the best potential as generators, he knew the essential problem: in rough terms, hobby BLDCs are optimized for turning volts into RPMs, and not the other way around. He started with a teardown of a small motor, to understand the mechanical challenges involved, then moved onto a larger motor. The bigger motor was stubborn, but with some elbow grease, a lot of scratches, and some destroyed bearings, the motor was relieved of both its rotor and stator. The windings were stripped off and replaced with heavier magnet wire with more turns per pole than the original. The effect of this was to drive the Kv down and allow better performance at low RPMs. Things looked even better when the windings were rewired from delta to wye configuration.

The take-home lesson is probably to use a generator where you need a generator and let motors be motors. But we appreciate [GreatScott!]’s lesson on the innards of BLDCs nonetheless, and his other work in the “DIY or buy?” vein. Whether you want to make your own inverter, turn a hard drive motor into an encoder, or roll your own lithium battery pack, he’s done a lot of the dirty work already.

Continue reading “Rewound And Rewired BLDC Makes A Half-Decent Generator”

It Happened At Supercon: Six Days Of Fun In A Three Day Con

A weekend for people who love hardware, by people who love hardware. It’s a simple recipe and it makes a delicious event that we call the Hackaday Superconference. If you made it to Pasadena last weekend, I’m sure going back to work on Monday was difficult after three days of far too little sleep and way too much fun. (It was for me.) If you didn’t make it to the con, set a reminder for July 1st to start watching for next year’s early bird tickets. Don’t believe me? Okay, let’s step through the hype of a weekend we’ll all remember.

Check out the recap video above and then join me after the break for a photo-heavy expose of the weekend’s highlights.

Continue reading “It Happened At Supercon: Six Days Of Fun In A Three Day Con”

Digital Picture Frame Turned Vectrex Overlay

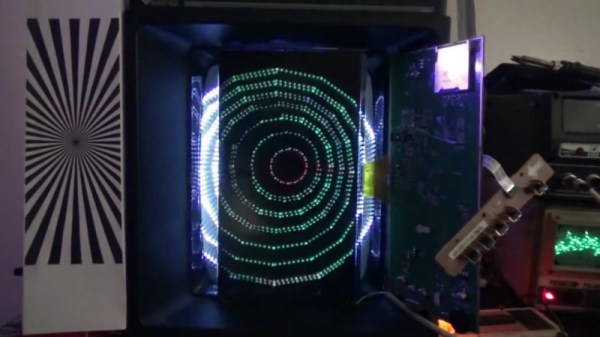
For Hackaday readers which might not be so well versed in the world of home video gaming before the 1983 crash, the Vectrex was an interesting attempt at bringing vector graphics into player’s living rooms. Priced around $500 in today’s dollars, the machine was unique in that it included its own black and white CRT display rather than requiring the owner to plug it into their television. To spice things up a little bit, games would include a thin plastic overlay you could put over the screen to give the game faux colors. What can we say? It was the 1980’s.

Like many vintage gaming systems, the Vectrex still commands a devoted following of fans, some of which continue to find ways to hack and mod the system nearly 40 years after its release. One such fan is [Arcade Jason], who’s recently been fiddling with the idea of creating a modern take on the overlay concept using a hacked LCD display. While it’s still a bit rough around the edges, it does hold promise. He hopes somebody might even run with the idea and turn it into a marketable product for the Vectrex community.

[Jason] started by getting an old digital picture frame and tearing it down until he liberated the LCD panel. By carefully disassembling it, he was able to remove the backlight and was left with a transparent display. He then installed the panel over the display of the Vectrex, leaving the picture frame’s PCB and controls dangling off to the side. Extending the display’s ribbon cable should be easy enough for a more robust installation.

He then loaded the frame with random psychedelic pictures he found online, as well as some custom overlays which he quickly whipped up using colored blocks in an art program. In the video after the break, [Jason] shuffles through images on the frame using the buttons on the PCB while loading different demos to show the kind of visual effects that are possible.

While a neat concept, there are a couple of issues that need to be resolved before this could really be put into practice. For one, the LCD panel isn’t the proper size or aspect ratio to match the Vectrex display, so it doesn’t cover the whole CRT. It’s also rather difficult to select images to show on the LCD panel; an improved version might use something like the Raspberry Pi to load images on the panel while exposing a control interface on a secondary screen of some type.

This isn’t the first time [Jason] has experimented with the Vectrex, or even the first time he’s tried to add color to the classic system. We’re interested to see what he comes up with next.

Continue reading “Digital Picture Frame Turned Vectrex Overlay”