Rock, paper, scissors game that uses servos to choose one at random for the computer.

Forget ChatGPT And Play Rock-Paper-Scissors With Yourself Instead

This isn’t like the cool AI everyone’s getting caught up with these days, but we’re sure it will make a fun party gimmick nonetheless.

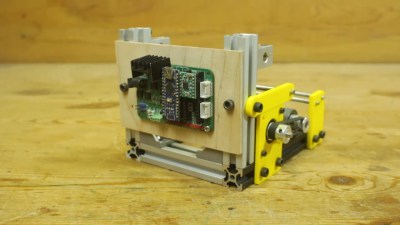
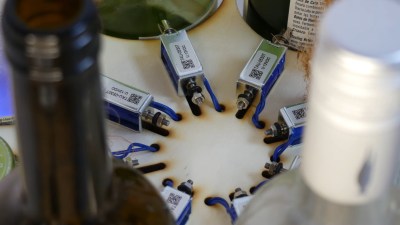
The premise of [CrazyScience]’s game is really simple, with three servos connected to labels that display rock, paper, and scissors, respectively. The game code is written to pick a label to display at random. Furthermore, an ultrasonic distance sensor detects when the player has moved their hand close to the game, indicating the player has chosen a hand and is challenging the game. The result of the game is decided by the player, so we imagine you could pretend you never lost and no one would know.

It would be cool to see the game support multiple players, keep score, or make sure you can never win. And you’ll probably want to add the randomSeed function in the code too. But that seems like a version two problem.

The only thing left to do is add some AI since that’s all we’re doing nowadays. But maybe you’re the type to enjoy the simple 8-bit pleasures instead. If you ask us though, we’d rather play with friends.

Continue reading “Forget ChatGPT And Play Rock-Paper-Scissors With Yourself Instead”

An Ultra Low Power Dash Cam

Dash cameras are handy as they provide a video recording of interactions on the road. However, their utility comes from the fact that they are always recording while driving. This always-on means power draw. [Kuzysk] took it upon himself to cut that power draw by a factor of almost 70x.

He found his existing dash cam from MiVue consumed 3.5mA in idle which works out to be a whole amp-hour every 12 days. The custom version takes just 50uA which means it will draw an amp-hour in two years. The brains of the chip are formed by an ATmega328 and an LM2596M, which is a simple step-down regulator. Interestingly, [Kuzysk] purchased clones and original chips and found that the cheaper clones had a lower switching frequency but a much lower power draw. Programming an Arduino bootloader onto the board is fairly straightforward and [Kuzysk] kindly provides his code. It can detect the ACC voltage that’s on when the engine is on and is powered by a permanent 12v connection to the battery.

Overall it’s a straightforward hack that goes through rolling your own Arduino, optimizing for low power, and putting it all together into a polished project. Perhaps for the next version, he can use the ATmega to control a cheaper camera and make it smart.

Thanks to [Microchip makes] and [Abe] for the tip!

A shot of the underside of a "One Fast Cat" cat wheel with an installed ESP8266 and hall effect sensors attached to the base.

Spy On Your Cat To Make Sure It Gets Its Paws In

[Scott Cutler] has a young cat, [Cygnus], that loves to run on a cat wheel and [Scott] had some some important questions about [Cygnus]’s usage of the cat wheel like, how often it’s used, what direction is preferred and how fast does [Cygnus] go. To answer these questions, [Scott] put some telemetry sensors onto the cat wheel and analyzed the results.

An ESP8266 microcontroller and two 3144E hall effect modules were used to sense eight magnets glued onto the outer housing of a “One Fast Cat” cat wheel. [Scott] installed the ESP8266 and hall effect modules onto the base support for the wheels, using 3D printed brackets to secure them.

For the software side, the ESP8266 attaches an interrupt handler whenever a sensor passes by, recording a window of three previous measurements for valid sample determination and, if accepted, uses the time between samples to infer direction and speed. The ESP8266 connects to a pre-configured local WiFi network and has a telnet interface to extract stored log information, in the form of JSON data.

[Scott] has some nice graphs and other data visualizations on [Cygnus]’s usage, including a preference for running at 3 AM, achieving a maximum speed of 14 mph and an average of 4 seconds per run. The source is available on GitHub and the STL files are available embedded in [Scott]’s write-up. We’ve featured cat exercise trackers before with a giant hamster wheel outfitted with a Raspberry Pi and it’s nice to see some options that allow for a retrofit option in addition to a complete DIY solution.

Sound Sculpture Uses Daisy Seed To Generate Audio

Here at Hackaday, we love a good art piece, whether that involves light or sound. Combining both is a sure-fire way to get our attention, and [Eirik Brandal] did just that with his Void Extrusion piece.

The project is built around the Daisy Seed from Electrosmith. It’s an embedded platform designed for musical purposes, which made it perfect for [Eirik]’s project. Based on an STM32 chip, it’s very capable when it comes to DSP tasks. In this role, it’s charged with algorithmic music composition, providing the captivating soundtrack that emanates from the sculpture.

The sculpture itself looks almost like a fancy mid-century home from the Hollywood Hills, but it’s fundamentally a little more abstract than that. [Eirik] built it as an opportunity to experiment with using 3D printed forms in his work. To that end, it features a beautiful diffused LED wall and a speaker enclosure as an integral part of the build. The LEDs are run from an Arduino Nano Every.

[Eirik’s] work shows us that “generative” music can be intoxicating and compelling with a real sense of feeling and mood. The sculpture is a visually-capable pairing that works with the soundscape. It recalls us of some other great artworks we’ve featured from [Eirik] before, too.

Continue reading “Sound Sculpture Uses Daisy Seed To Generate Audio”

A cat skull enclosed in a domed security camera enclosure with green LEDs illuminating the eye sockets, sitting on a table with other skulls and rocks.

Cat Skull For Internet Connection Divination

[Emily Velasco] has an internet provider that provides sub-par connectivity. Instead of repeatedly refreshing a browser tab to test if the network is up, [Emily] decided to create an internet status monitor by embedding indicator lights in a cat skull…for some reason.

The electronics are straightforward, with the complete parts list consisting of an Arduino Nano 33 IoT device connected to a pair of RGB LEDs and 50 Ohm resistors. The Nano attempts to connect to a known site (in this case, the Google landing page) every two seconds and sets the LEDs to green if it succeeds or red if it fails.

The cat skull is thankfully a replica, 3D printed by one of [Emily]’s Twitter acquaintances, and the whole project was housed in a domed security camera enclosure. [Emily] mounts the LEDs into the skull to create a “brain in a jar” effect.

The source is available on GitHub for those wanting to take a look. We’ve featured internet connectivity status indicators in the form of traffic lights here before, as well as various network status monitors and videoconferencing indicator lights.

Move Aside Yoda, It’s Furby’s Turn On Luke’s Back

When you want a backpack that turns heads and gets people talking, you can get ahead of the conversation with a talking backpack. [Nina] created a rucksack with the legendary babbler itself, the infamous Furby.

Believe it or not, no actual Furbies were sacrificed in the making of this backpack. The build uses an Arduino Nano, two servos, and a DFPlayer Mini for audio. A 3D printed faceplate is used for the iconic eyes and face. The code is fairly simple, waiting for a random delay and then triggering one of four effects. It can play a sound or blink and does its best to move the mouth while the sound is playing thanks to the handy busy line coming off the sound module. A unicorn children’s backpack offered a furry shell to stuff the electronics inside. A custom PCB makes the whole thing just a little neater internally.

Perhaps next [Nina] can integrate voice recognition so that the backpack can answer simple questions like an Alexa-powered Furby we’ve seen before.

Continue reading “Move Aside Yoda, It’s Furby’s Turn On Luke’s Back”

Remote Water Quality Monitoring

While it can be straightforward to distill water to high purity, this is rarely the best method for producing water for useful purposes. Even drinking water typically needs certain minerals in it, plants may need a certain pH, and wastewater systems have a whole host of other qualities that need to be measured. Measuring water quality is a surprisingly complex endeavor as a result and often involves a wide array of sensors, much like this water quality meter from [RowlesGroupResearch].

The water quality meters that they are putting to use are typically set up in remote locations, without power, and are targeting natural bodies of water and also wastewater treatment plants. Temperature and pH are simple enough to measure and grasp, but this device also includes sensors for total dissolved solids (TDS) and turbidity which are both methods for measuring various amounts and types of particles suspended in the water. The build is based around an Arduino so that it is easy for others to replicate, and is housed in a waterproof box with a large battery, and includes data logging to an SD card in order to make it easy to deploy in remote, outdoor settings and to gather the data at a later time.

The build log for this device also goes into detail about all of the steps needed to set this up from scratch, as well as a comprehensive bill of materials. This could be useful in plenty of professional settings such as community wastewater treatment facilities but also in situations where it’s believed that industrial activity may be impacting a natural body of water. For a water quality meter more focused on drinking water, though, we’d recommend this build that is trained on its own neural network.